

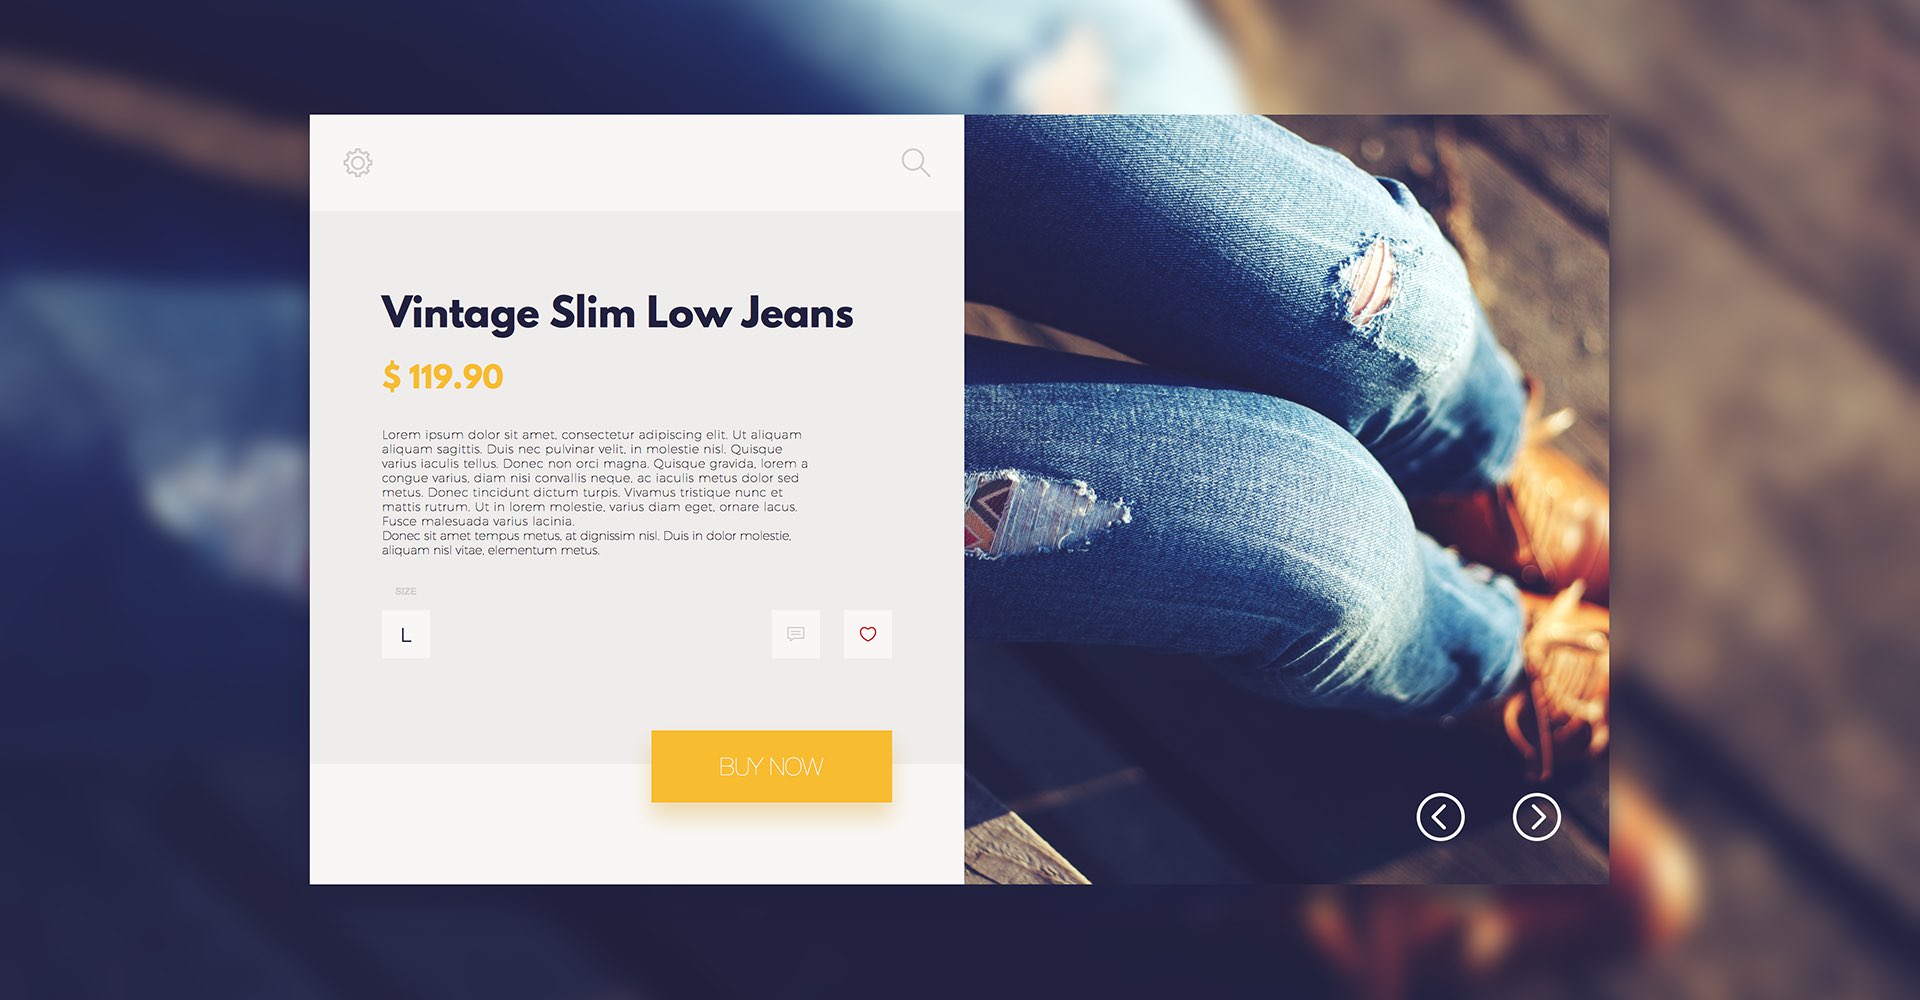
Create a Fashion Store Product Page
In the following tutorial you will learn how to create a sleek fashion store page in Graphic for iPad. iPad Pro users will learn how to easily import images, fonts, text or files using the new drag and drop feature.
For starters you will learn how to set up a simple grid and how to import & edit photos in Graphic. You will learn how to mask shapes or images and how to easily adjust them. Using basic tools, you will learn how to create the main vector shapes. Moving on, you will learn how to add subtle shading using the Effects pane and how to cleverly use the Label feature.
You'll learn how to increase your work speed with the aid of the Snap to Grid and the Smart Guides features and how to add and adjust text fields. Finally, you will learn how to import and edit several SVG files.
Step 1
First, you need to download the League Spartan font and the Montserrat-Thin font and this set of SVG files. Save them inside your iCloud Drive and open Graphic.
Next, you need to import those two fonts to make them available in Graphic. If you're using Graphic on an iPad Pro you can easily import these fonts using the drag and drop feature. Go to your Files app, tap the League Spartan font to highlight it and swipe up from the bottom of the screen to access the dock. Now, you can either tap Graphic or hover your dragged font over Graphic to open it. Once Graphic is opened, all you have to do is drop the font. Use the same technique to import the Montserrat-Thin font.
Don't worry, adding fonts in Graphic on a regular iPad is just as easy. Open Graphic and tap that Import button from the right side of the Titlebar. Tap the Import from iCloud Drive command to open your Files app and tap that League Spartan font to add it. Don't forget to also import the Montserrat-Thin font.
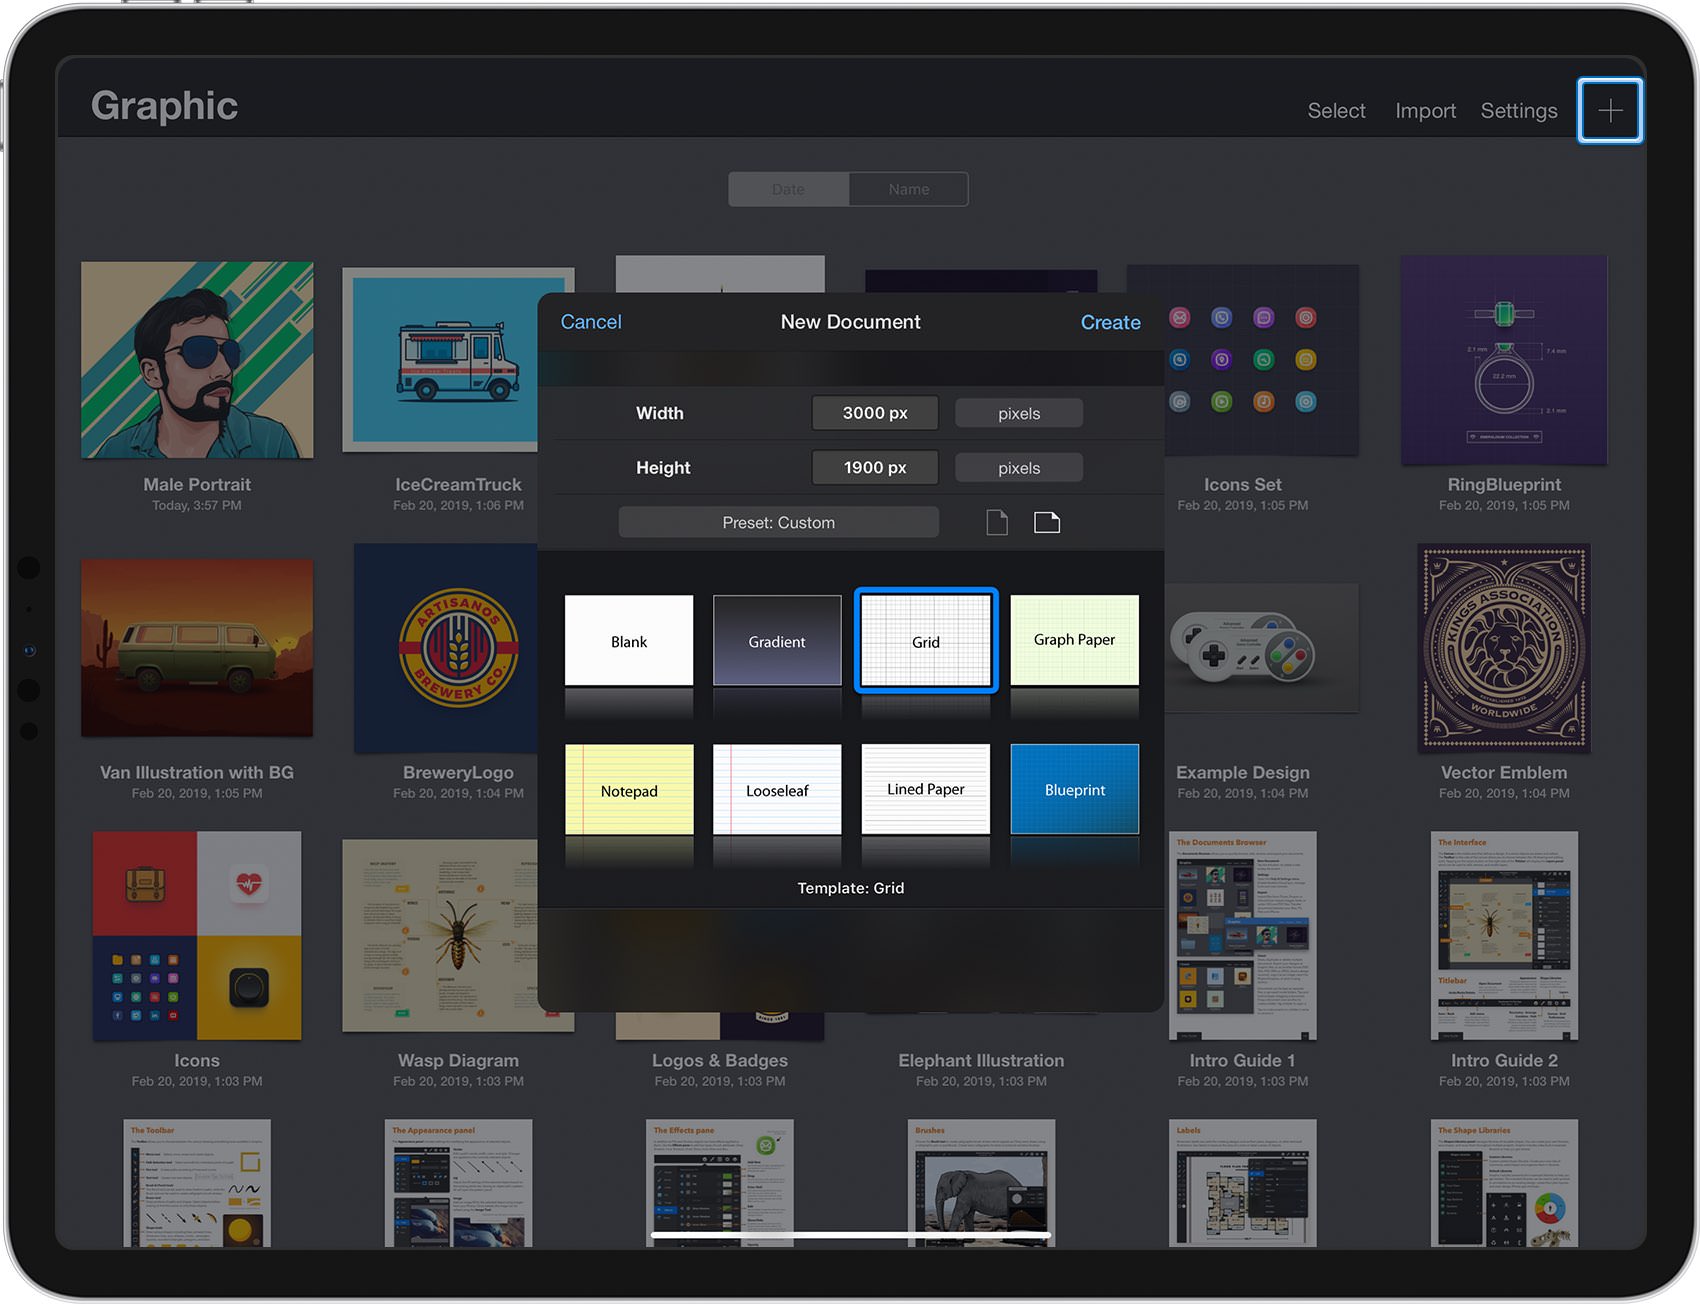
Now, let's create a new document. From the Documents Browser, tap the plus button at the top-right corner of the Titlebar and choose the Grid document style.
Select Pixels for the base units, set the Width to 3000 px and the Height to 1900 px, and then tap the Create button.
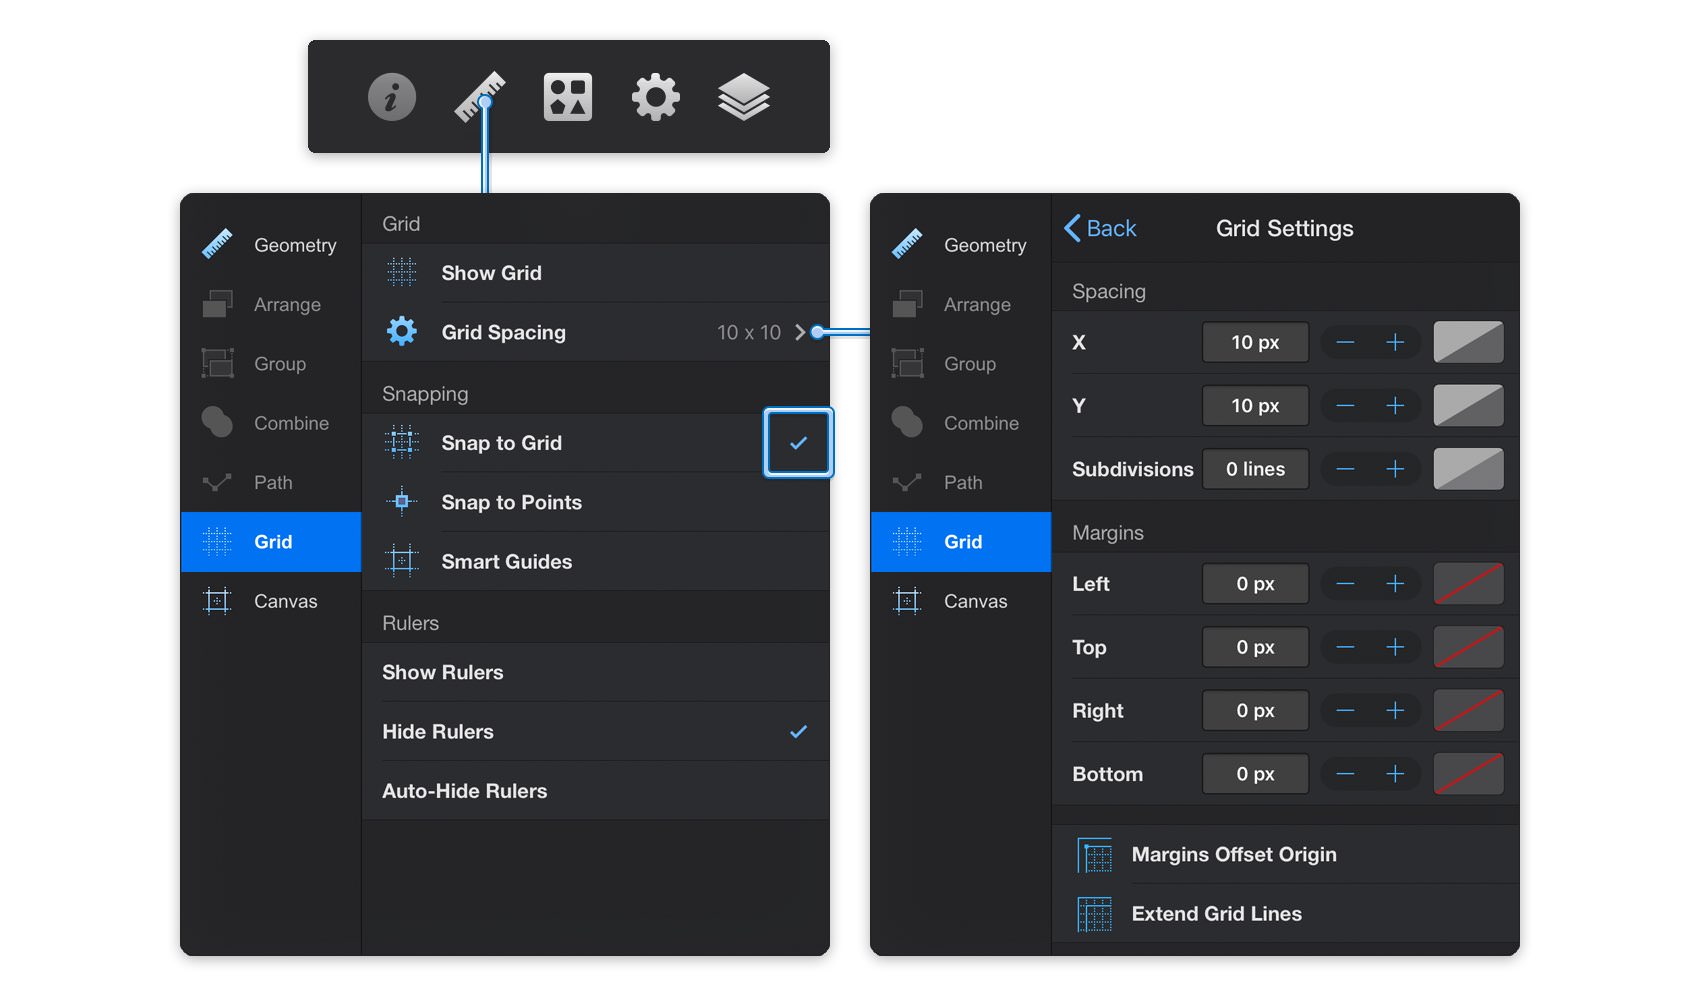
Next, we'll set up the document grid. Focus on the right side of the Titlebar and tap the ruler icon to open the Properties panel and go to the Grid pane.
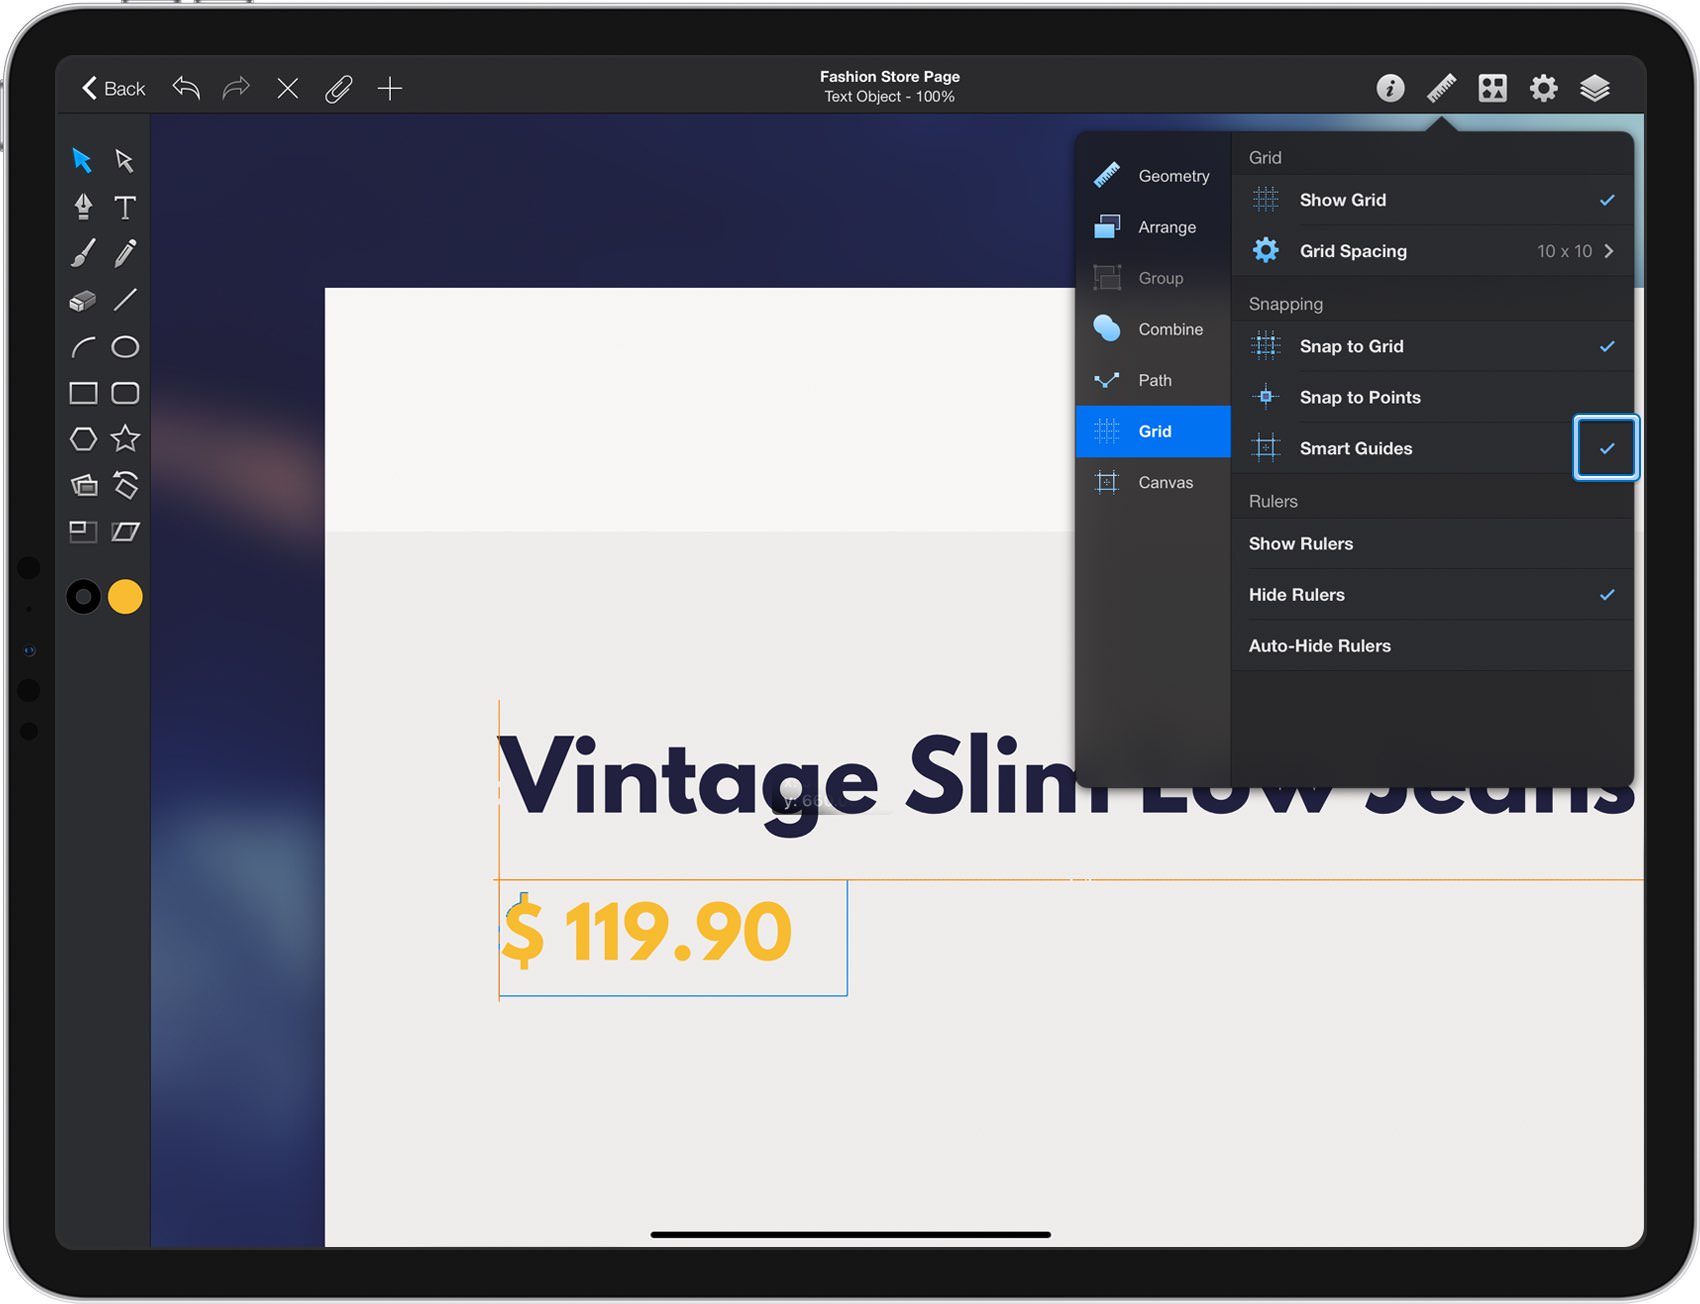
Be sure that the Snap to Grid feature is enabled and keep in mind that this is where you should come whenever you wish to enable or disable the grid or the Snap to Grid feature. Open the Grid Spacing pane, enter 10 px in both Spacing boxes and 0 lines in the Subdivisions box.
Step 2
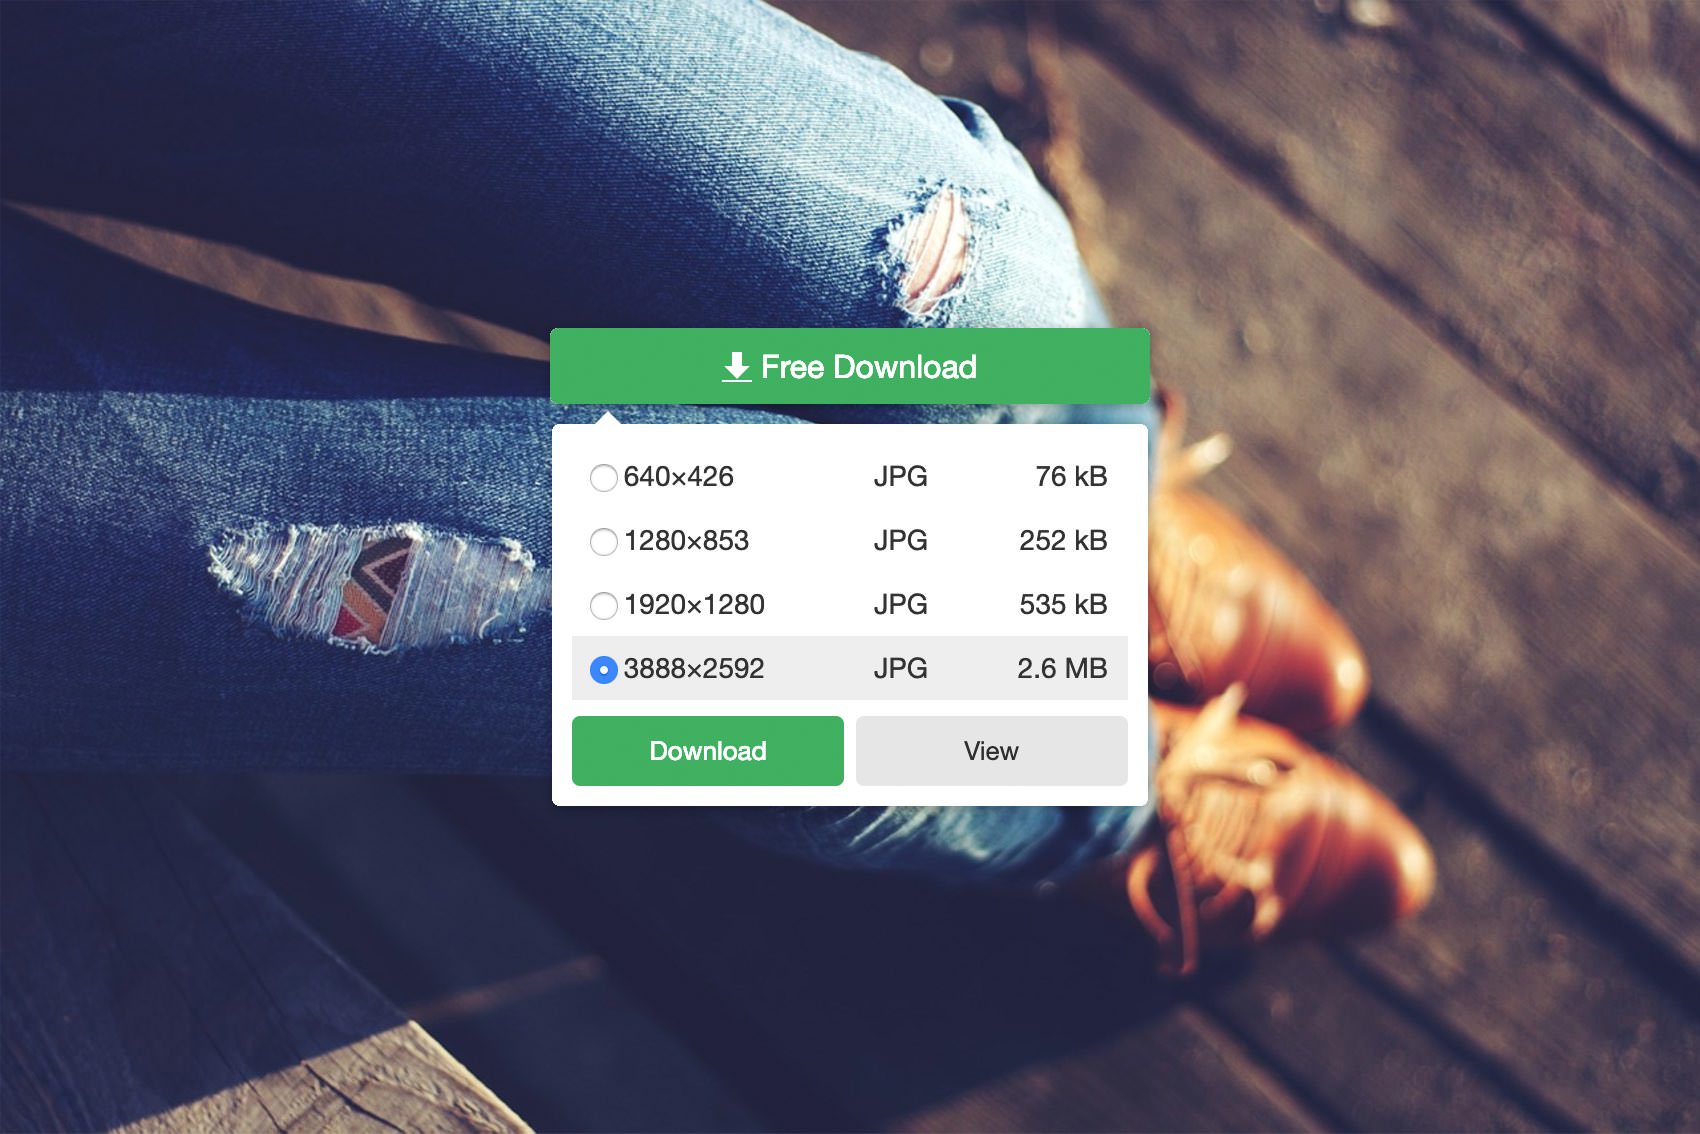
Open this jeans photo in your web browser, select the 3888 x 2592 version and tap the View button.
Step 3
Using that same drag and drop feature you can easily drag this jeans photo inside your Graphic file. Alternatively, you can save this photo inside your iCloud Drive and import it using the Import button.
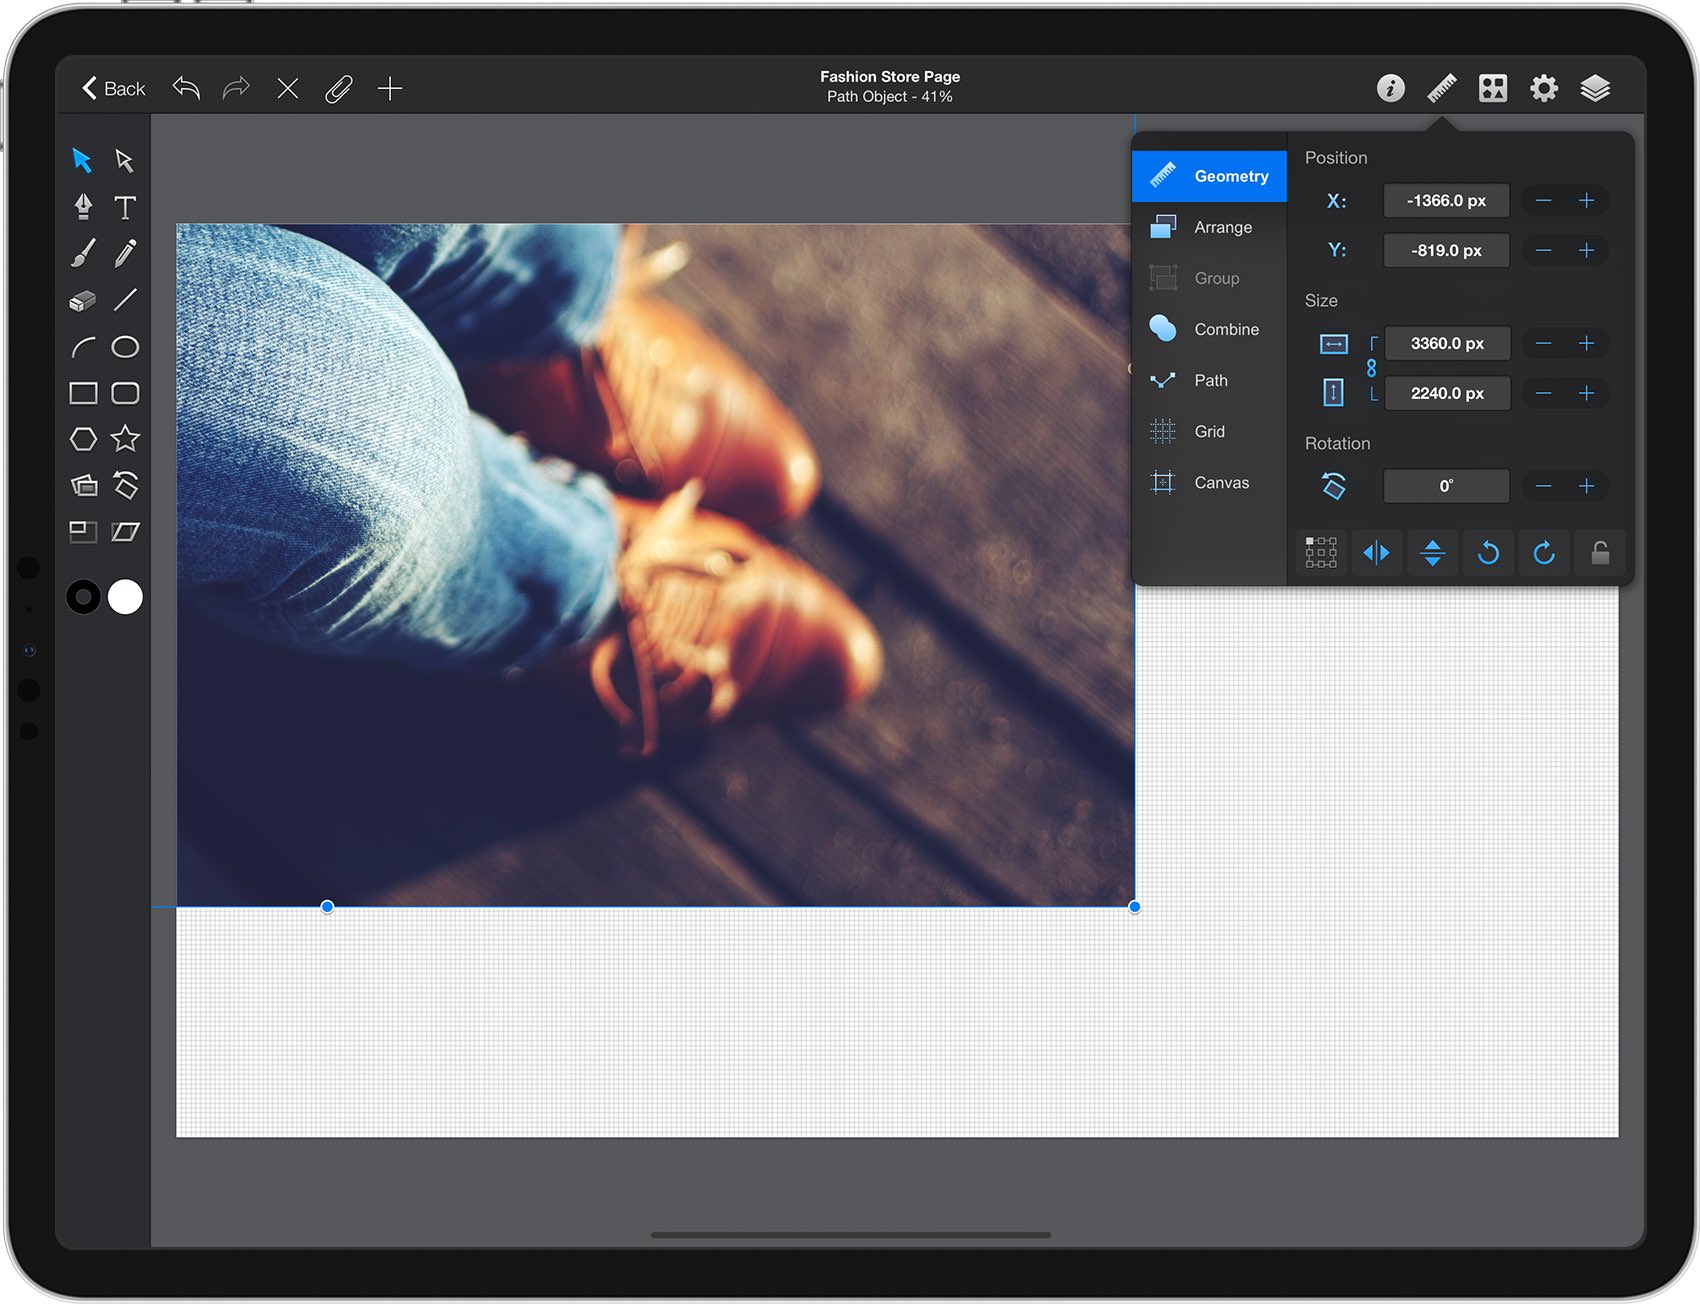
Pick the Move Tool and select your image. Focus on the right side of your Titlebar, tap that ruler icon and open the Geometry pane. Be sure that the aspect ratio is locked and set the Width to 3360 px.
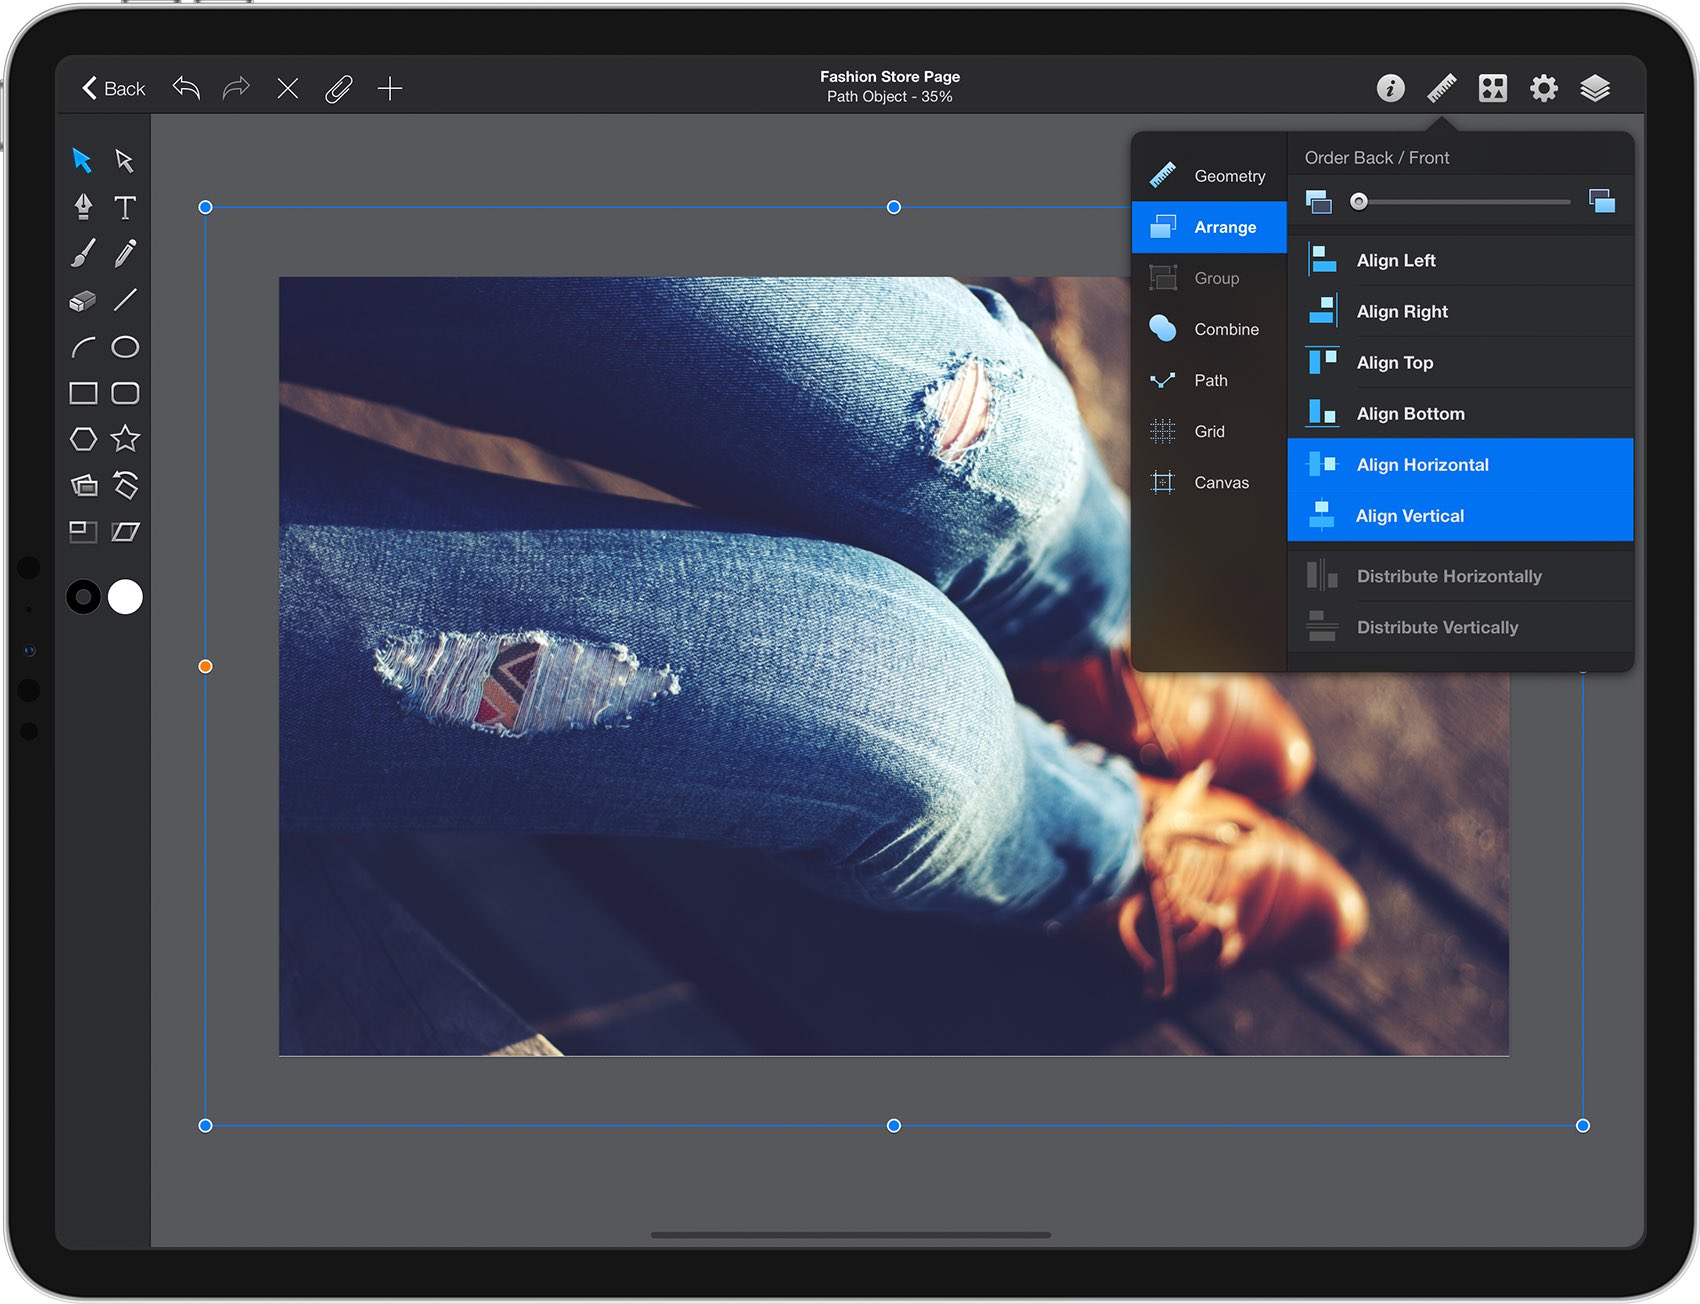
Make sure that your image stays selected and tap the ruler icon. Open the Arrange pane, tap the Align Horizontal and the Align Vertical commands to easily move your image in the center of the canvas.
Step 4
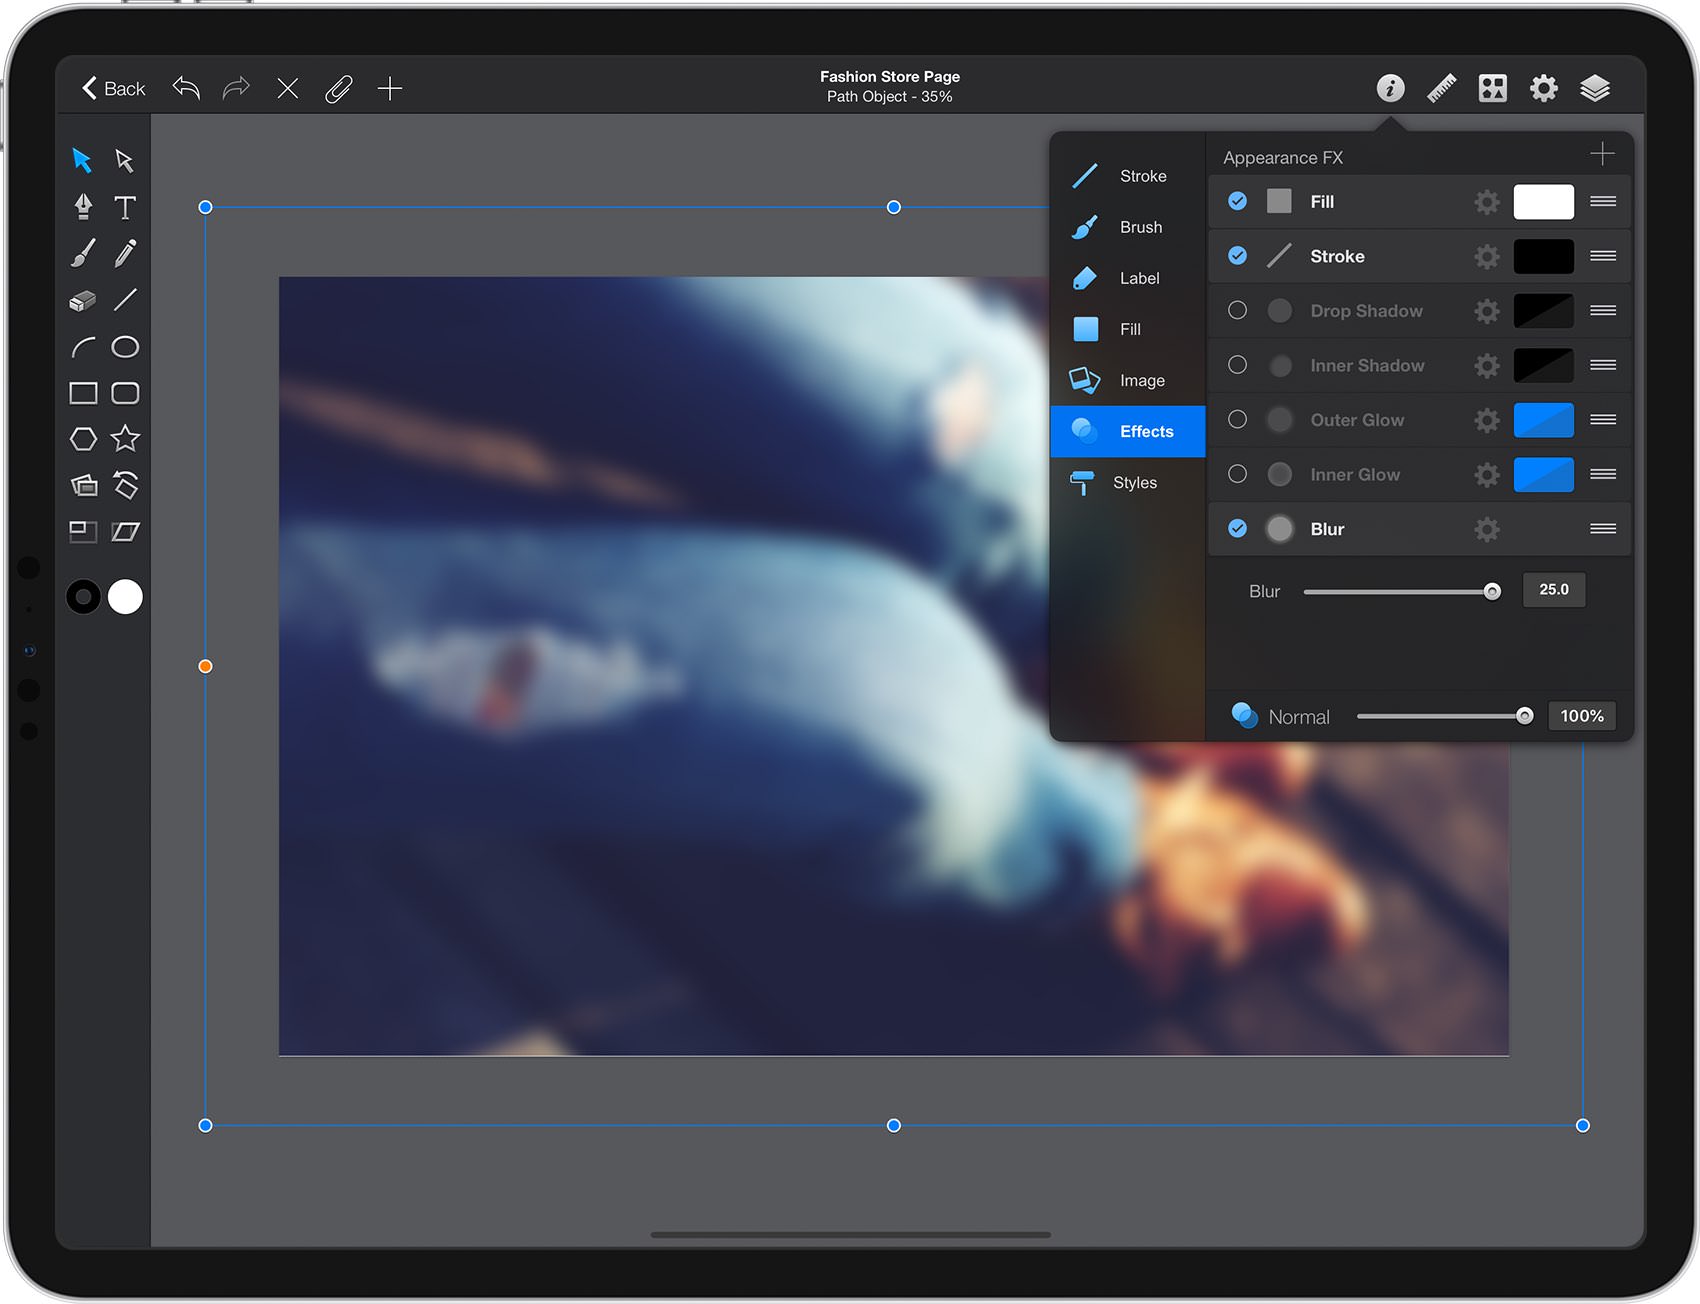
Make sure that your image is still selected, focus on the right side of your Titlebar and tap the leftmost icon to open the Appearance panel. Open the Effects pane and check the round checkbox of the existing Blur effect to activate it. Tap this effect to expand it and then drag that Blur slider to 25.
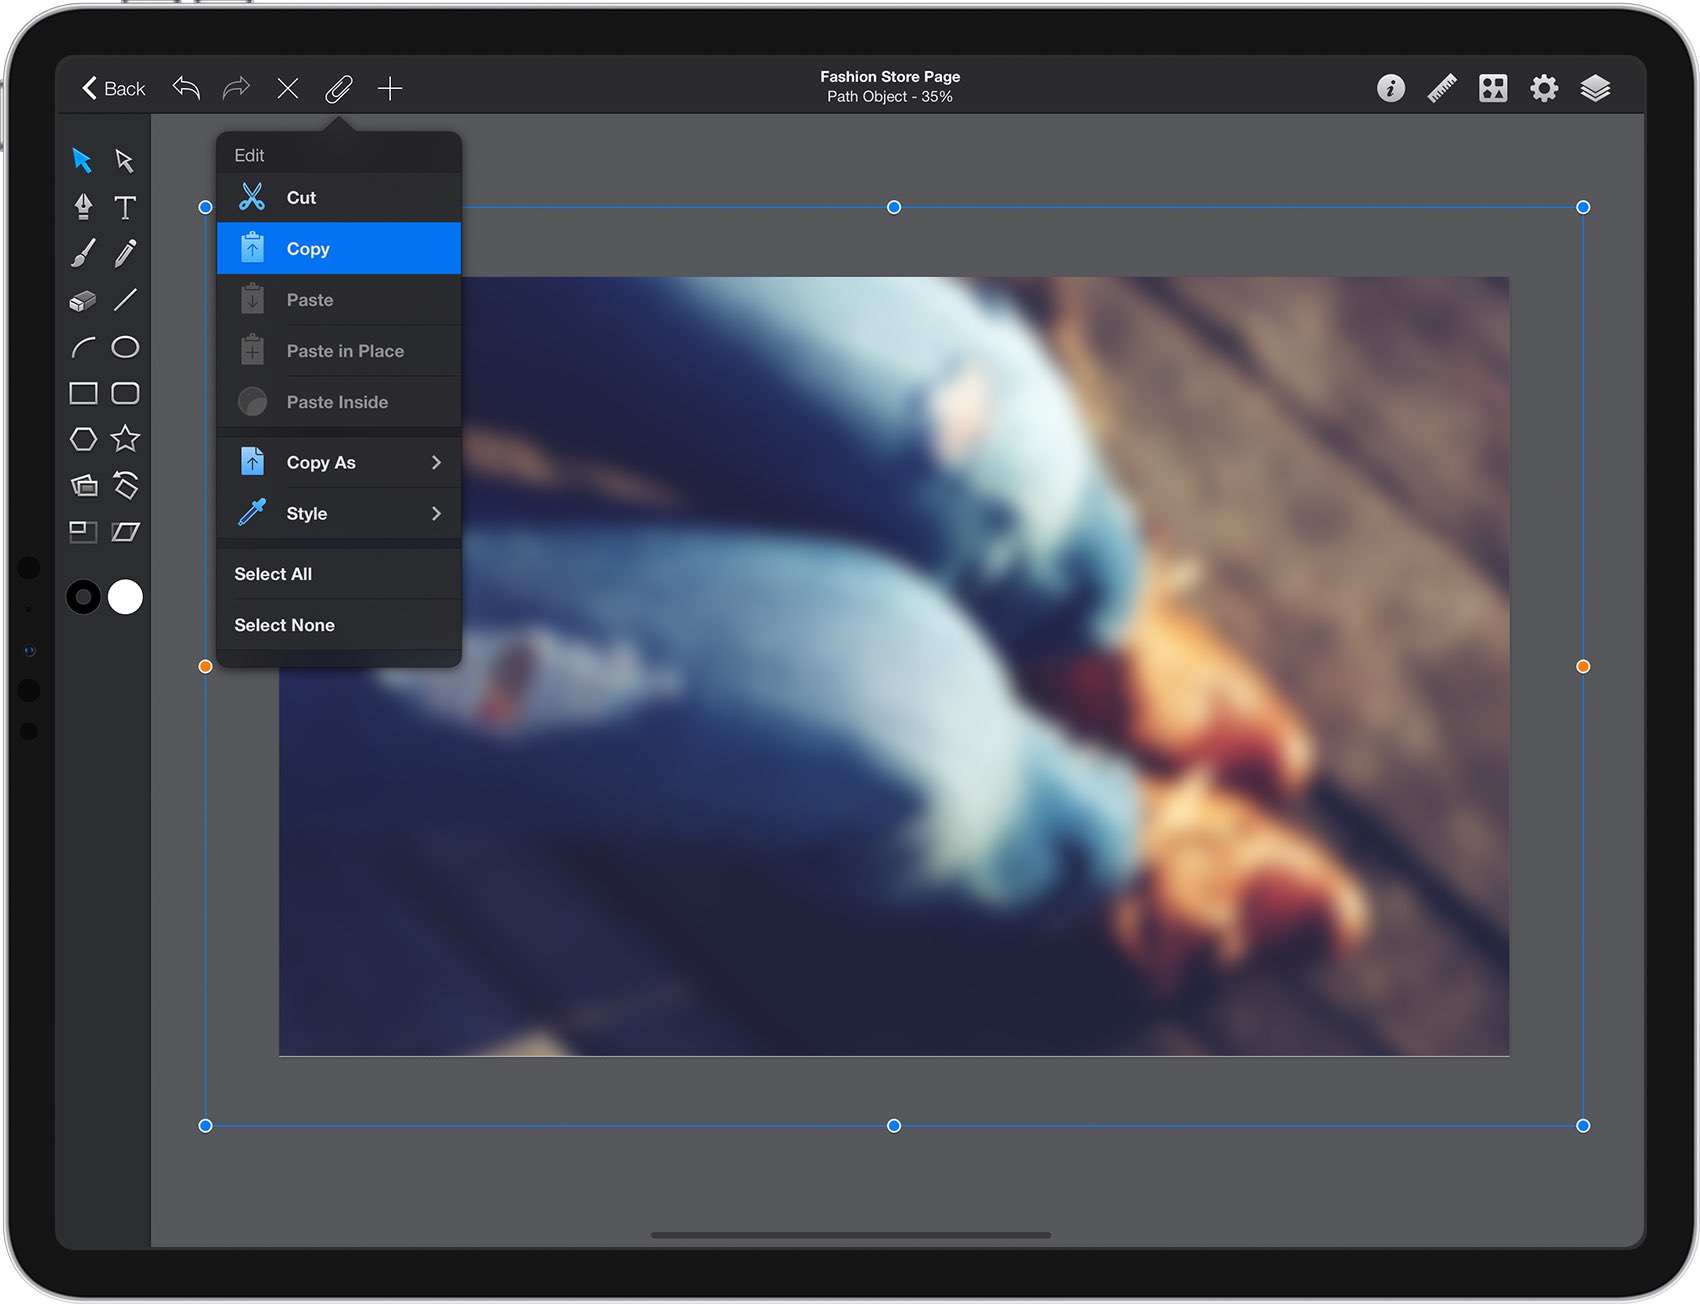
Make sure that your image is still selected and focus on the left side of your Titlebar. Tap that paperclip icon to open the Edit pane and then tap the Copy command.
Step 5
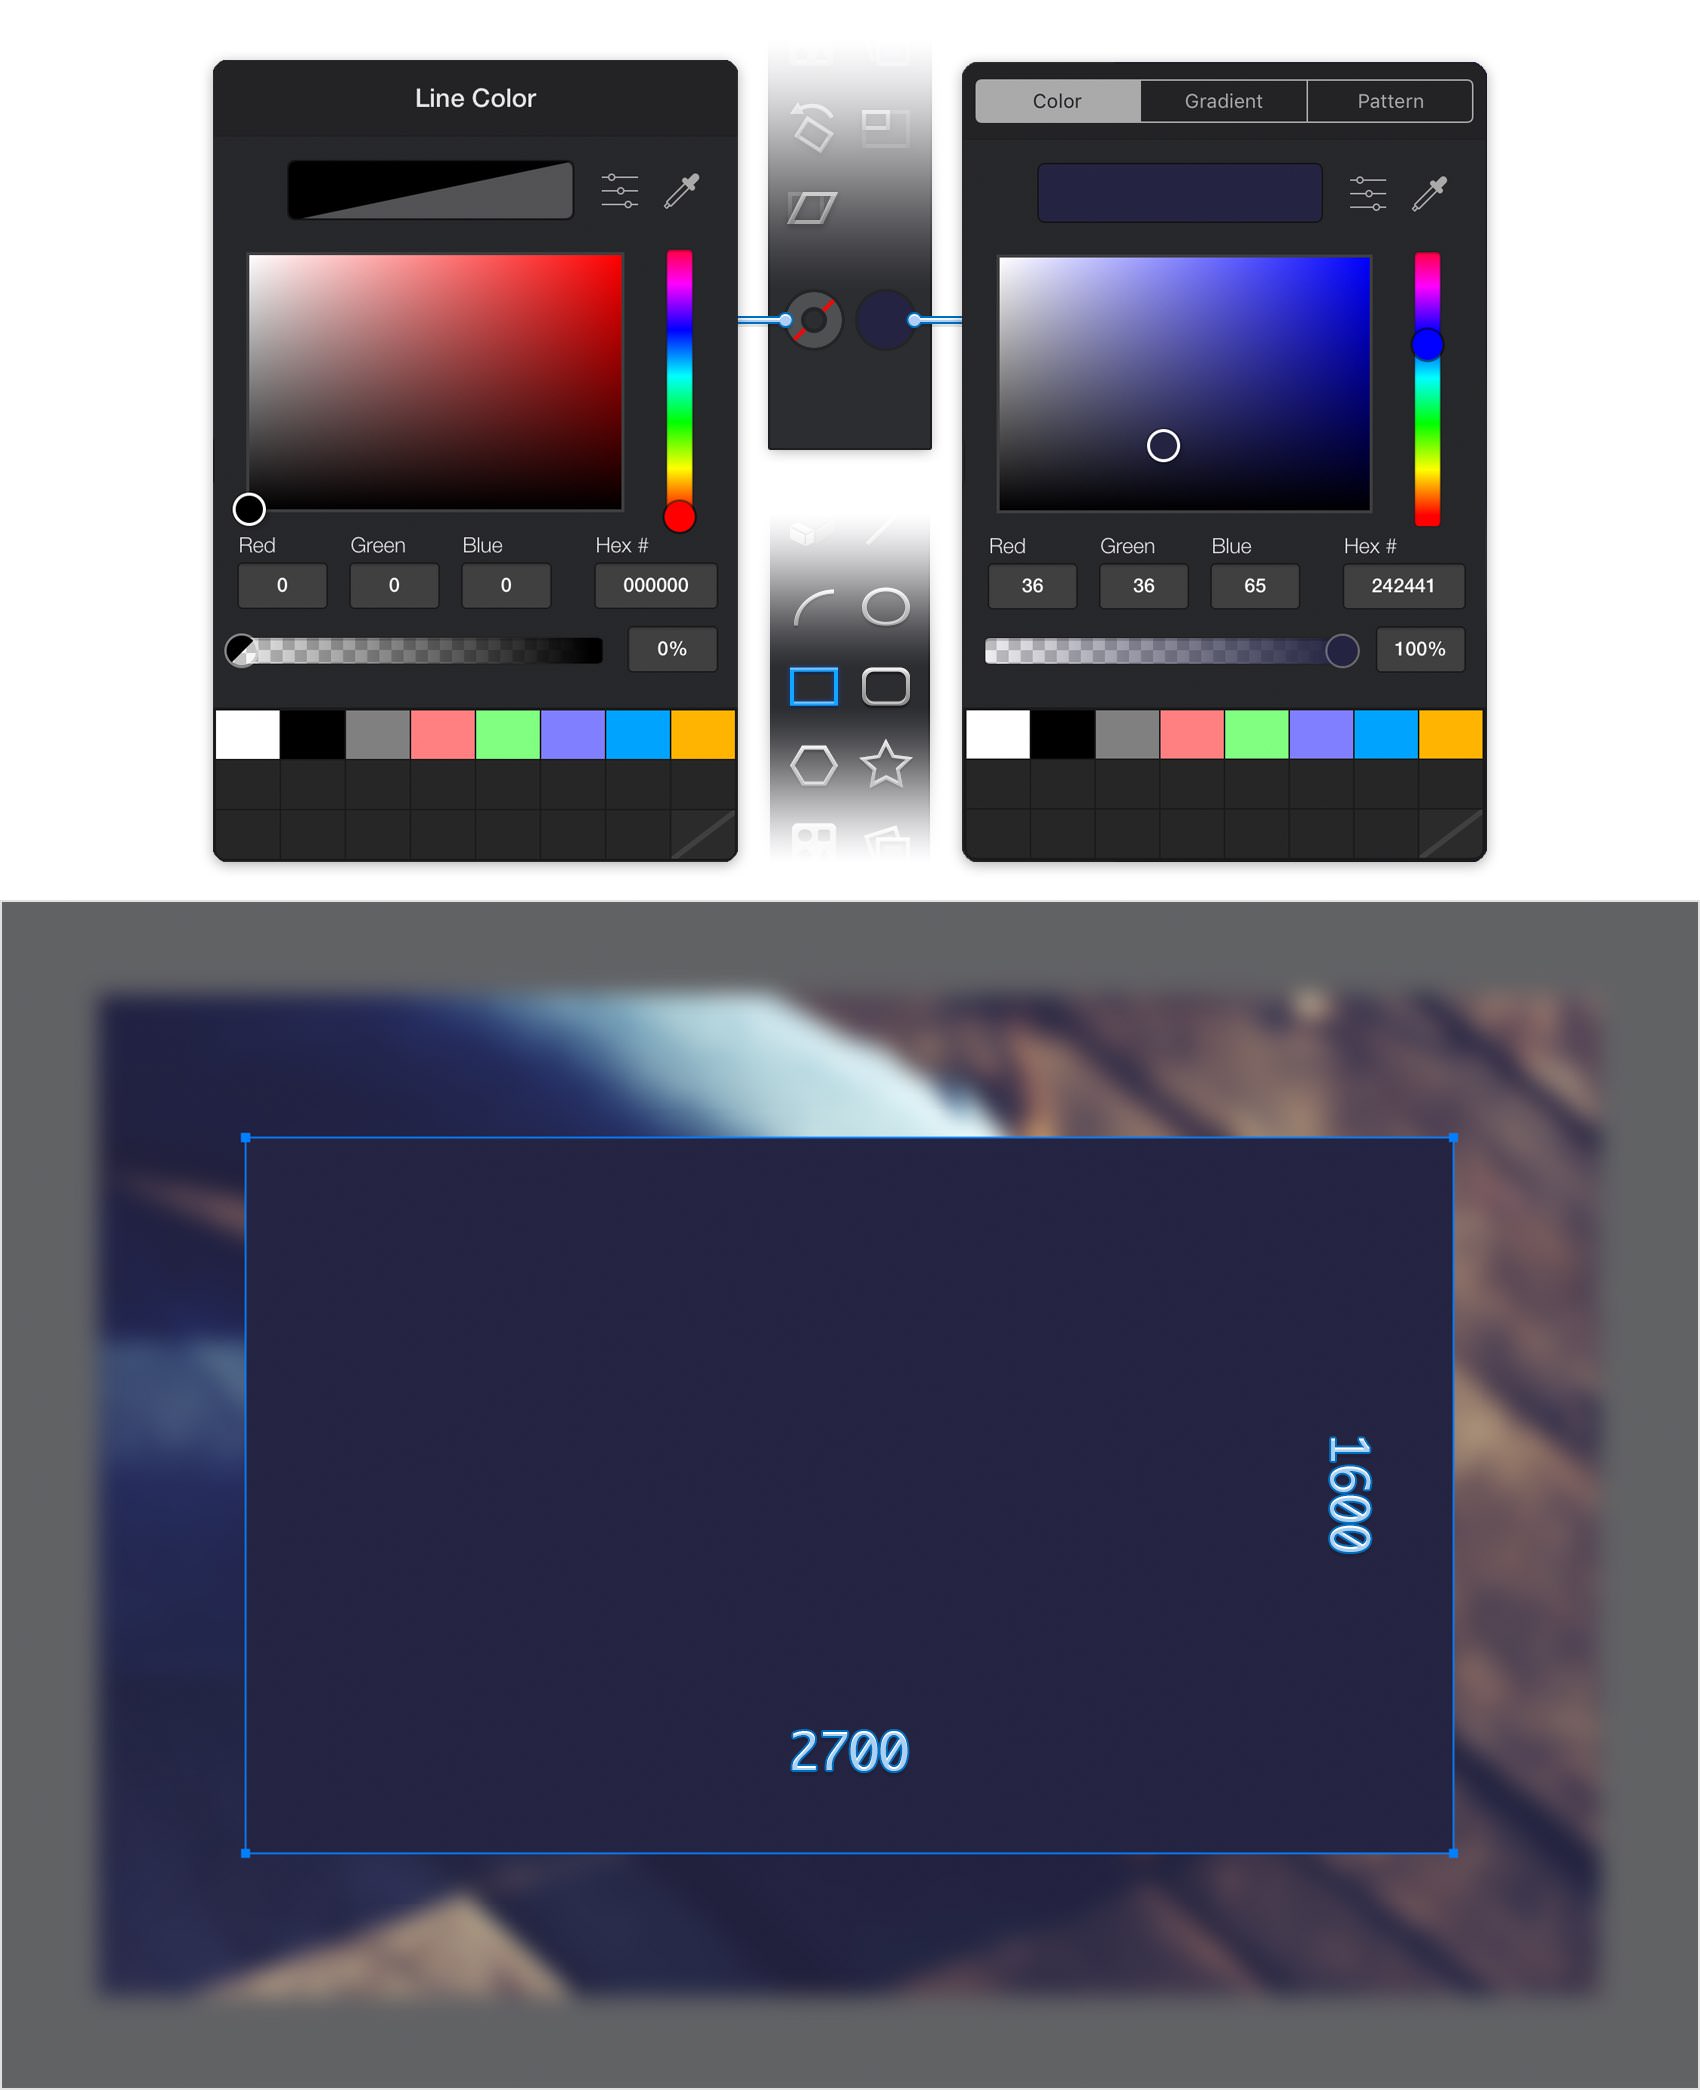
Pick the Move Tool and tap outside your selected image to deselect it. Focus on the Toolbar and tap the Line color well. Drag the Alpha slider to 0% which will make your Line invisible. Tap the Fill color well and replace the existing color with R=36 G=36 B=65.
Pick the Rectangle Tool, focus on your canvas and create a 2700 x 1600 px shape. Make sure that it stays selected and move it to the center of the canvas using the same Align Horizontal and the Align Vertical commands from the Arrange pane.
Step 6
Make sure that your rectangle is still selected and open the Effects pane.
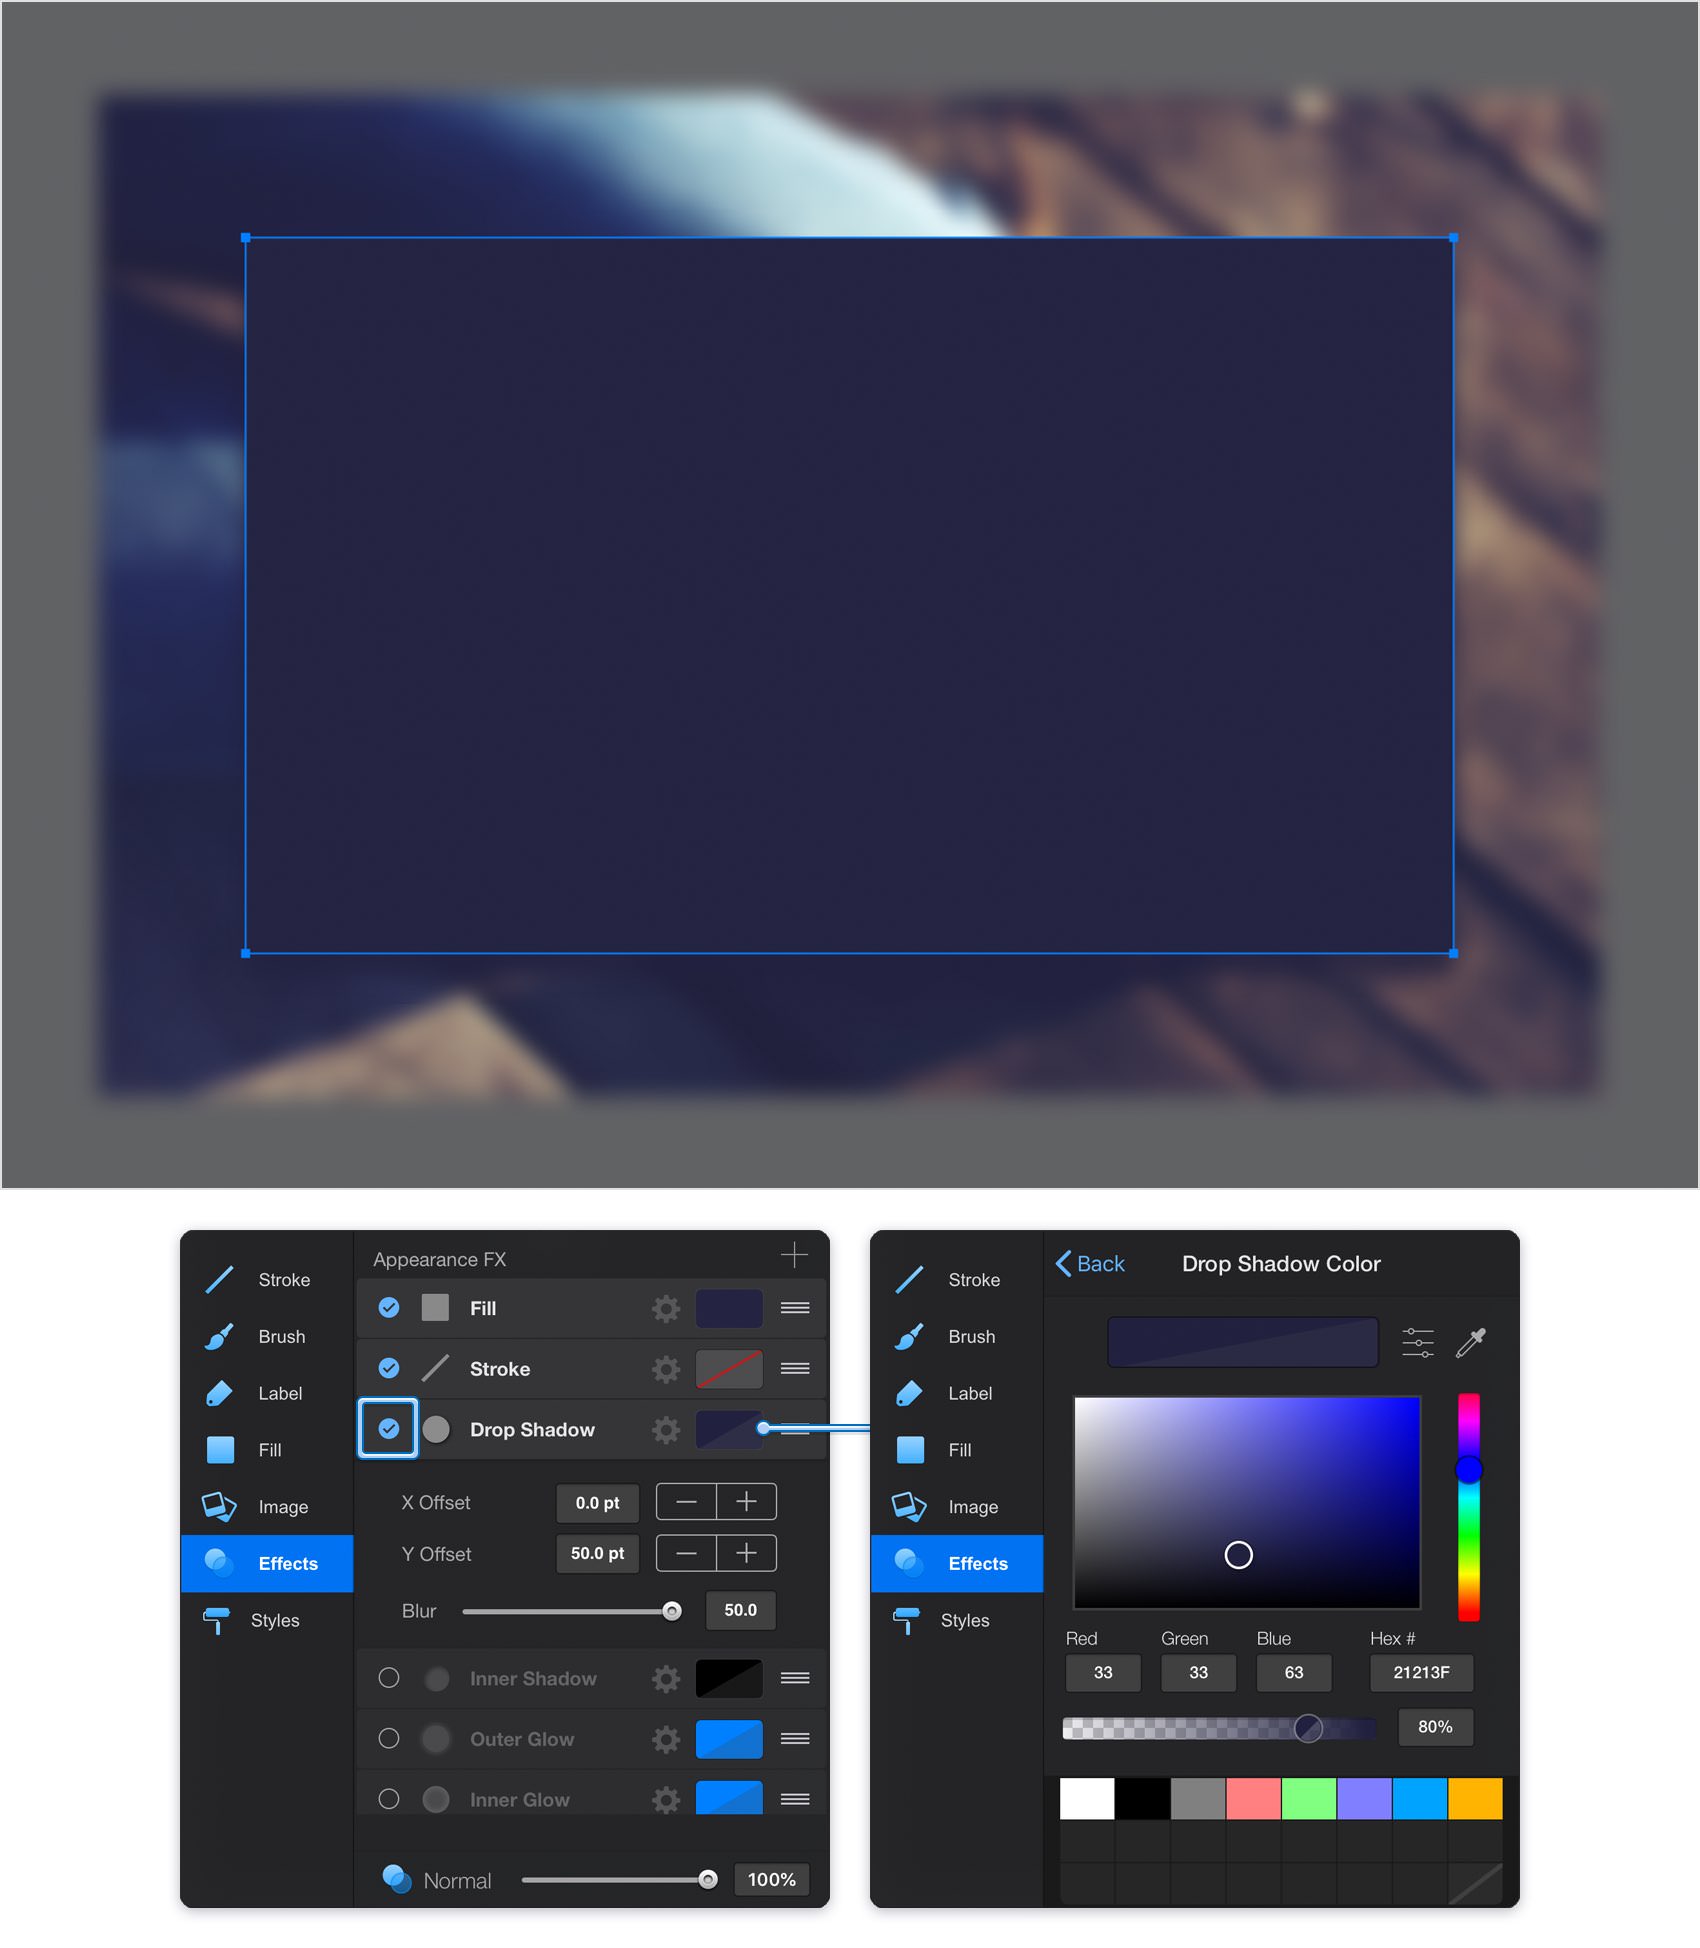
Activate the existing Drop Shadow effect and expand it. Enter 0 pt in the X Offset box and 50 pt in the Y Offset box, drag that Blur slider to 50 pt, and then tap the color well of this effect. Replace the existing color with R=33 G=33 B=63 and drag that Alpha slider to 80%.
Step 7
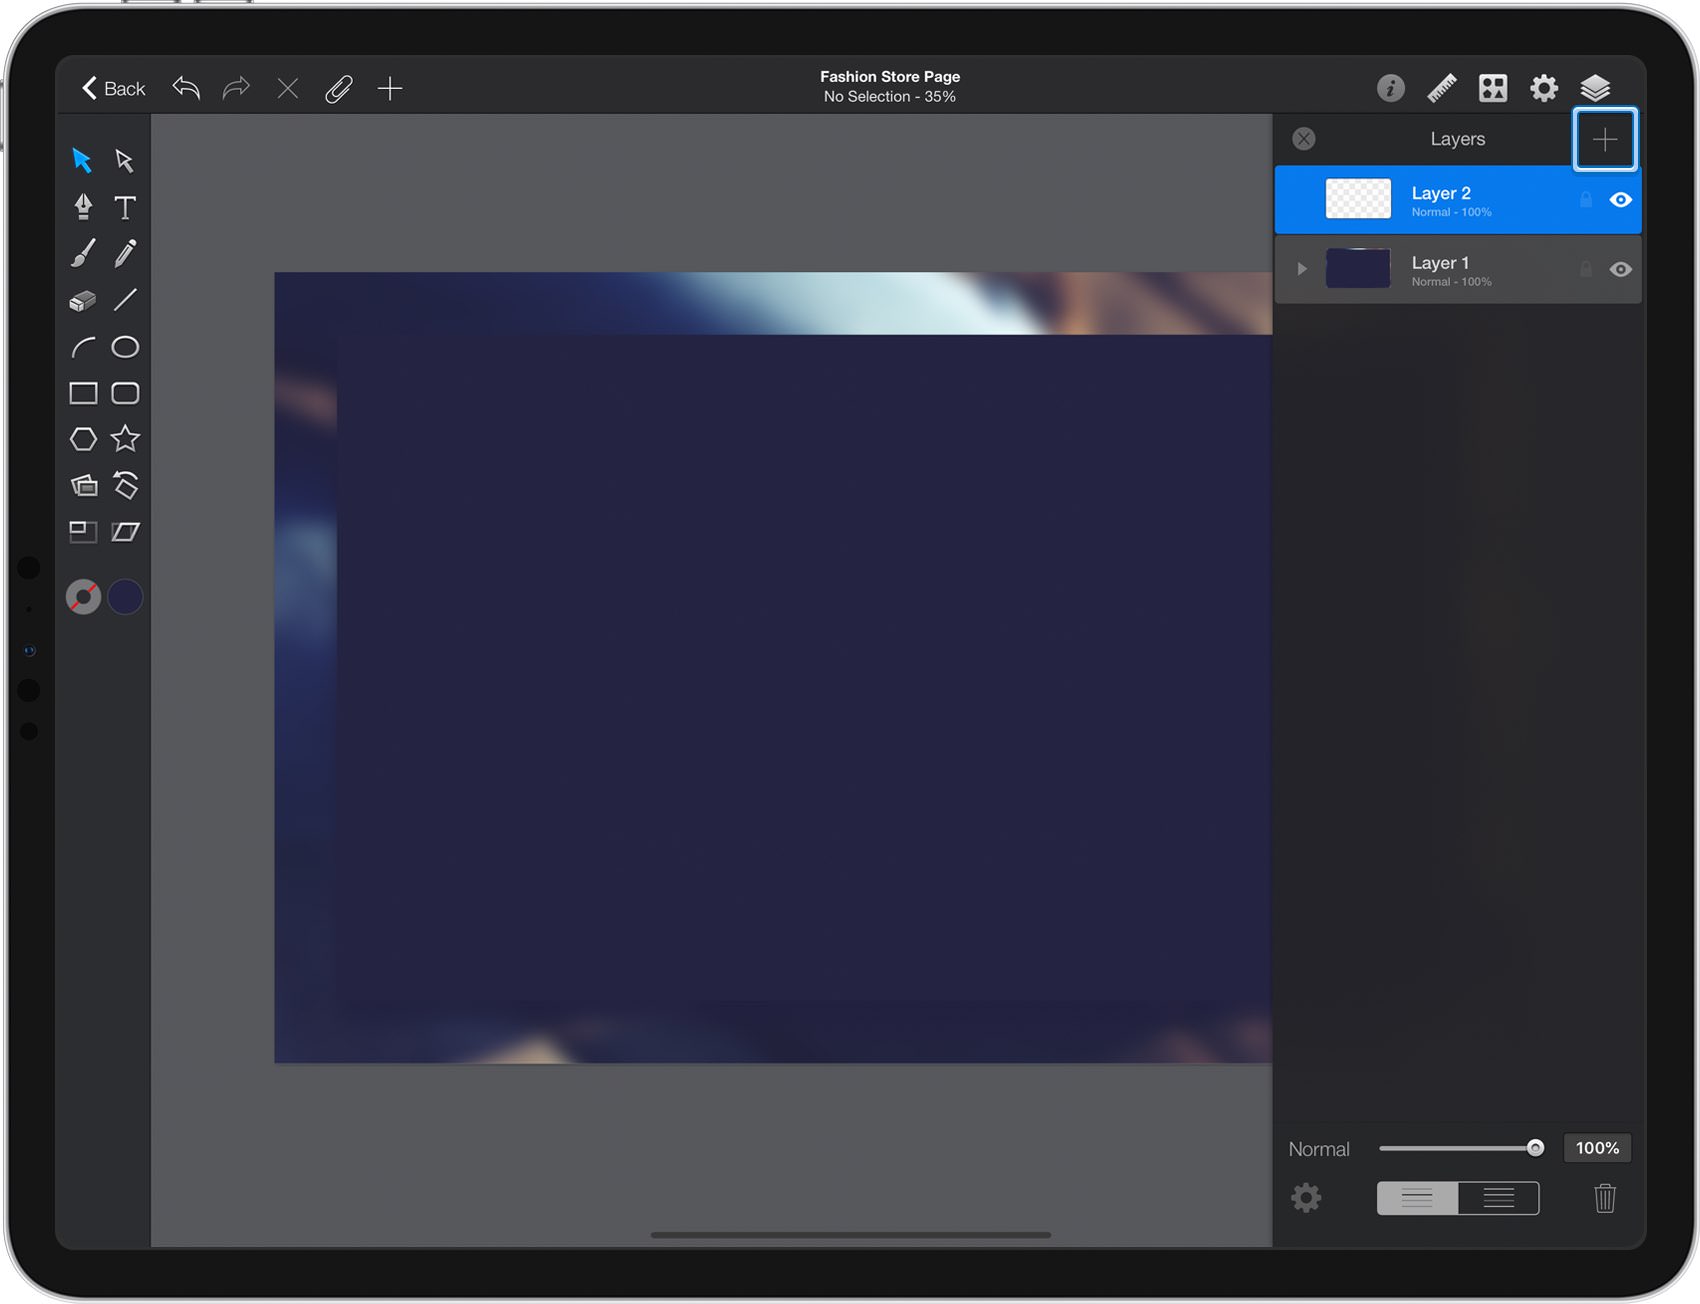
Focus on the right side of your Titlebar and tap the rightmost icon to open the Layers panel. Add a second layer using the plus button from the top of the panel and make sure that this new layer stays selected, as the new shapes you are about to create will go here.
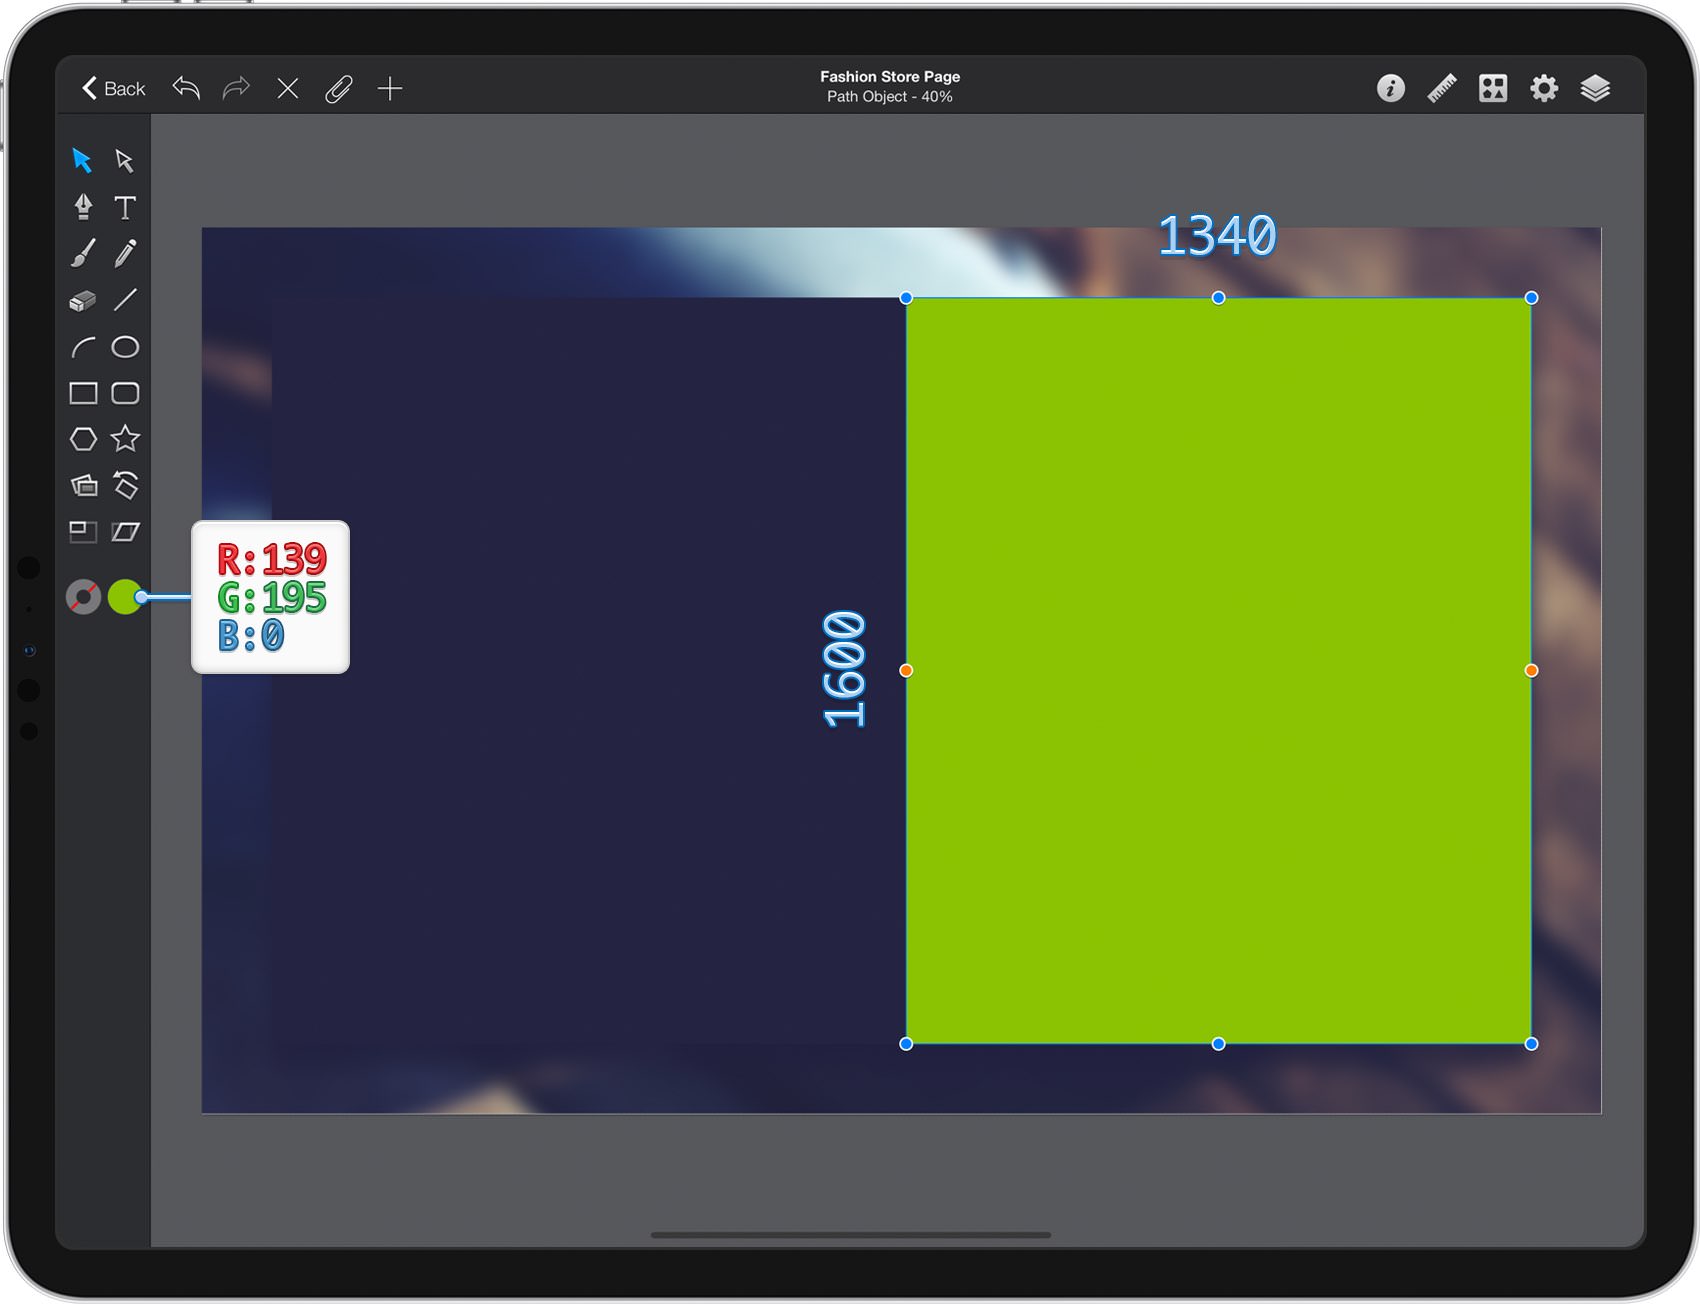
Return to your Toolbar and set the Fill color to R=139 G=195 B=0. Using the Rectangle Tool, create a 1340 x 1600 px shape and place it as shown in the following image.
Step 8
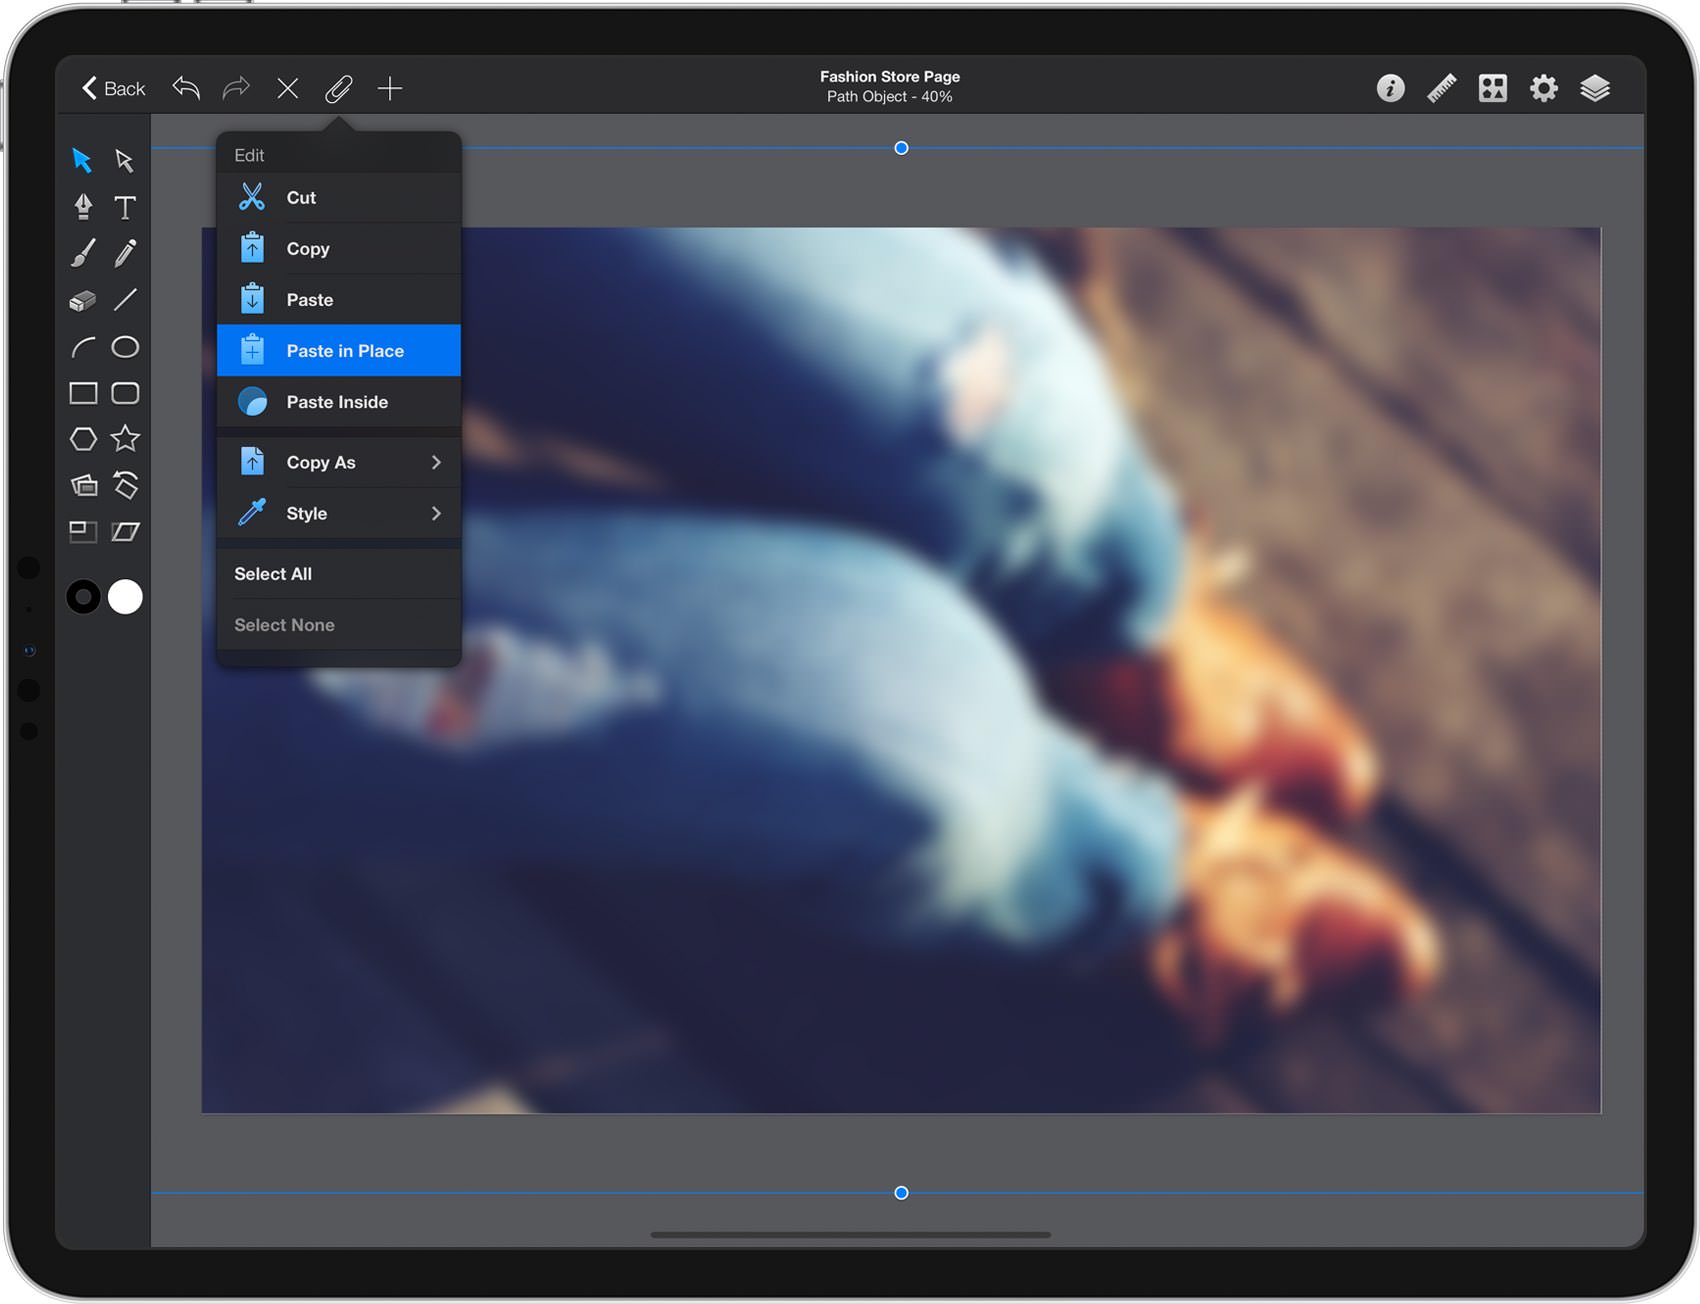
Open the Edit pane and tap the Paste in Place command to add a copy of your jeans photo. Make sure that this copy stays selected, go to the Effects pane and disable the existing Blur effect.
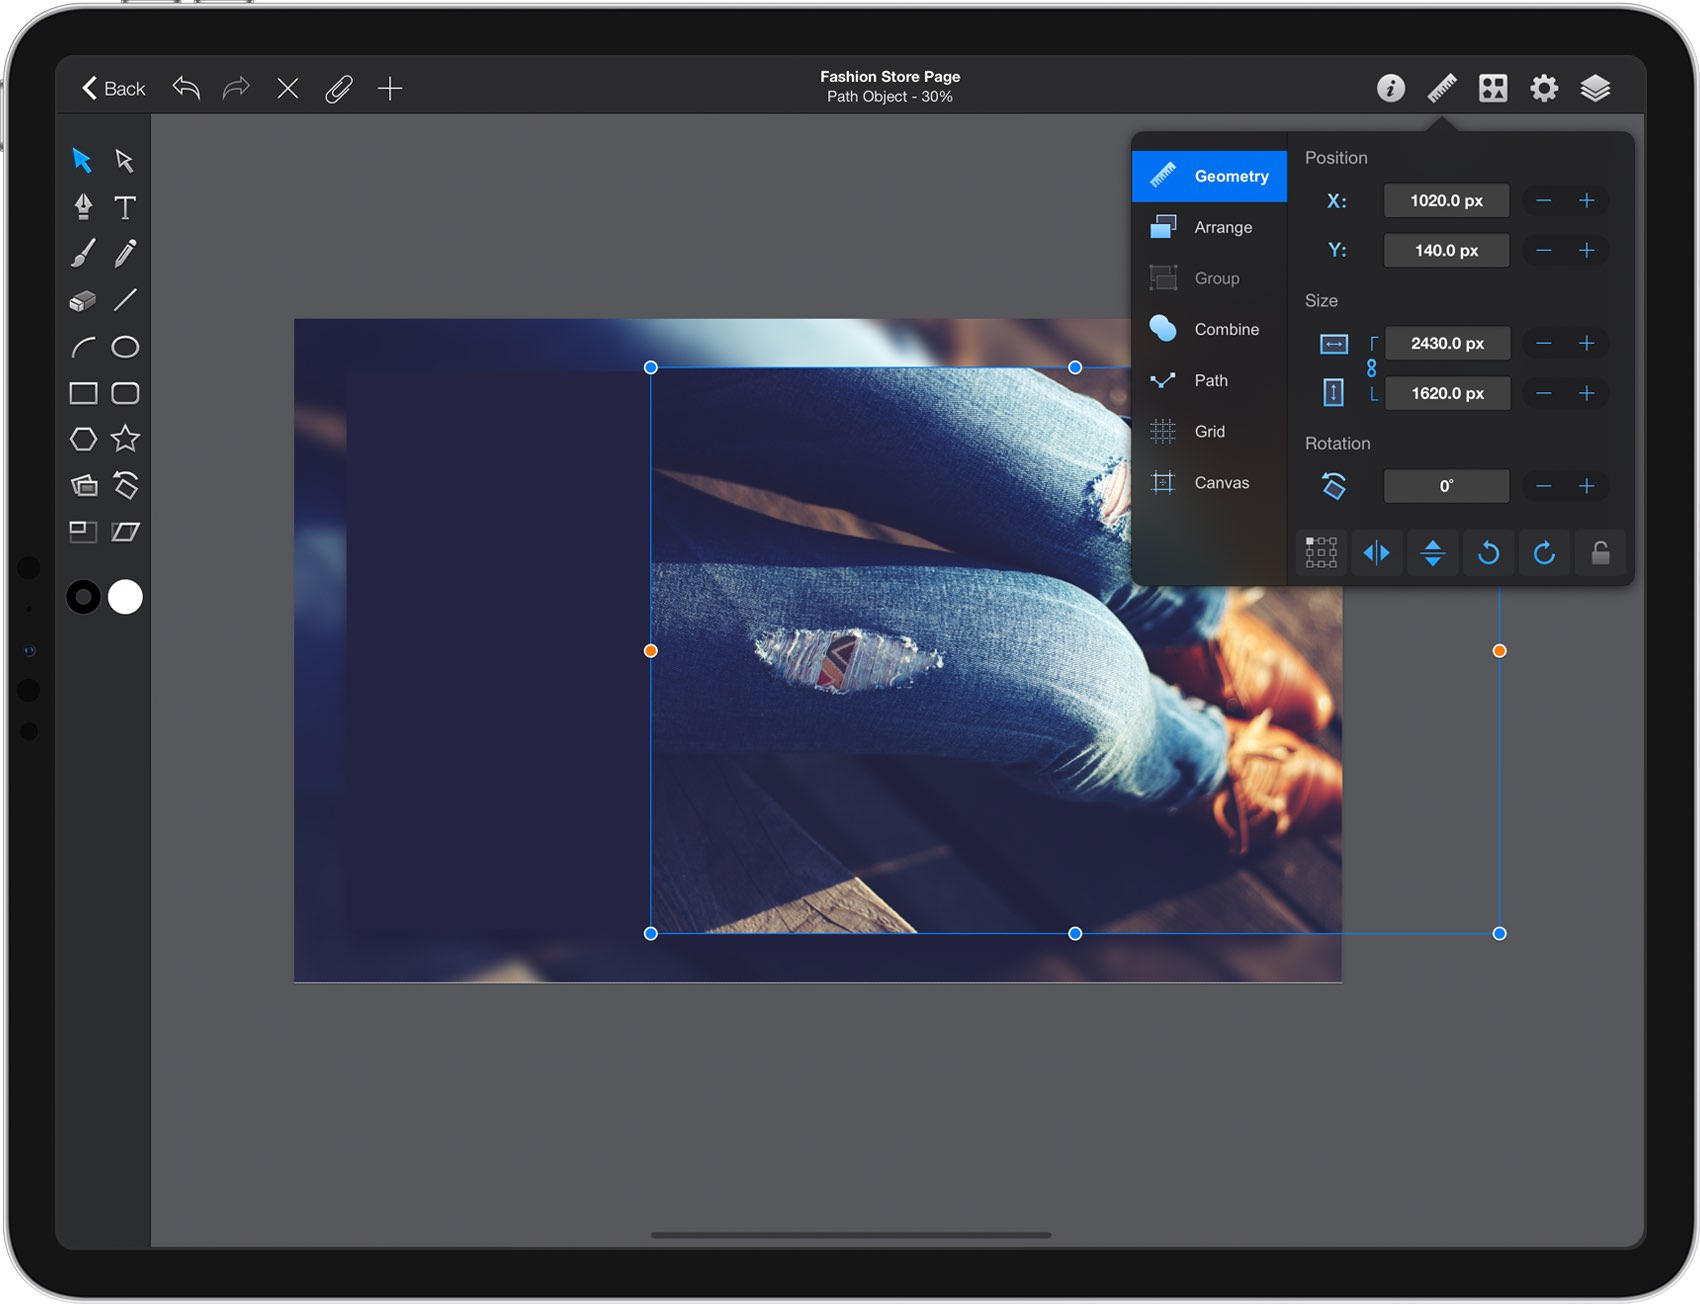
Make sure that your new image stays selected, open the Geometry pane and set the Width to 2430 px. Focus on the Position attributes to numerically position your selection horizontally to 1020 px and vertically to 140 px.
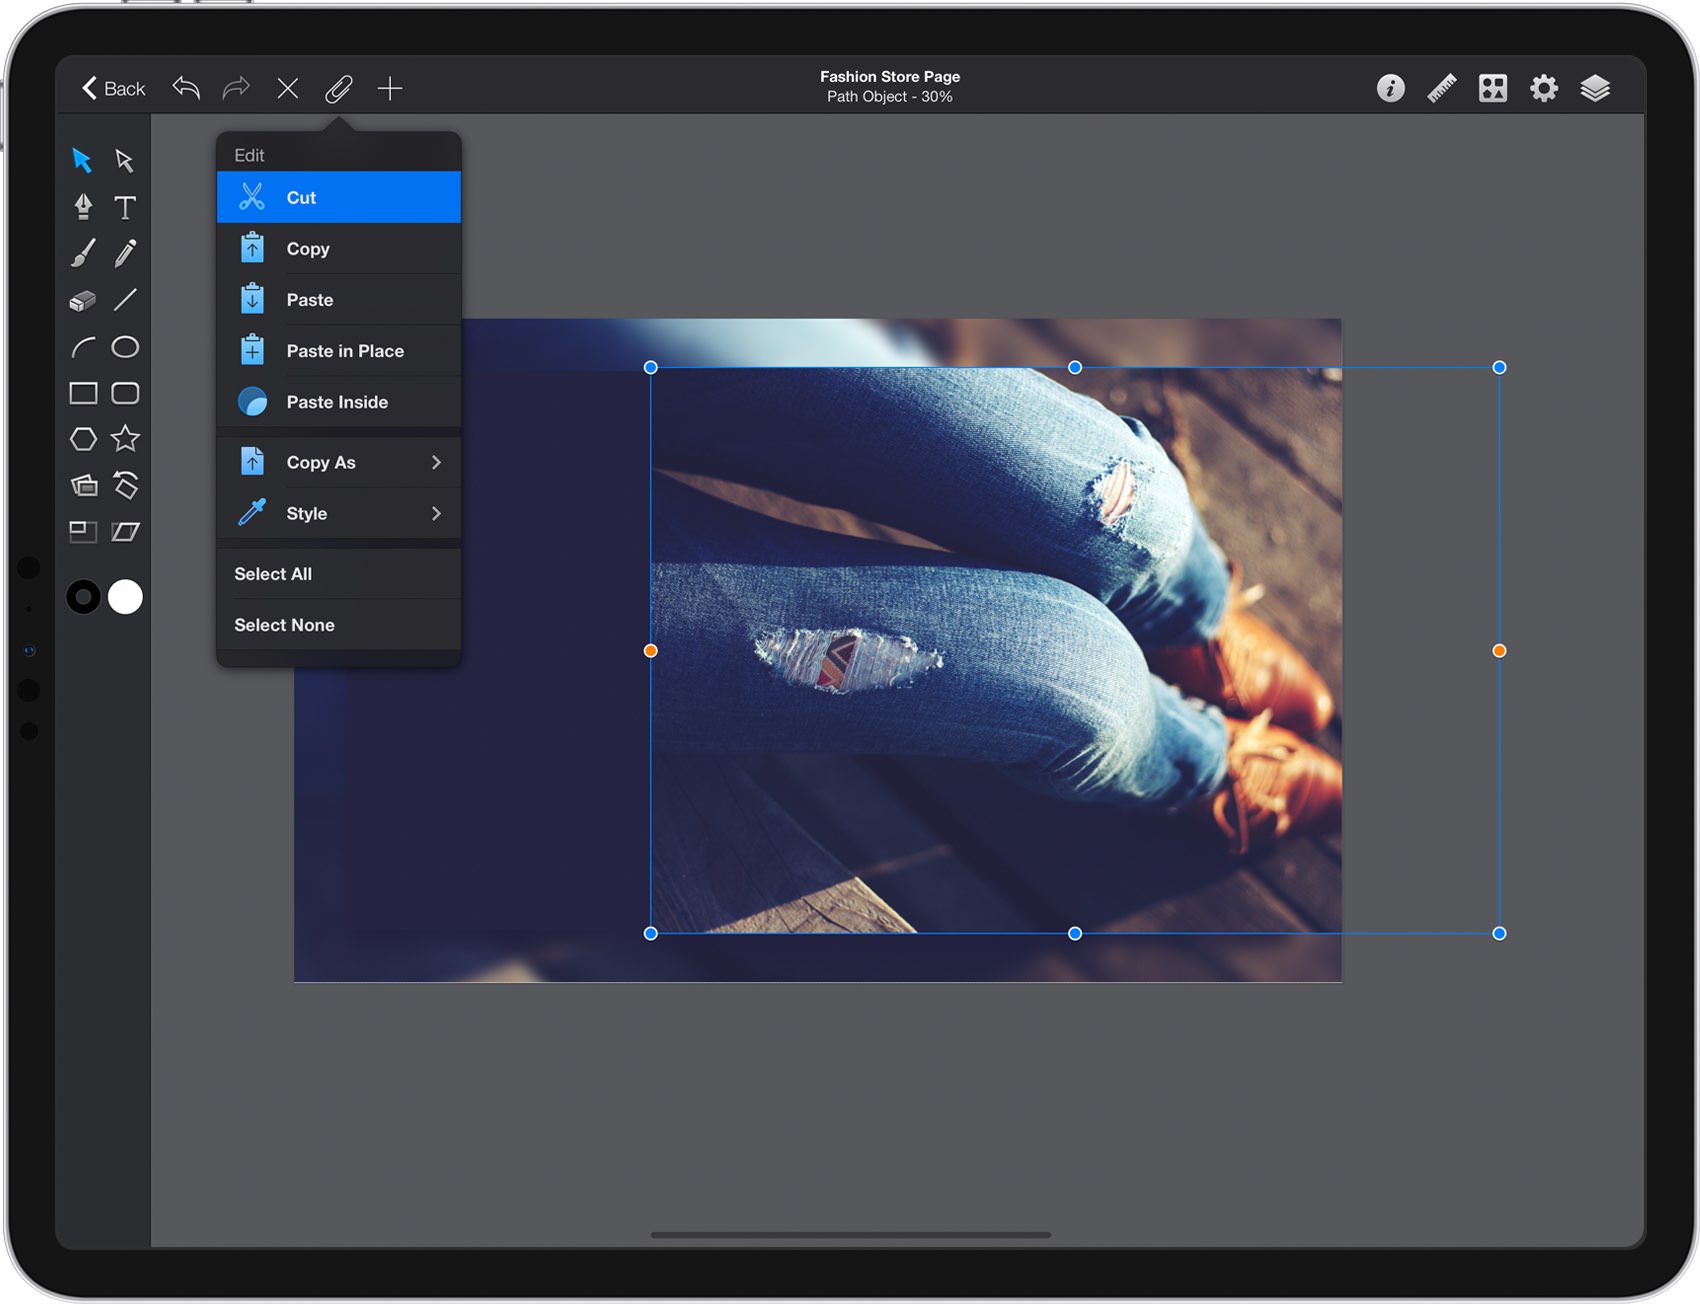
With your new image still selected, reopen that Edit pane and tap the Cut command.
Step 9
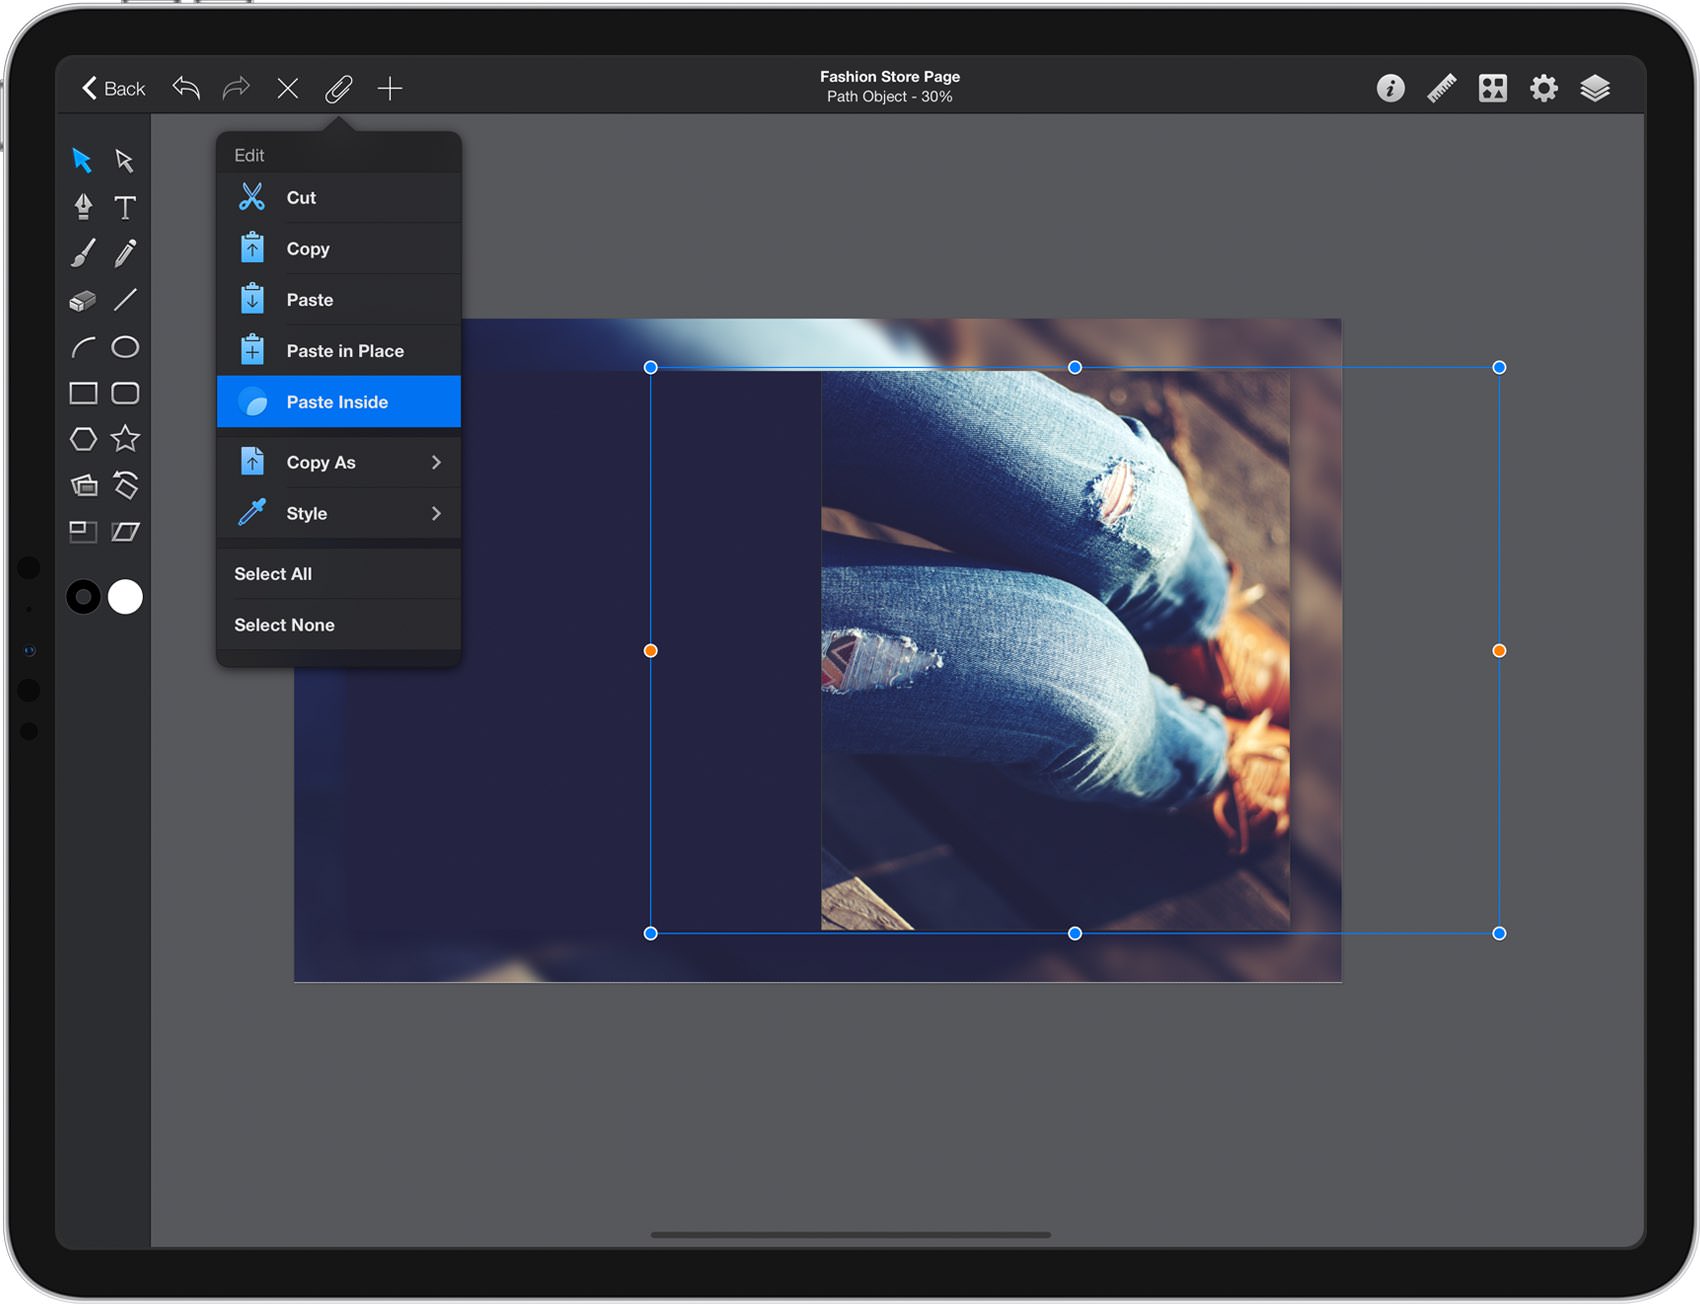
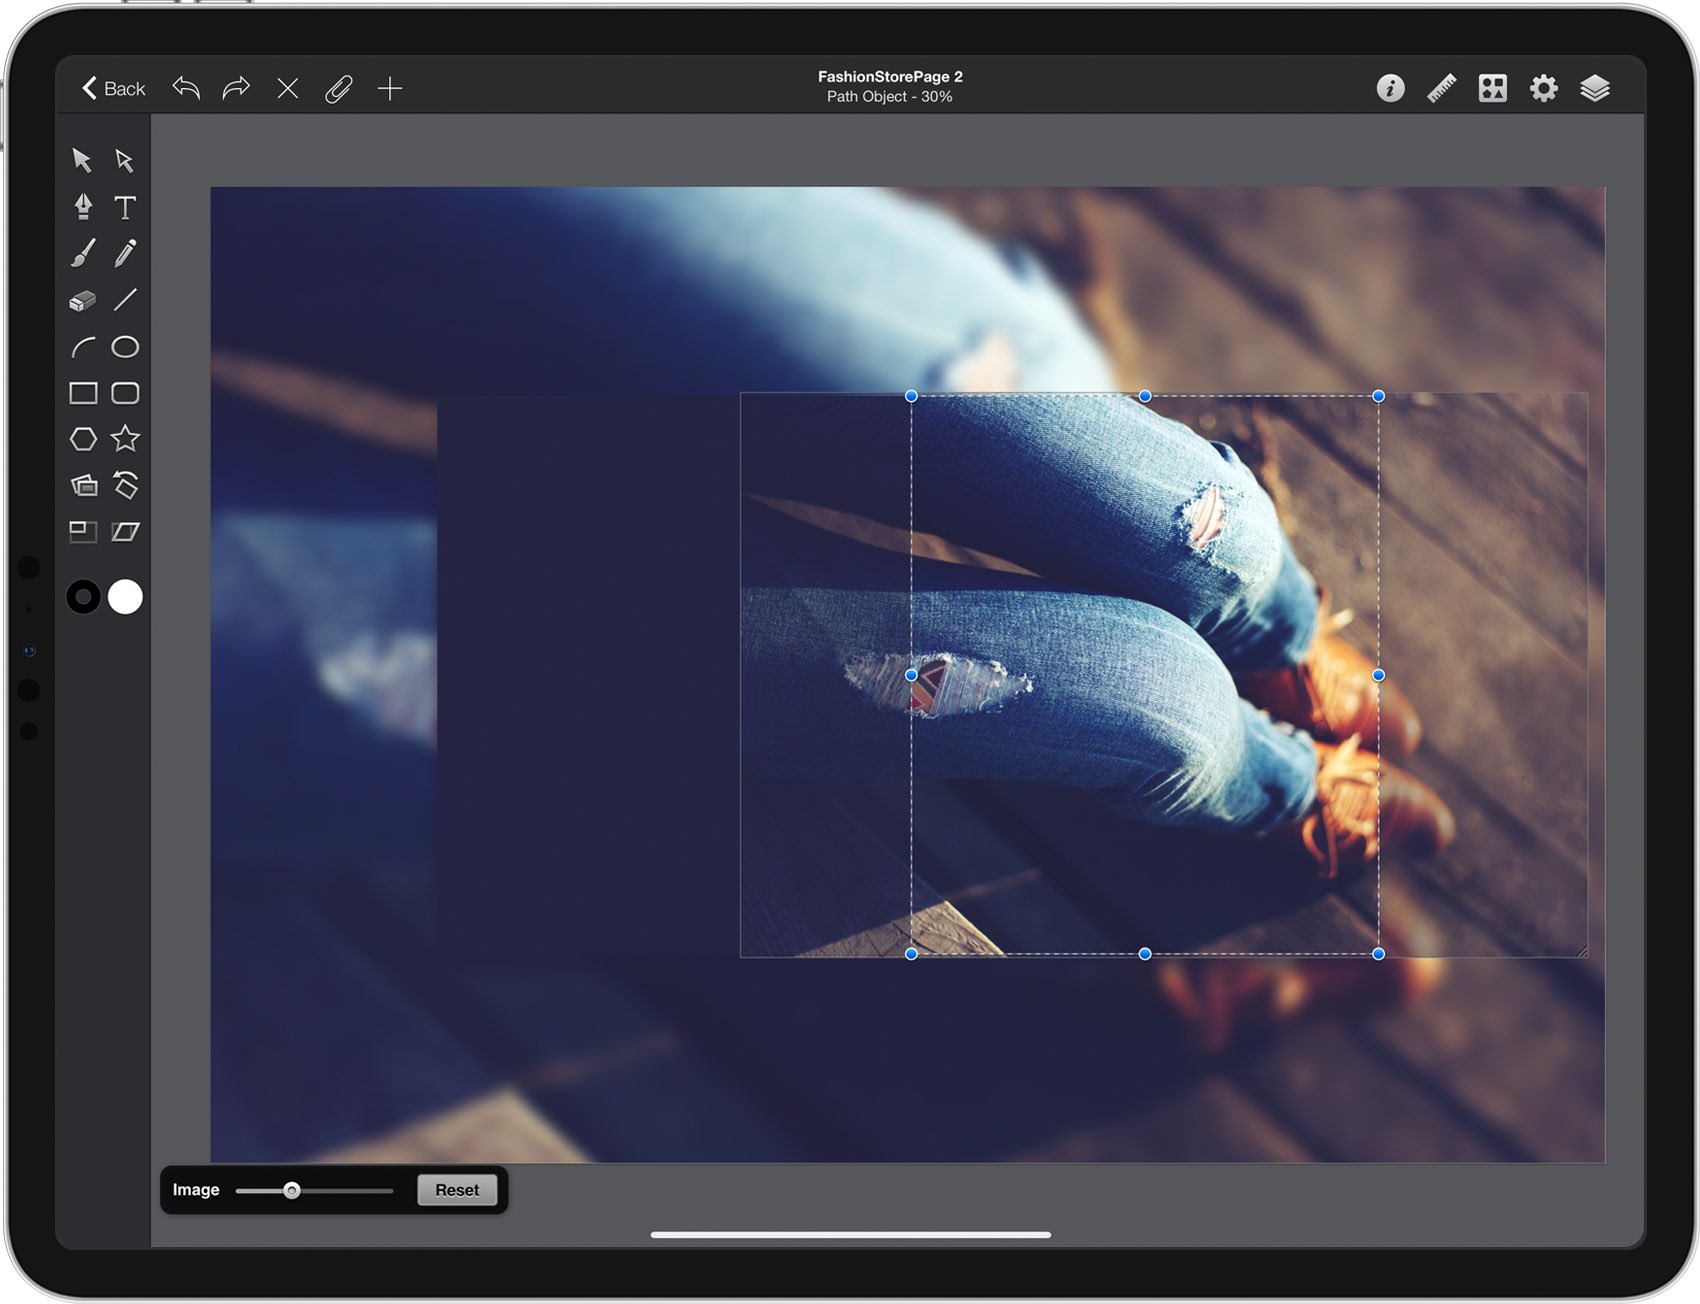
Pick the Move Tool and select your green rectangle. Open the Edit pane and tap the Paste Inside command to paste the image cut in the previous step inside your green shape. Your green shape will act as a mask.
Step 10
Keep in mind that you can always adjust your masked image. All you have to do is double-tap on it using the Move Tool and then you can easily move or resize it as you wish.
Step 11
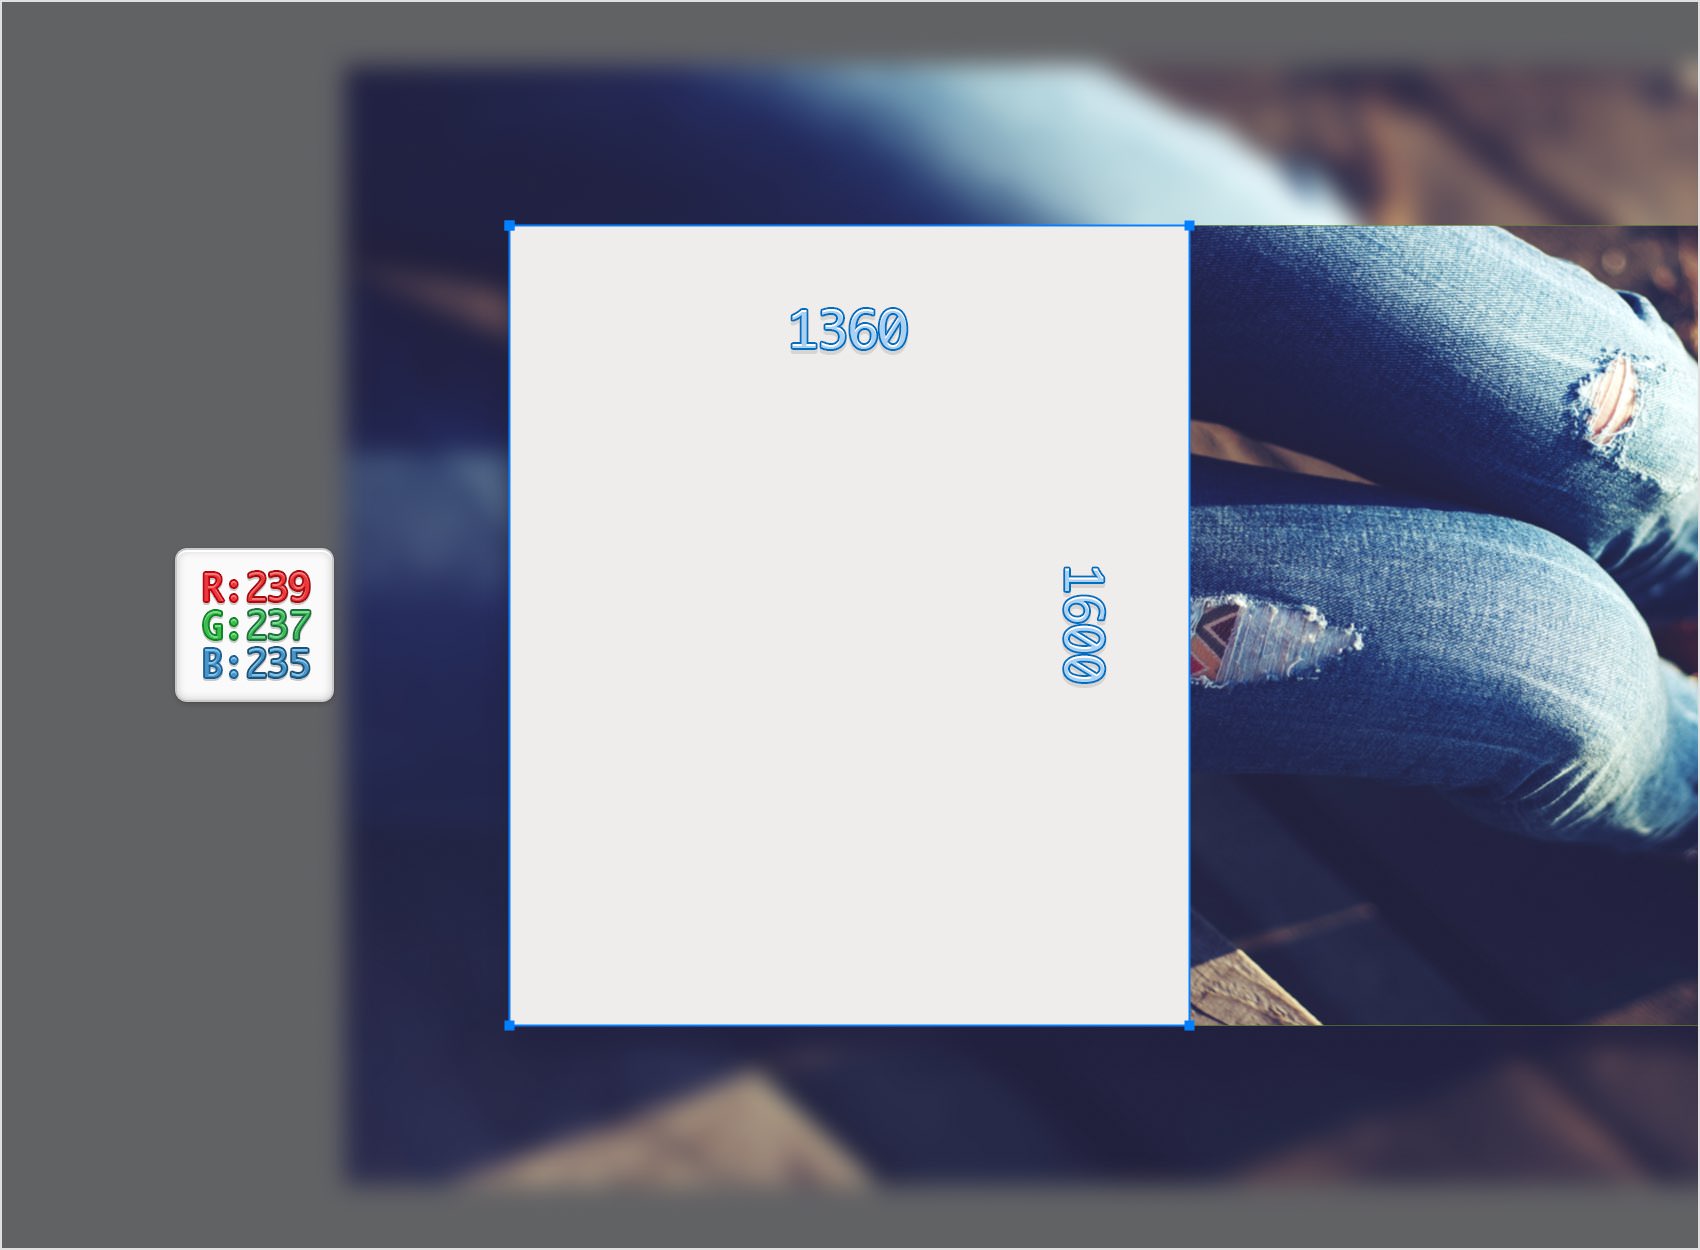
Focus on your Toolbar and set the Fill color to R=239 G=237 B=235. Pick the Rectangle Tool, create a 1360 x 1600 px shape and place it as shown in the following image.
Step 12
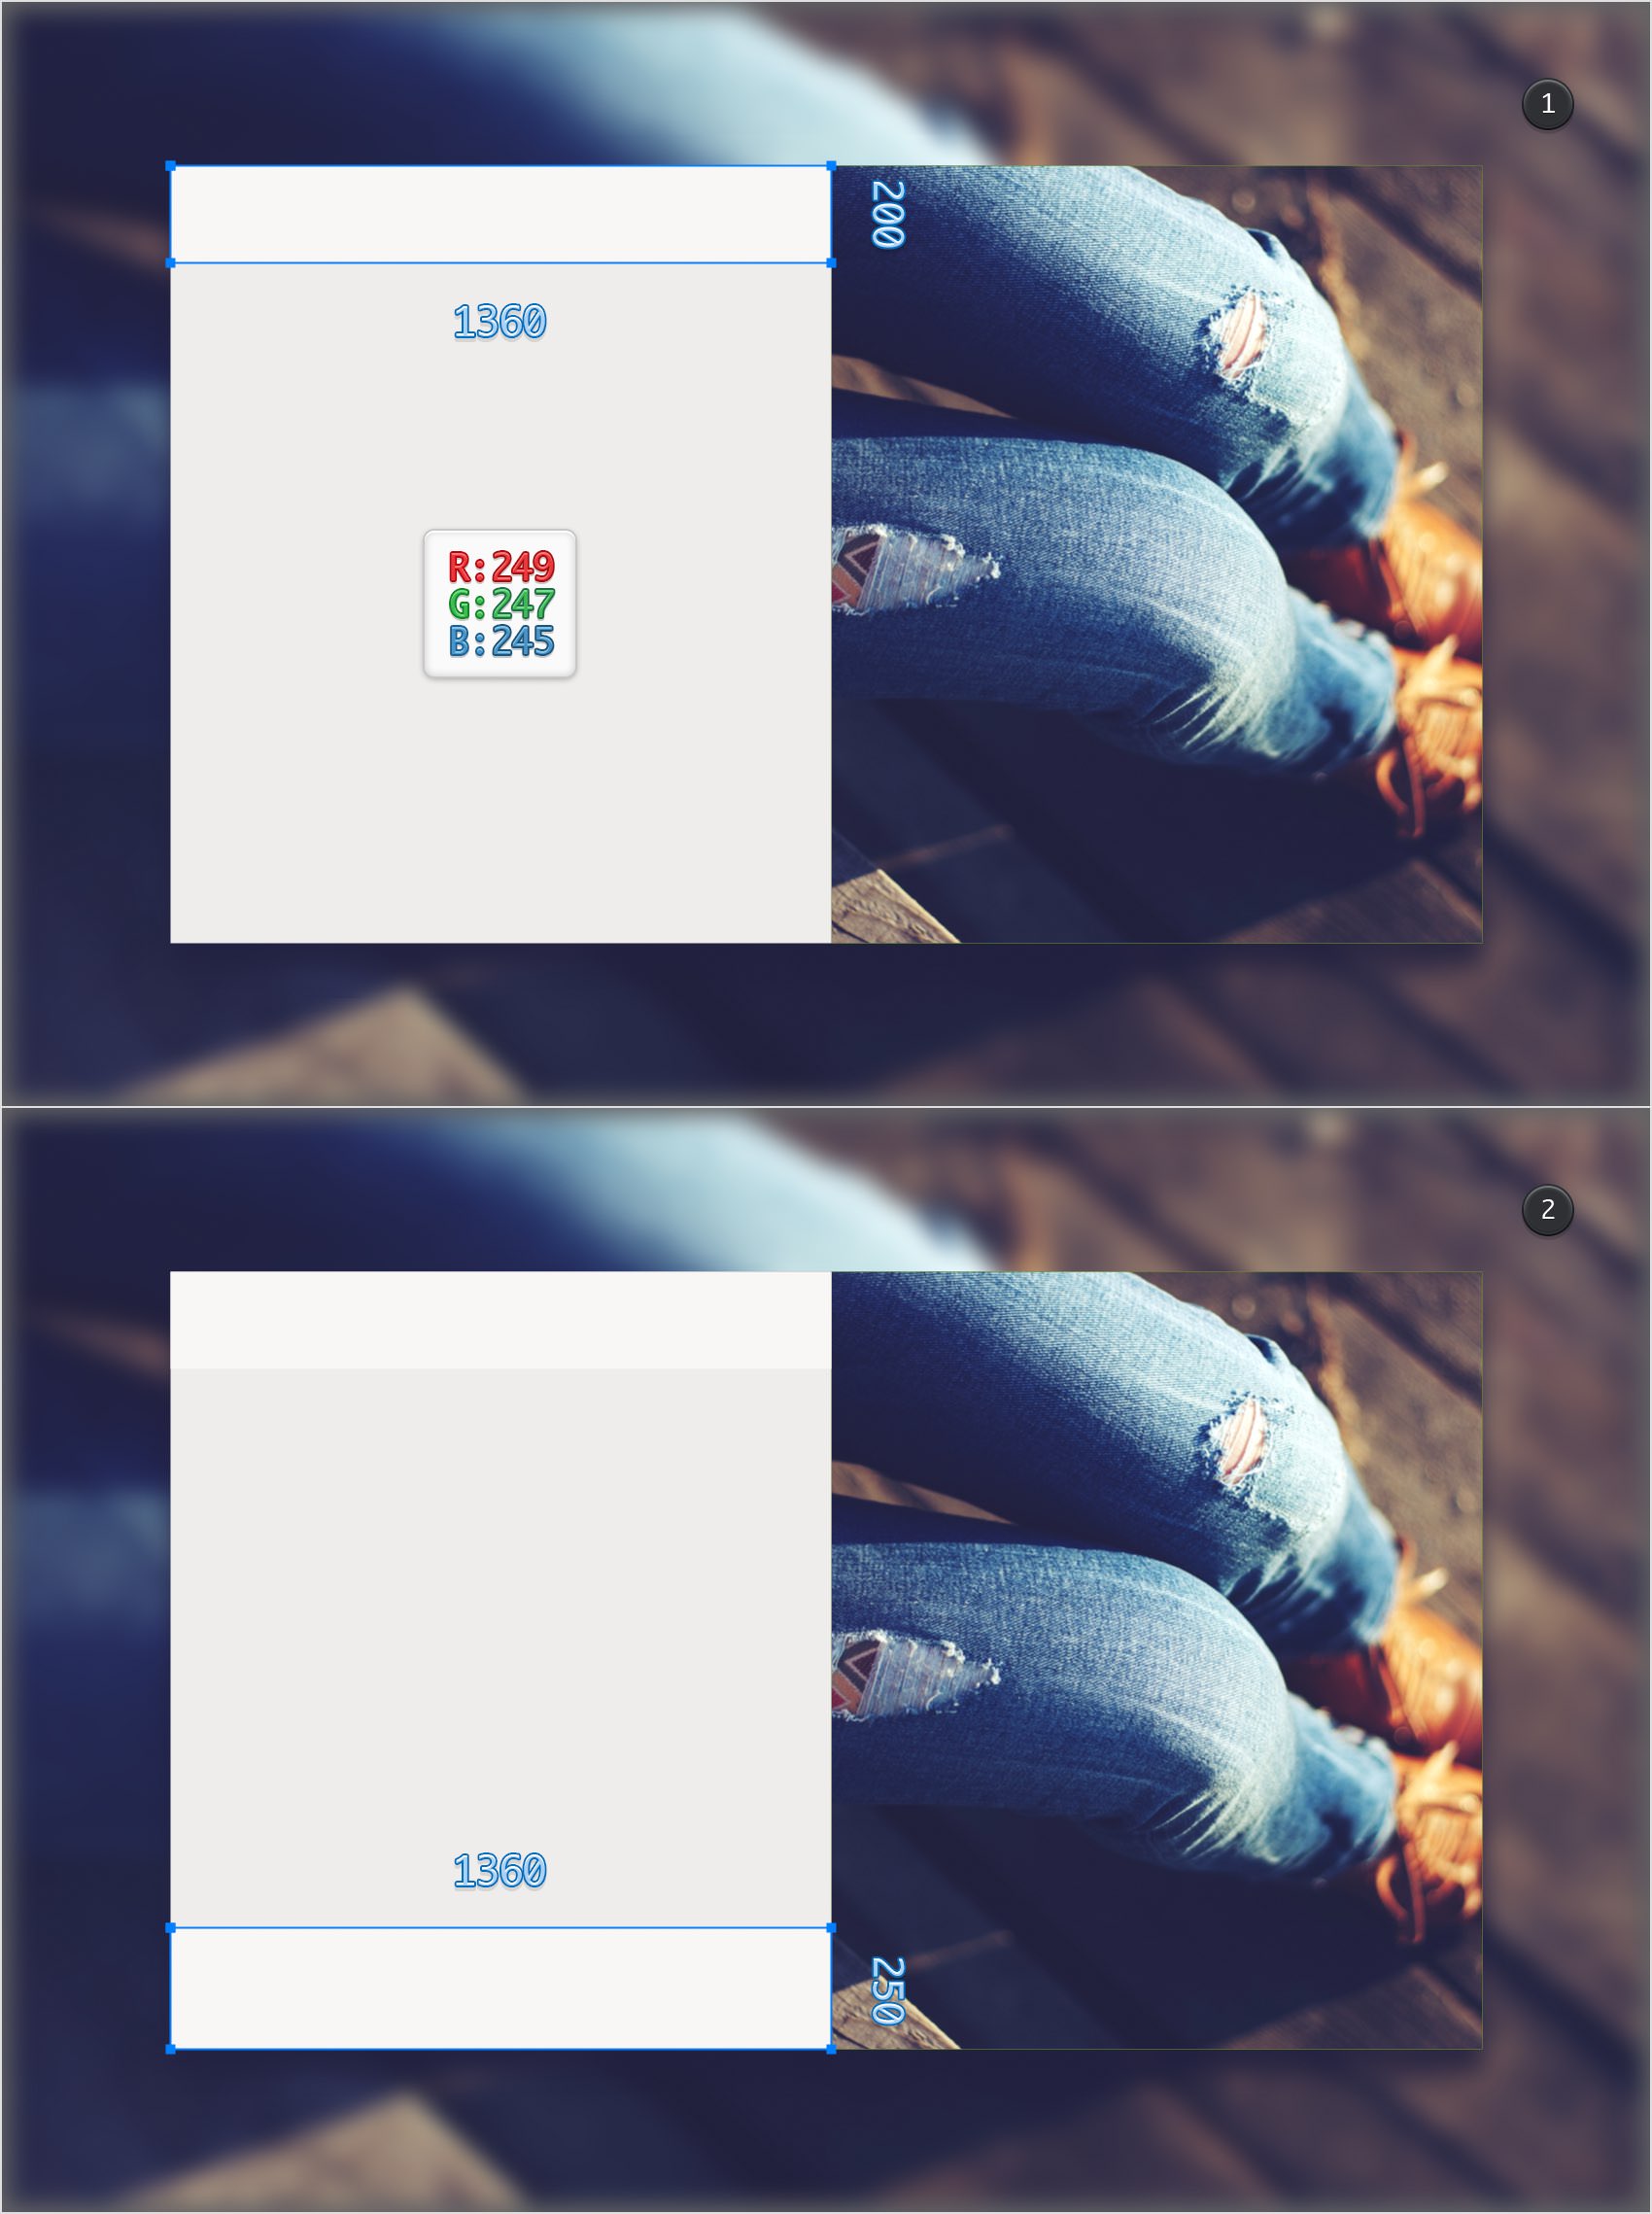
Focus on your Toolbar and set the Fill color to R=249 G=247 B=245. Pick the Rectangle Tool, create a 1360 x 200 px shape and place it as shown in the first image.
Using the same tool, create a 1360 x 250 px shape and place it as shown in the second image.
Step 13
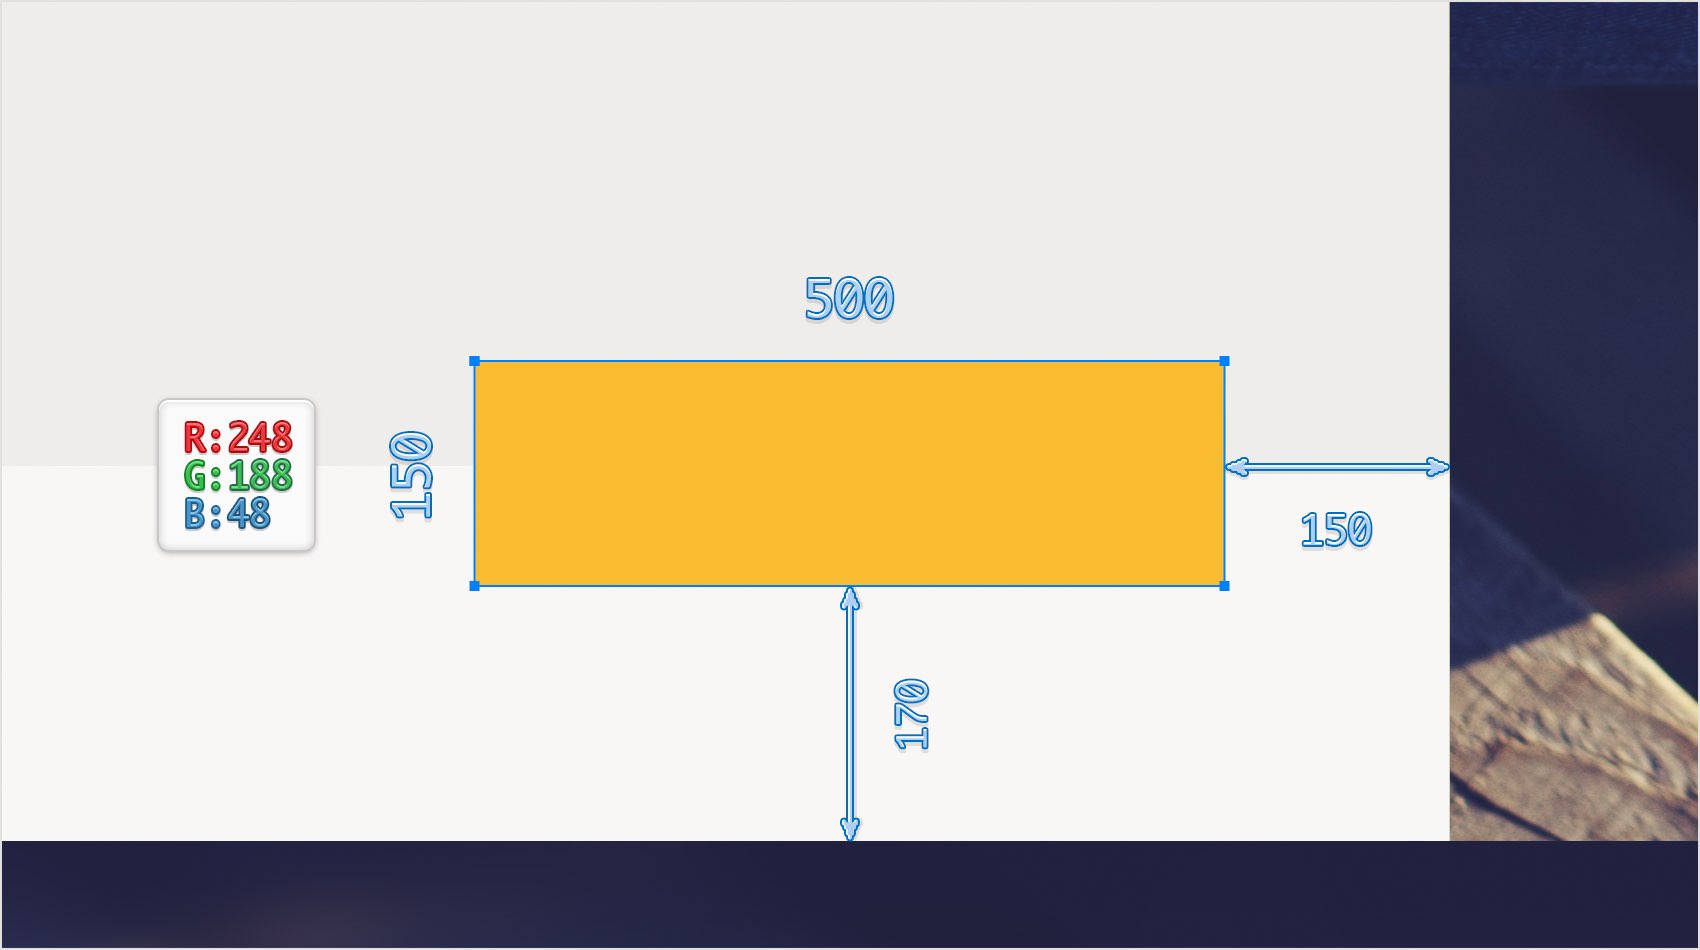
Focus on your Toolbar and set the Fill color to R=248 G=188 B=48. Pick the Rectangle Tool, create a 500 x 150 px shape and place it as shown in the following image.
Step 14
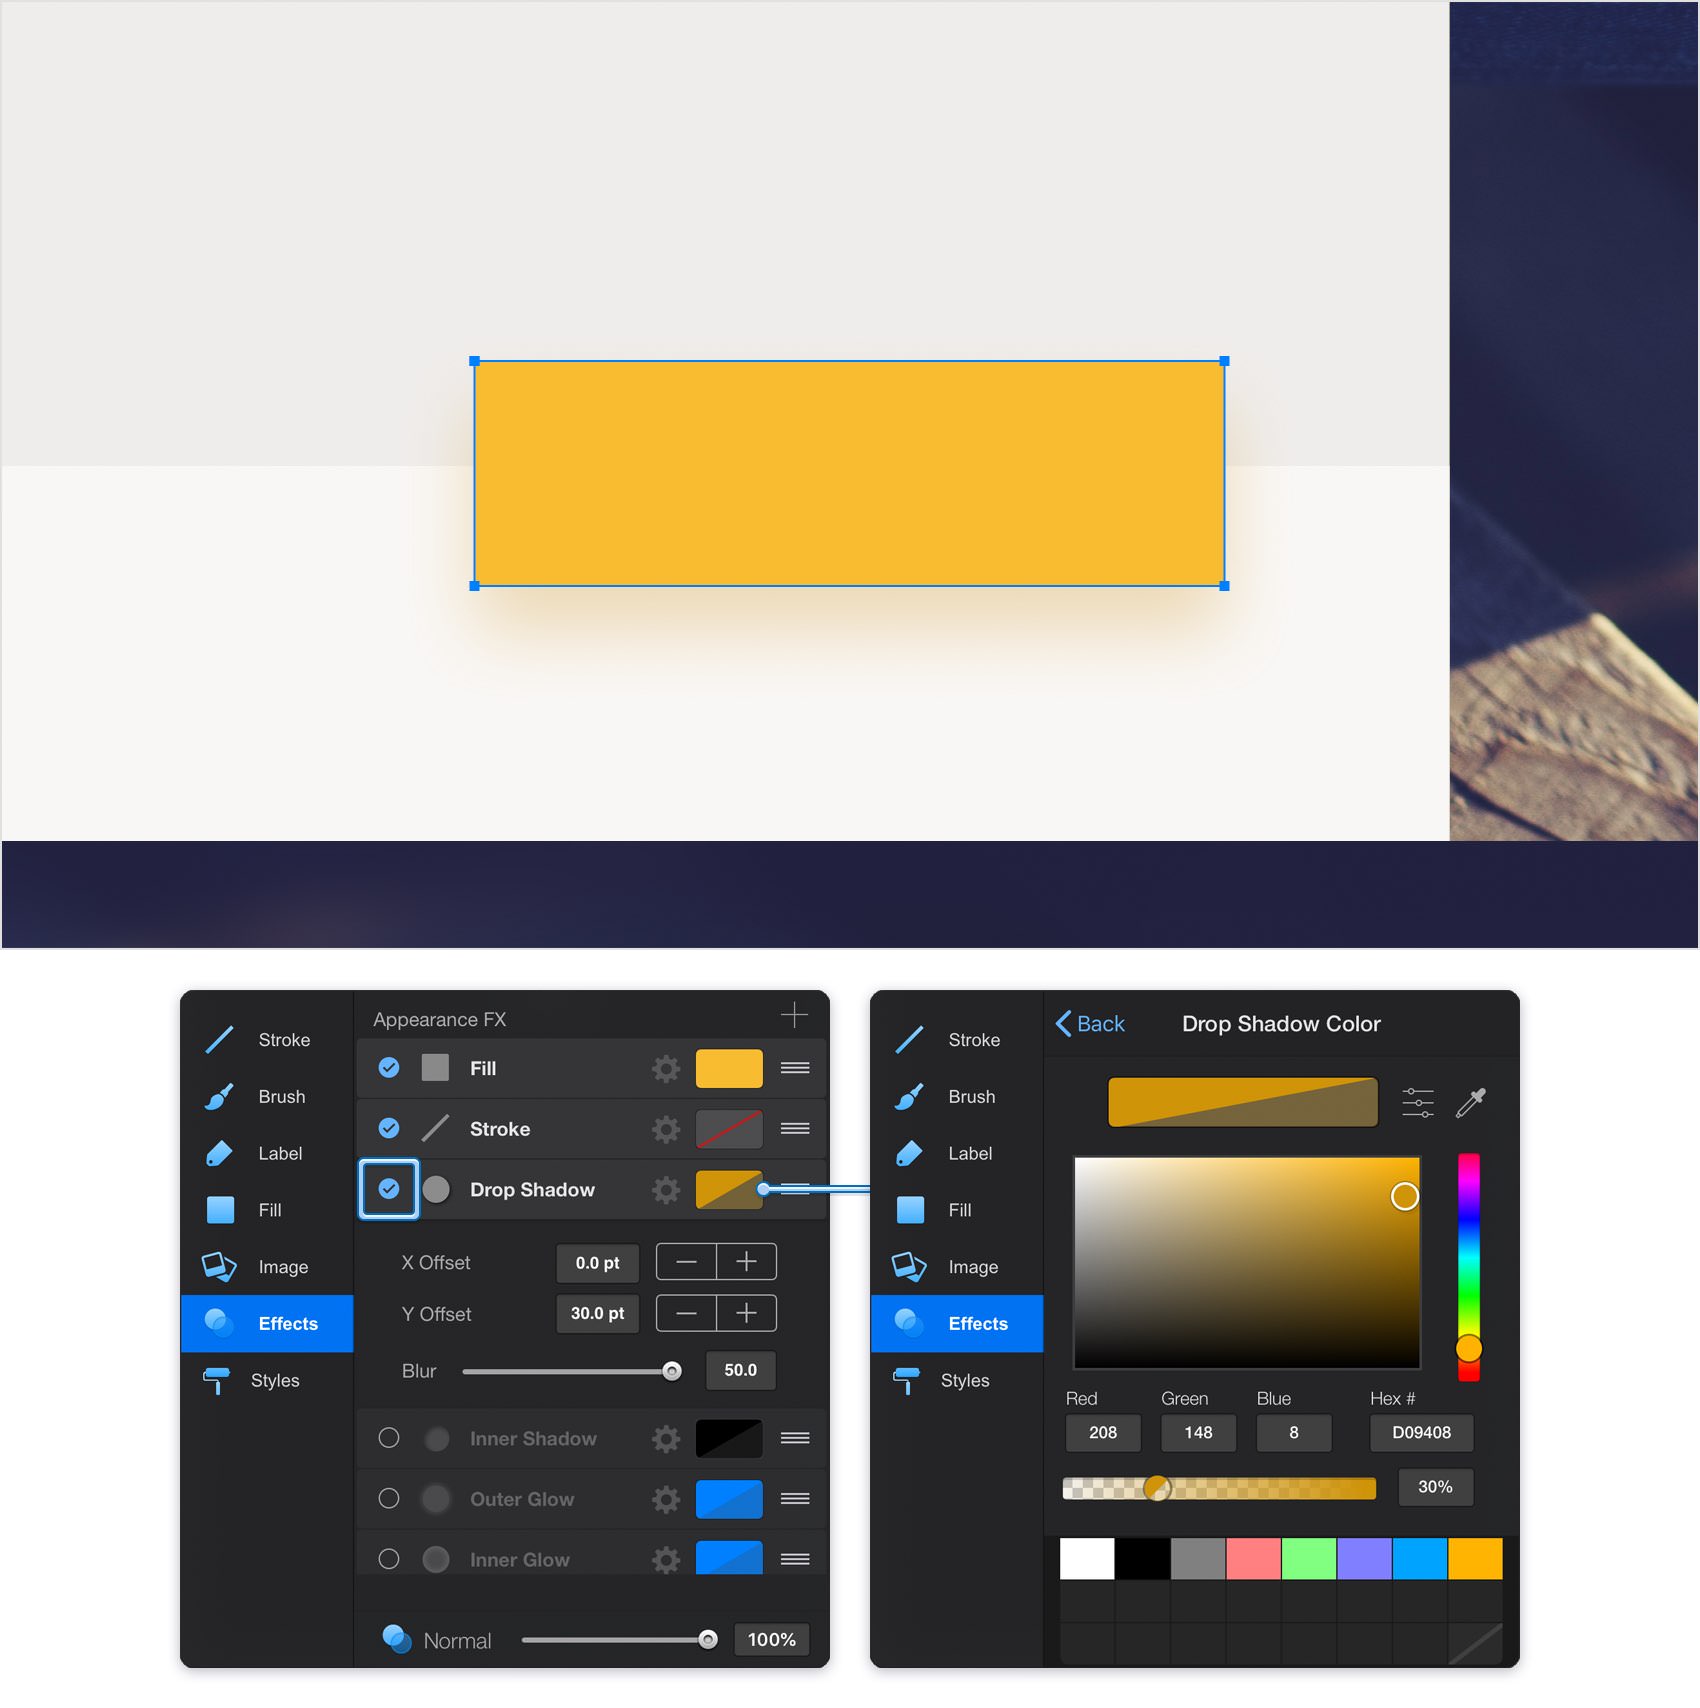
Make sure that your yellow rectangle is selected and open the Effects pane. Activate the existing Drop Shadow effect and enter the attributes shown below.
Step 15
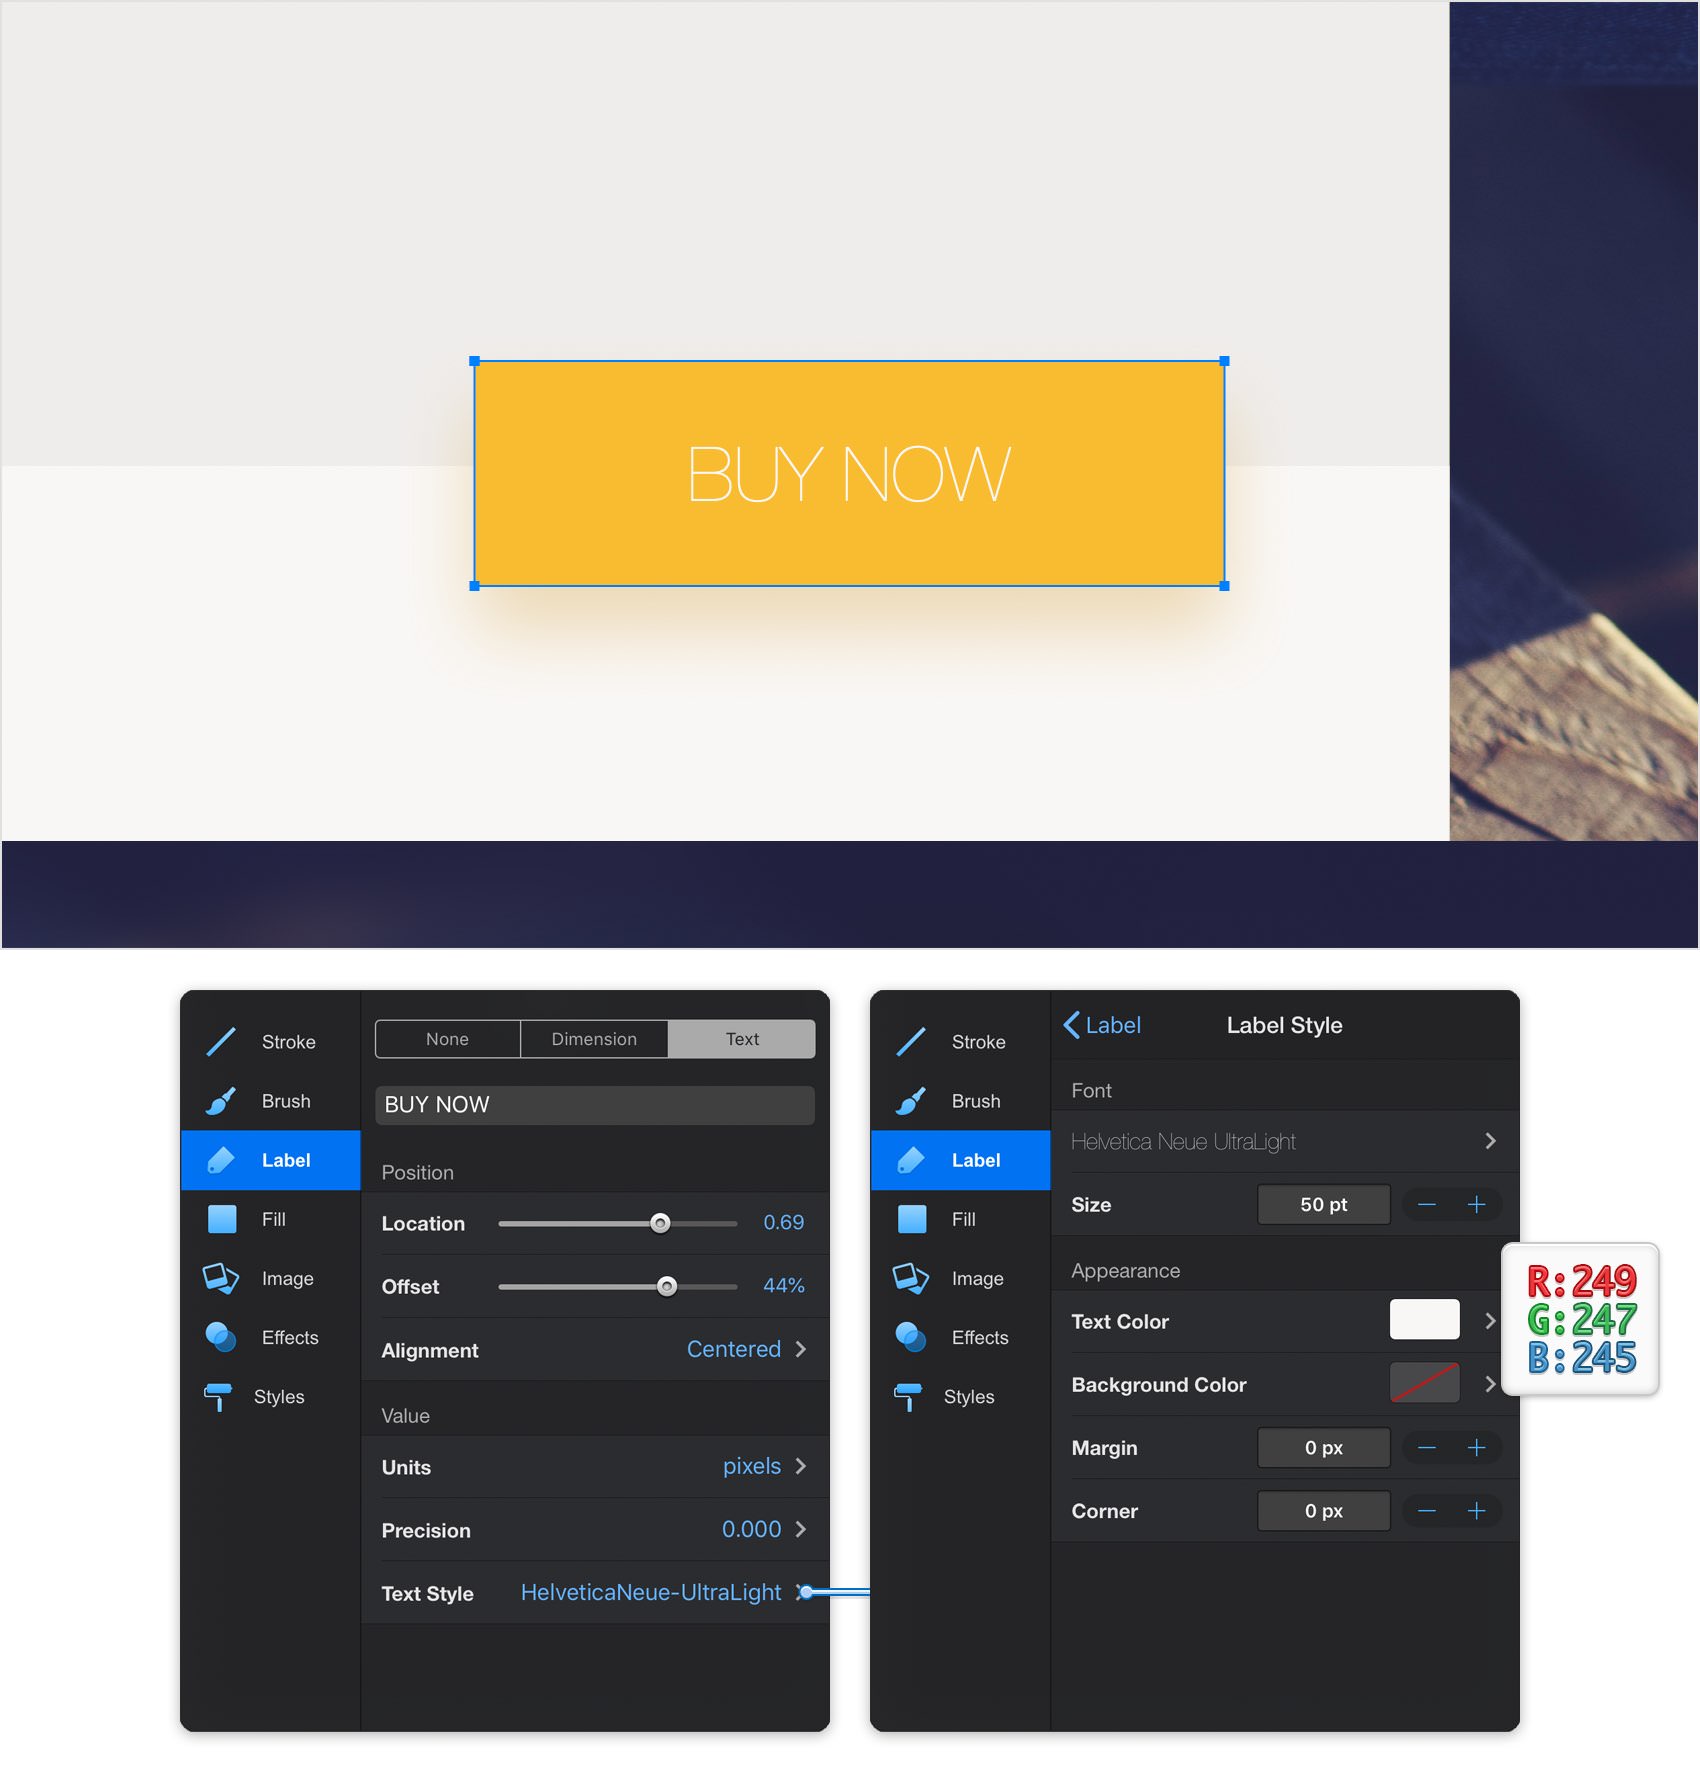
Make sure that your yellow rectangle stays selected and open the Label pane.
Tap the Text button to add a text label and enter the "BUY NOW" piece of text. Set the Alignment to Centered and then open the Label Style pane. Select the Helvetica Neue font, change the Style to UltraLight, set the Size to 50 pt and adjust that Text Color to R=249 G=247 B=245. In the end your yellow shape should look like in the following image.
Step 16
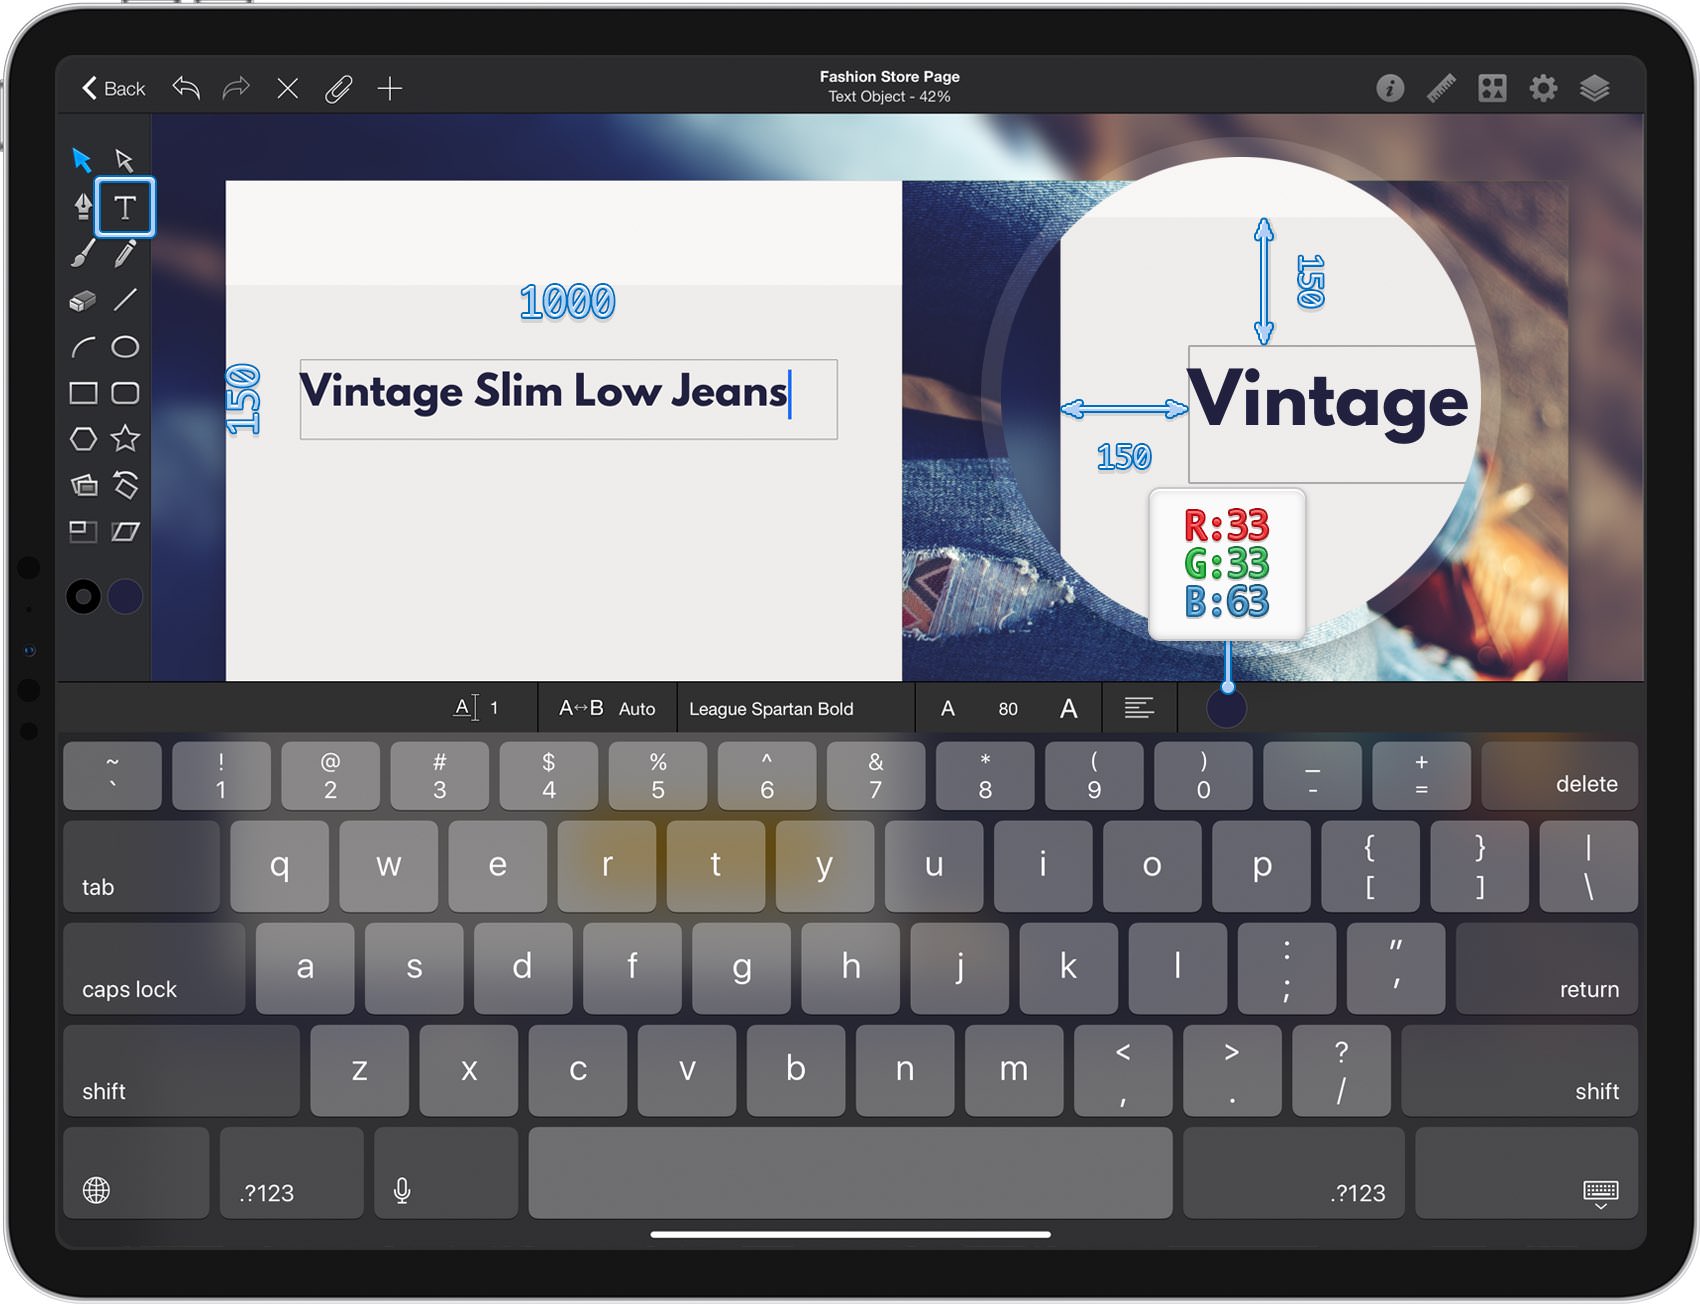
Pick the Text Tool and double-tap inside that new text field. Select the League Spartan font and set the Size to 80 pt. Change the Text Color to R=33 G=33 B=63 and make sure that the Text Alignment is set to Left.
Type the "Vintage Slim Low Jeans" piece of text. Use the Move Tool to stretch this text field to 1000 px wide and 150 px tall, and then place it as shown in the following image.
Step 17
Pick the Text Tool and double-tap inside that new text field. Use the same font, but lower the Size to 60 pt and change the text color to R=248 G=188 B=48. Type the "$ 119.90" piece of text.
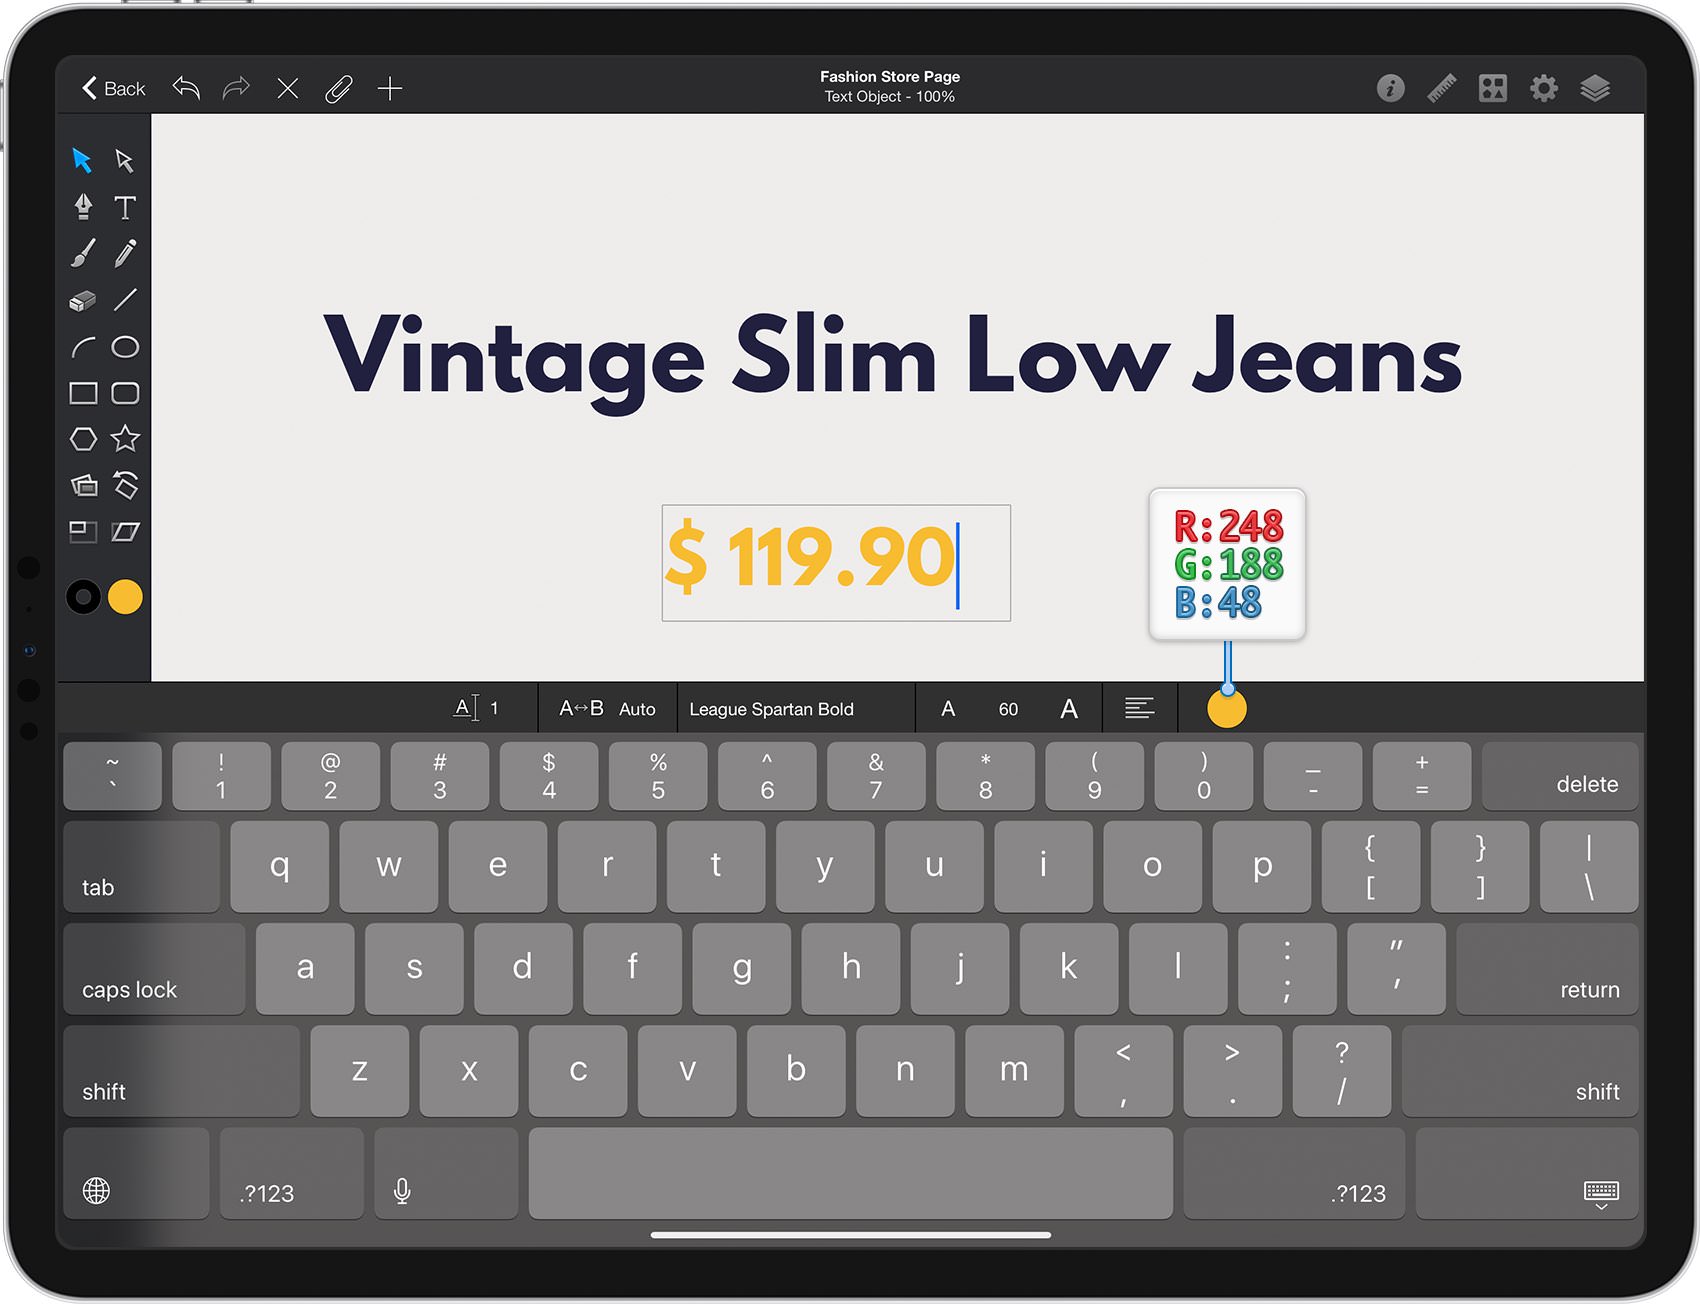
Use the Move Tool to stretch this text field to 300 px wide and 100 px tall, and then place it as shown in the following image. Feel free to enable the Smart Guides feature from the Grid pane to align your piece of text easier and faster.
Step 18
Using that same drag and drop feature you can easily drag text inside your Graphic file. Alternatively, you can use the classic Copy > Paste commands.
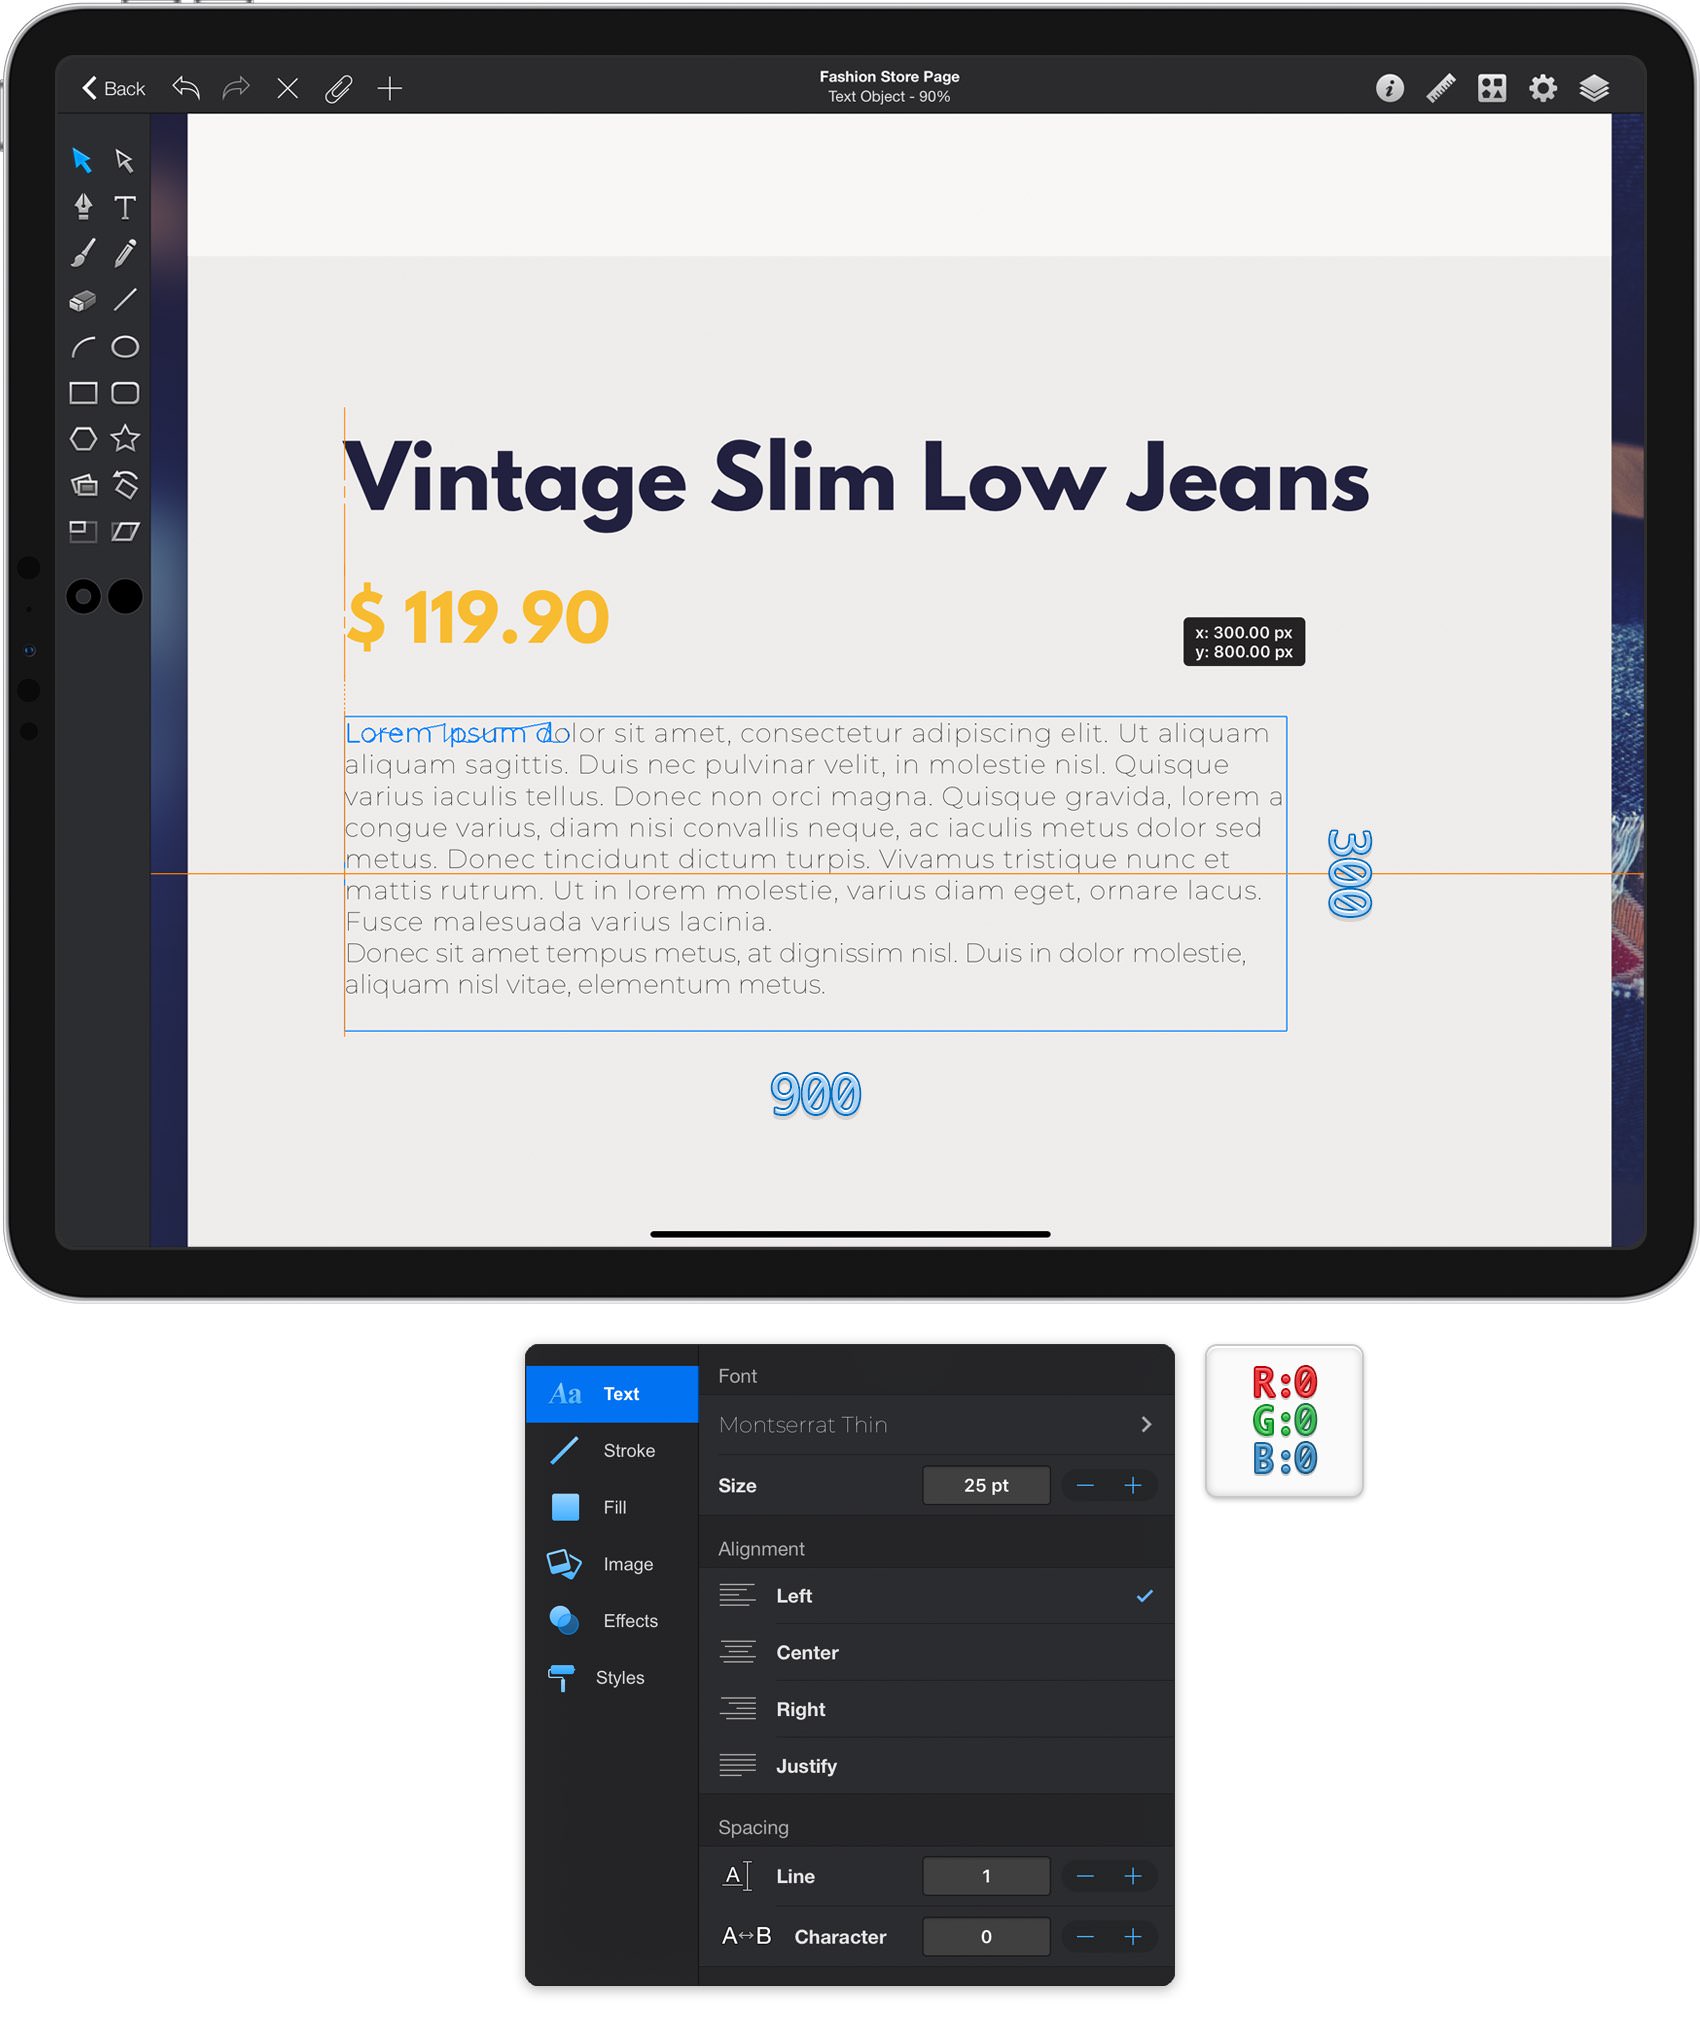
Use the Move Tool to stretch this new text field to 900 px wide and 300 px tall, and then place it as shown in the following image. The Smart Guides feature will once again come in handy.
Make sure that this text field stays selected and open the Text pane from the Appearance pane. Select the Montserrat Thin font, set the Size to 25 pt and change the Alignment to Left. Also, go to the Toolbar and make sure that the Fill color is set to black. (R=0 G=0 B=0).
Step 19
Open the Layers panel, add a new layer and make sure that it stays selected.
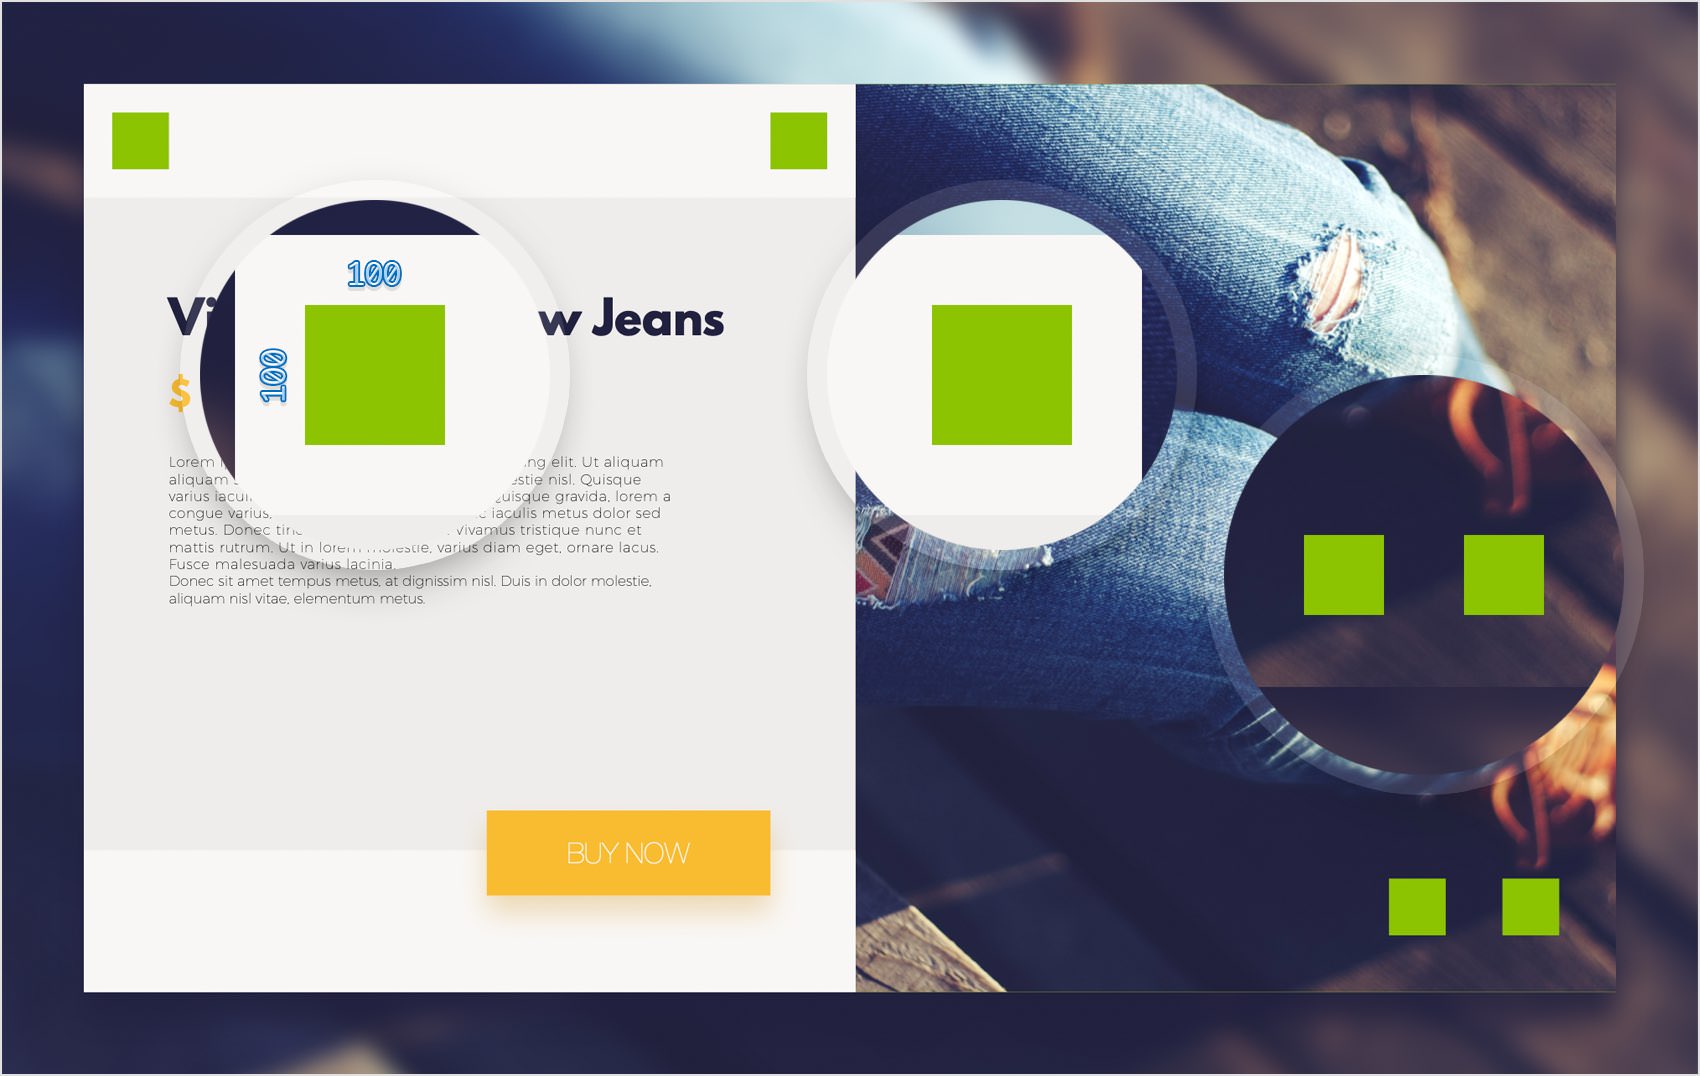
Return to your Toolbar and set the Fill color to R=139 G=195 B=0. Pick the Rectangle Tool and create four, 100 px squares. Place these new shapes as shown in the following image.
Step 20
Using that same drag and drop feature you can easily drag one of those SVG files saved inside your iCloud Drive in the beginning of the tutorial. Select the right-arrow-1.svg file and drag it inside your Graphic document.
Alternatively, you can import these file using the Import button. When you import the SVG files, the app will convert them to separate Graphic documents. You can easily copy the arrow shape from this new document and then paste it inside your own document.
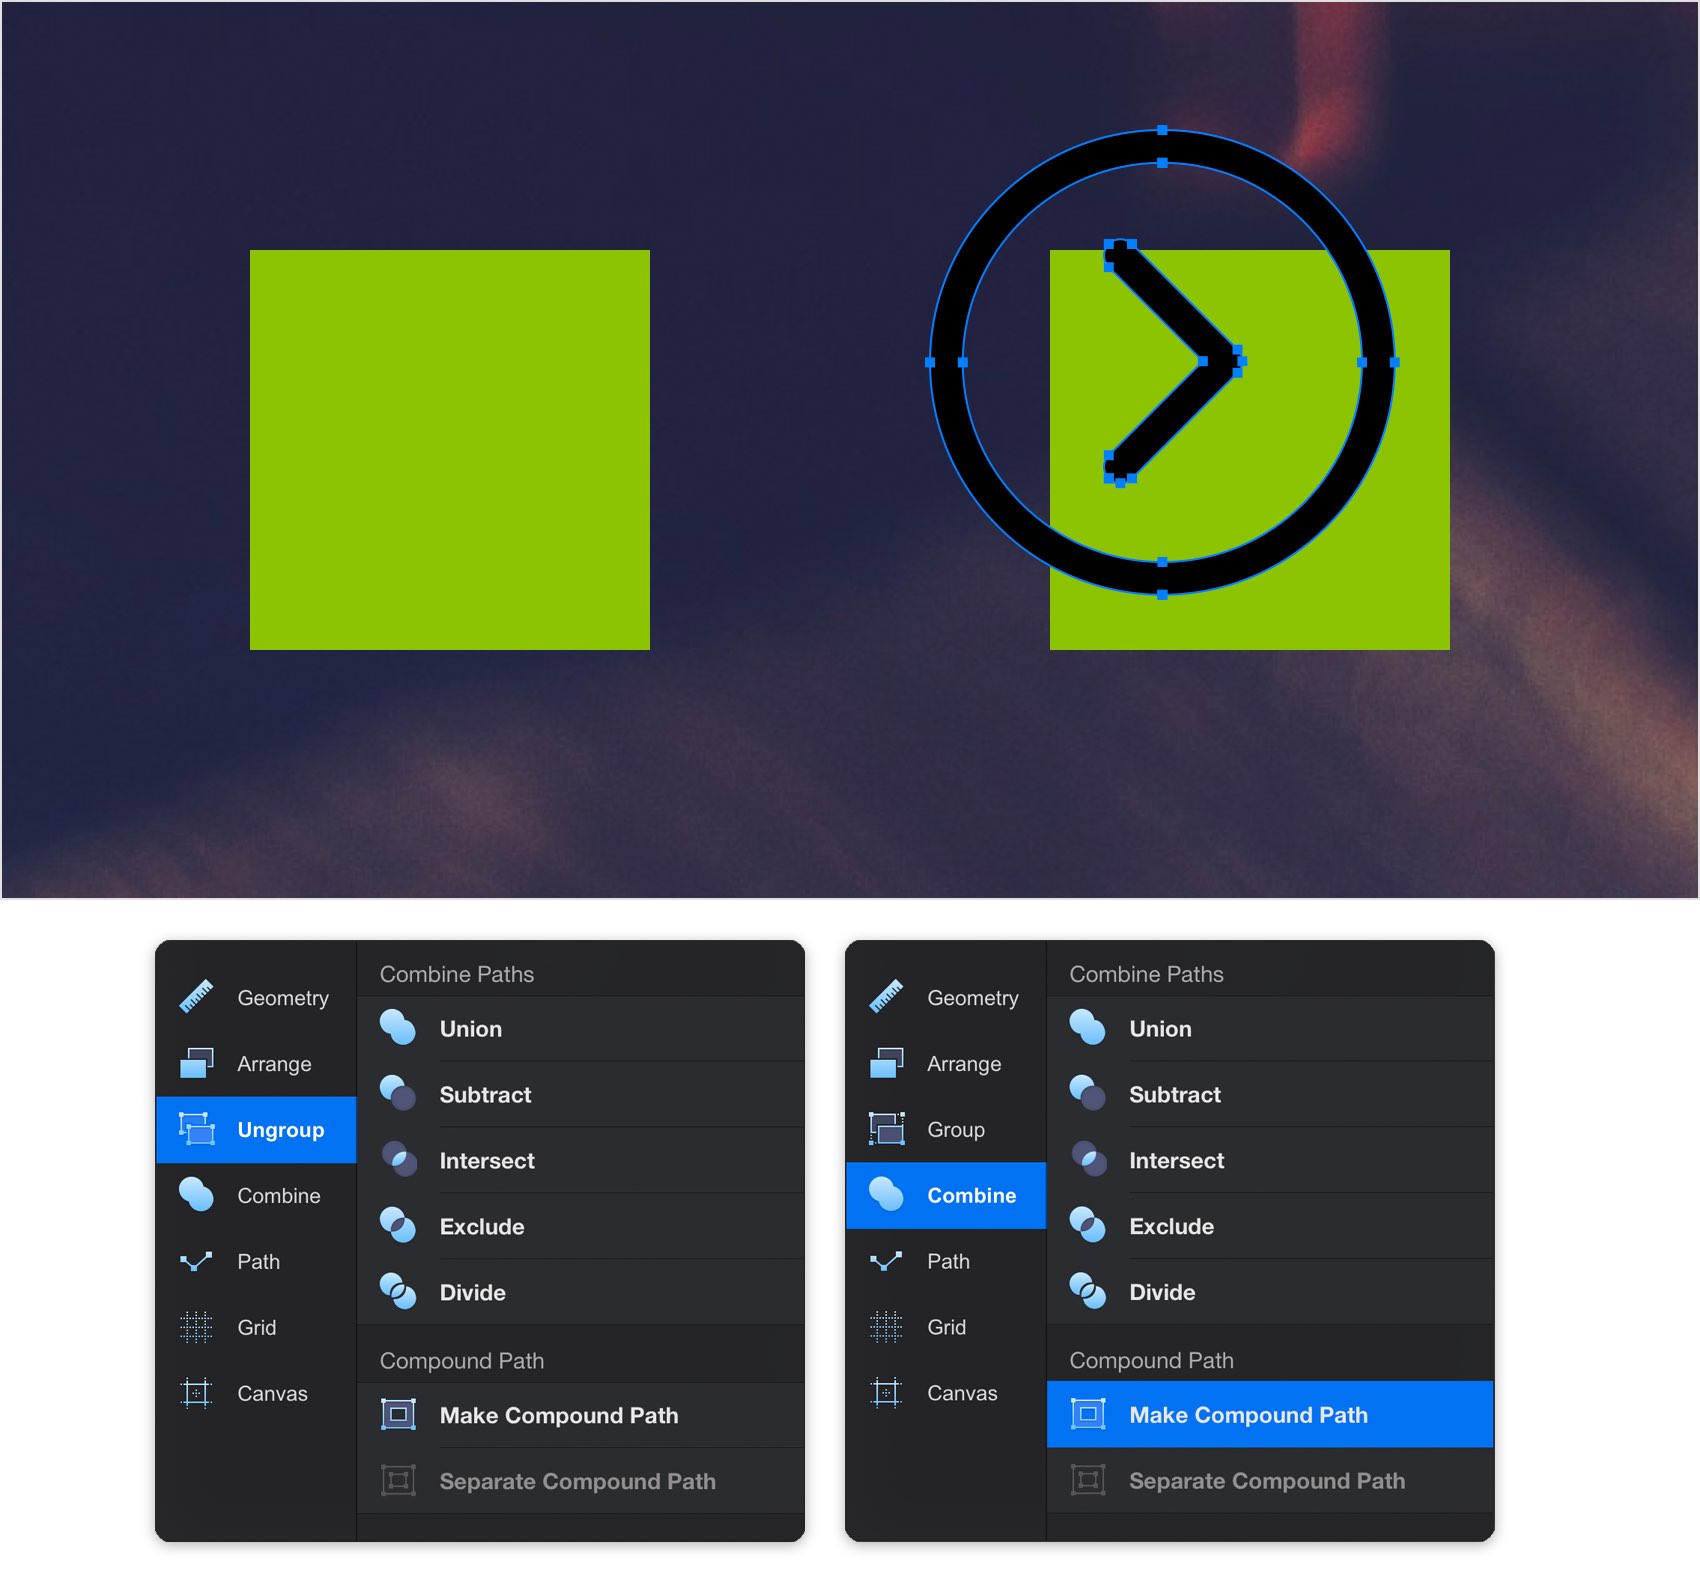
Once your SVG file is imported, you need to Ungroup the two shapes that make up your arrow icon. Go to the Layers panel, expand your selected layer and you'll see the group. Select it and tap the Ungroup command. Move to the Combine pane and tap the Make Compound Path command. This will combine the two shapes into a single object, making it easier for you to select or edit it.
Step 21
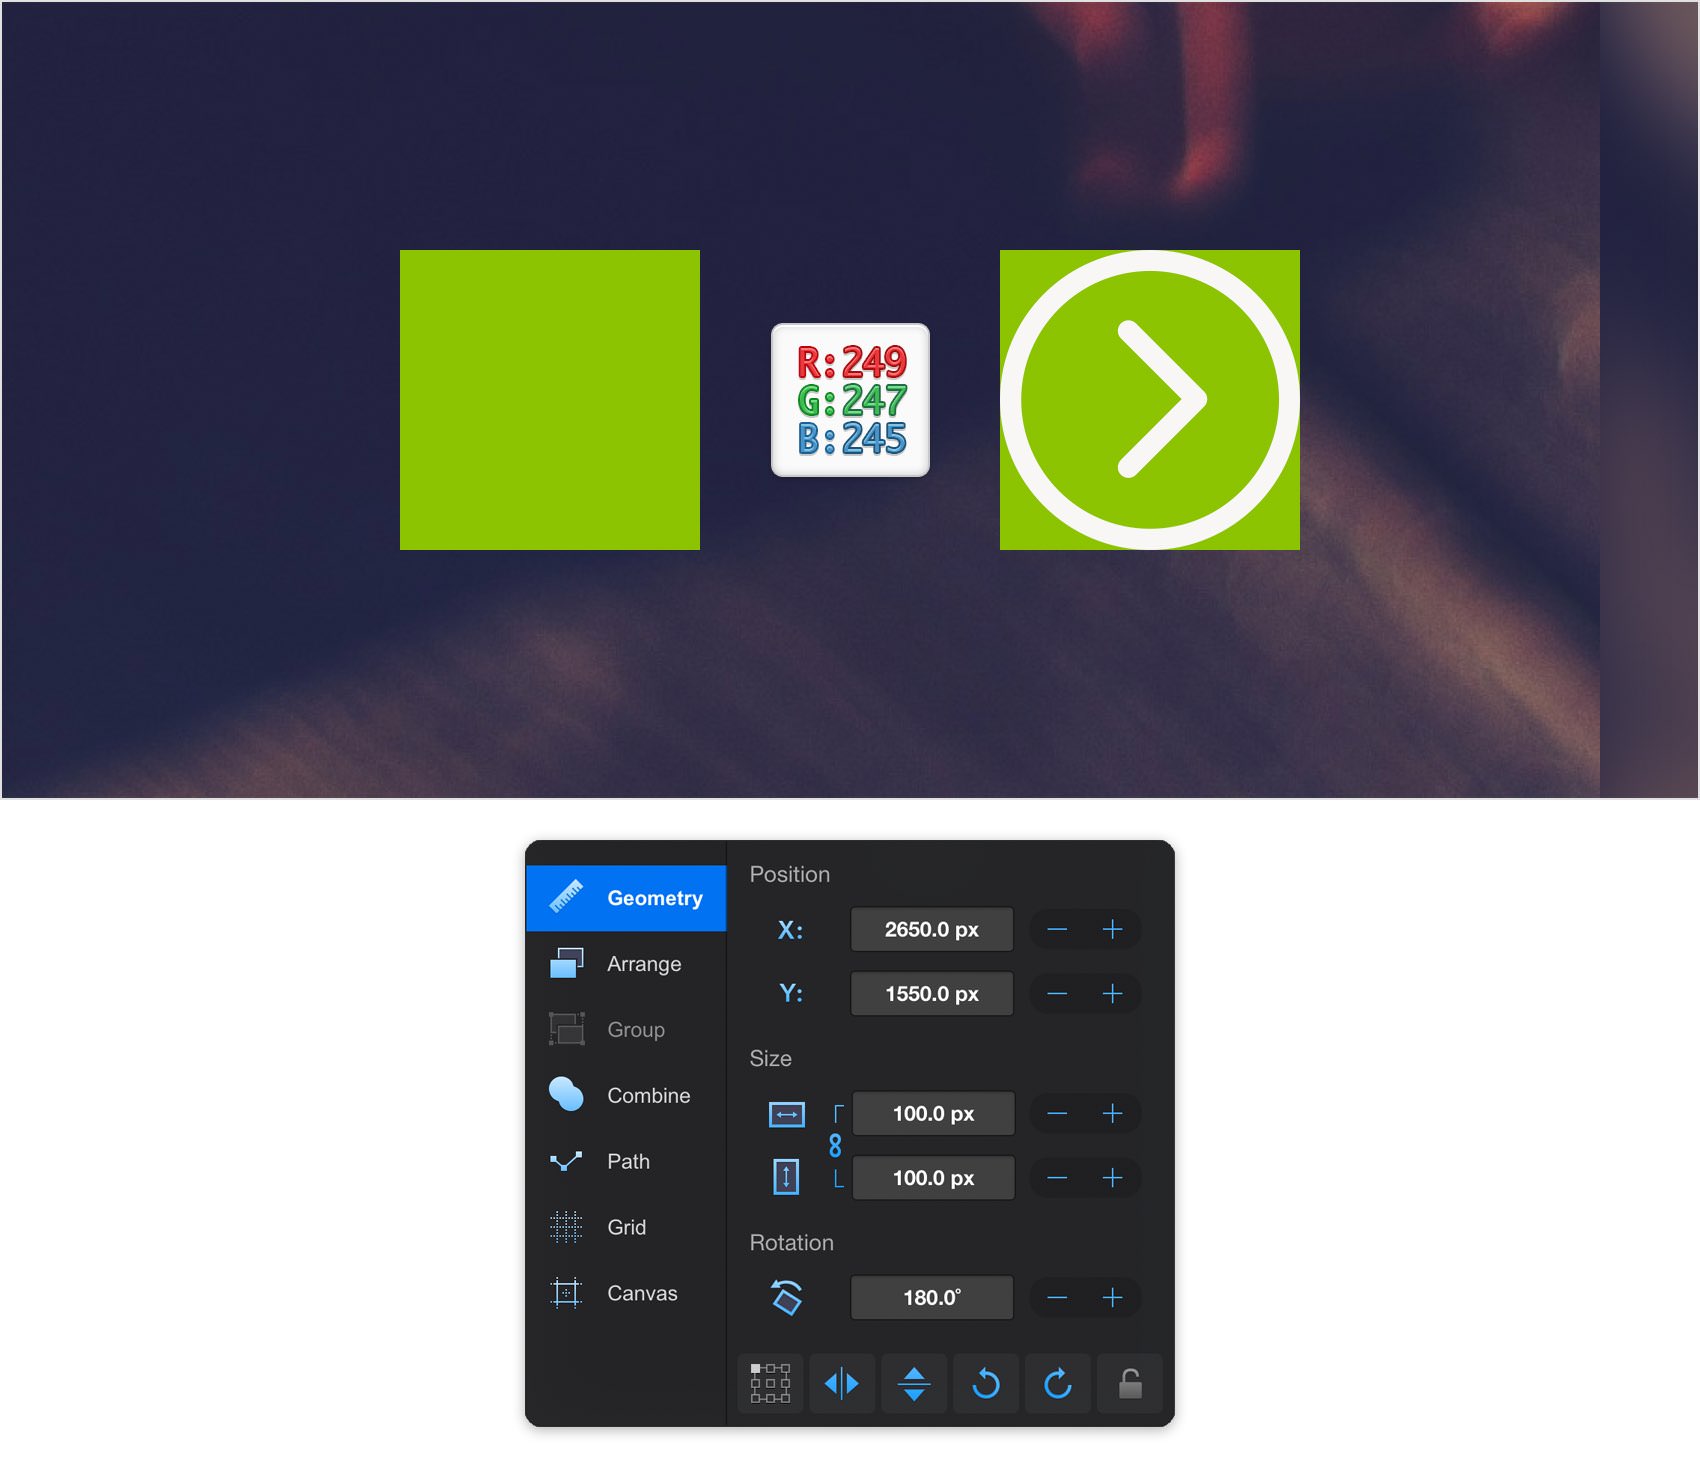
Make sure that your arrow icons stays selected, focus on the Toolbar and replace the existing Fill color with R=249 G=247 B=245.
Move to the Geometry pane, lock the aspect ratio and set the Width to 100 px. Position your arrow icon as shown in the first image.
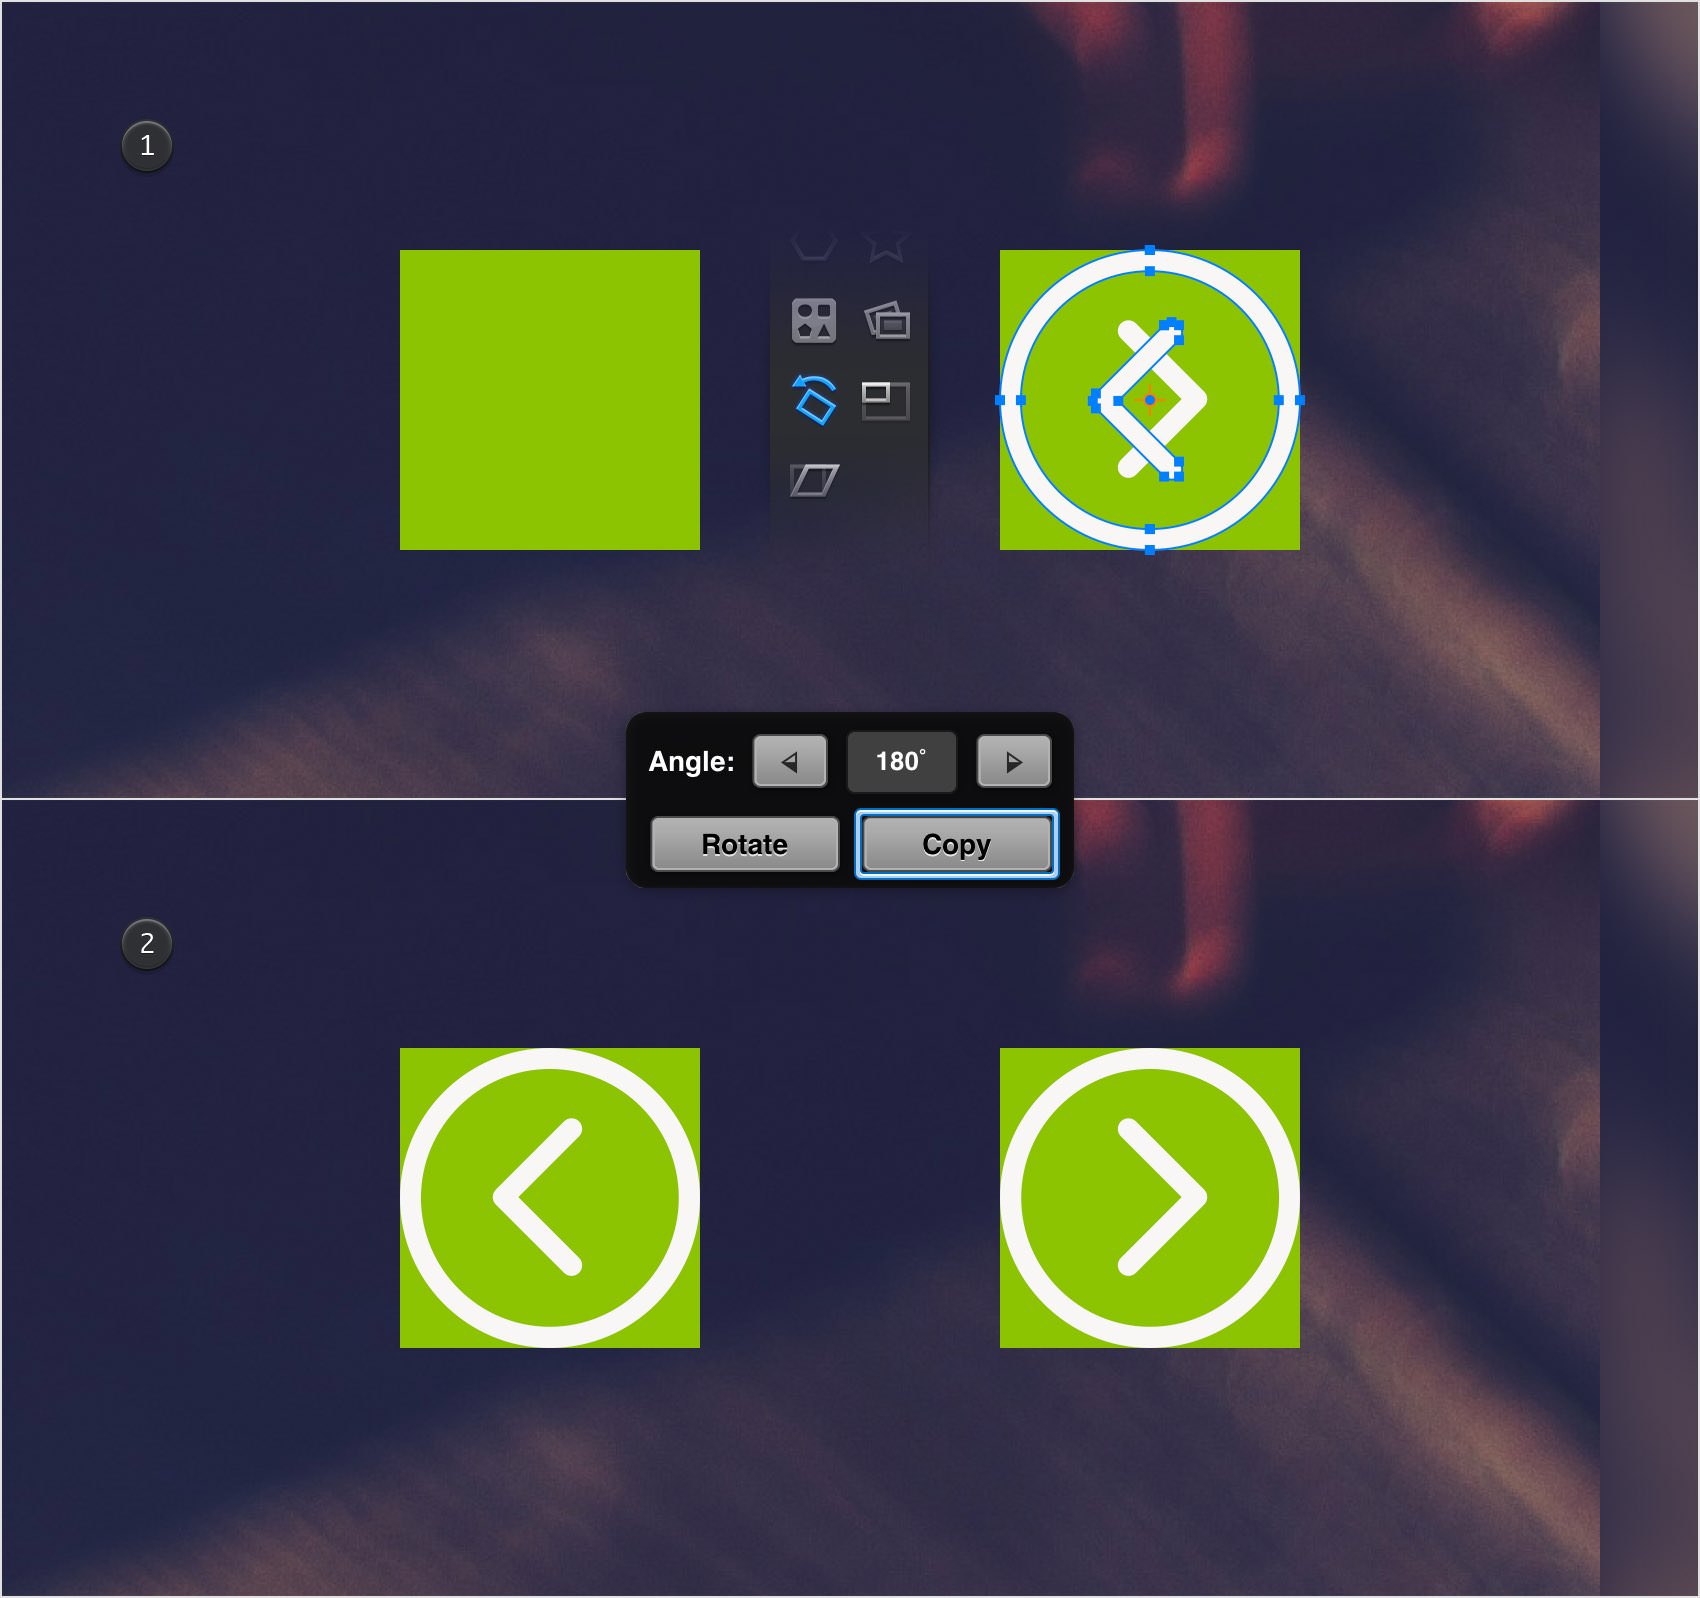
Pick the Rotate Tool and focus on the Tool Options pane. Set the Angle to 180 degrees and tap that Copy button to add a horizontally flipped copy of your arrow icon. Using the Move Tool, move this new shape as shown in the second image.
Step 22
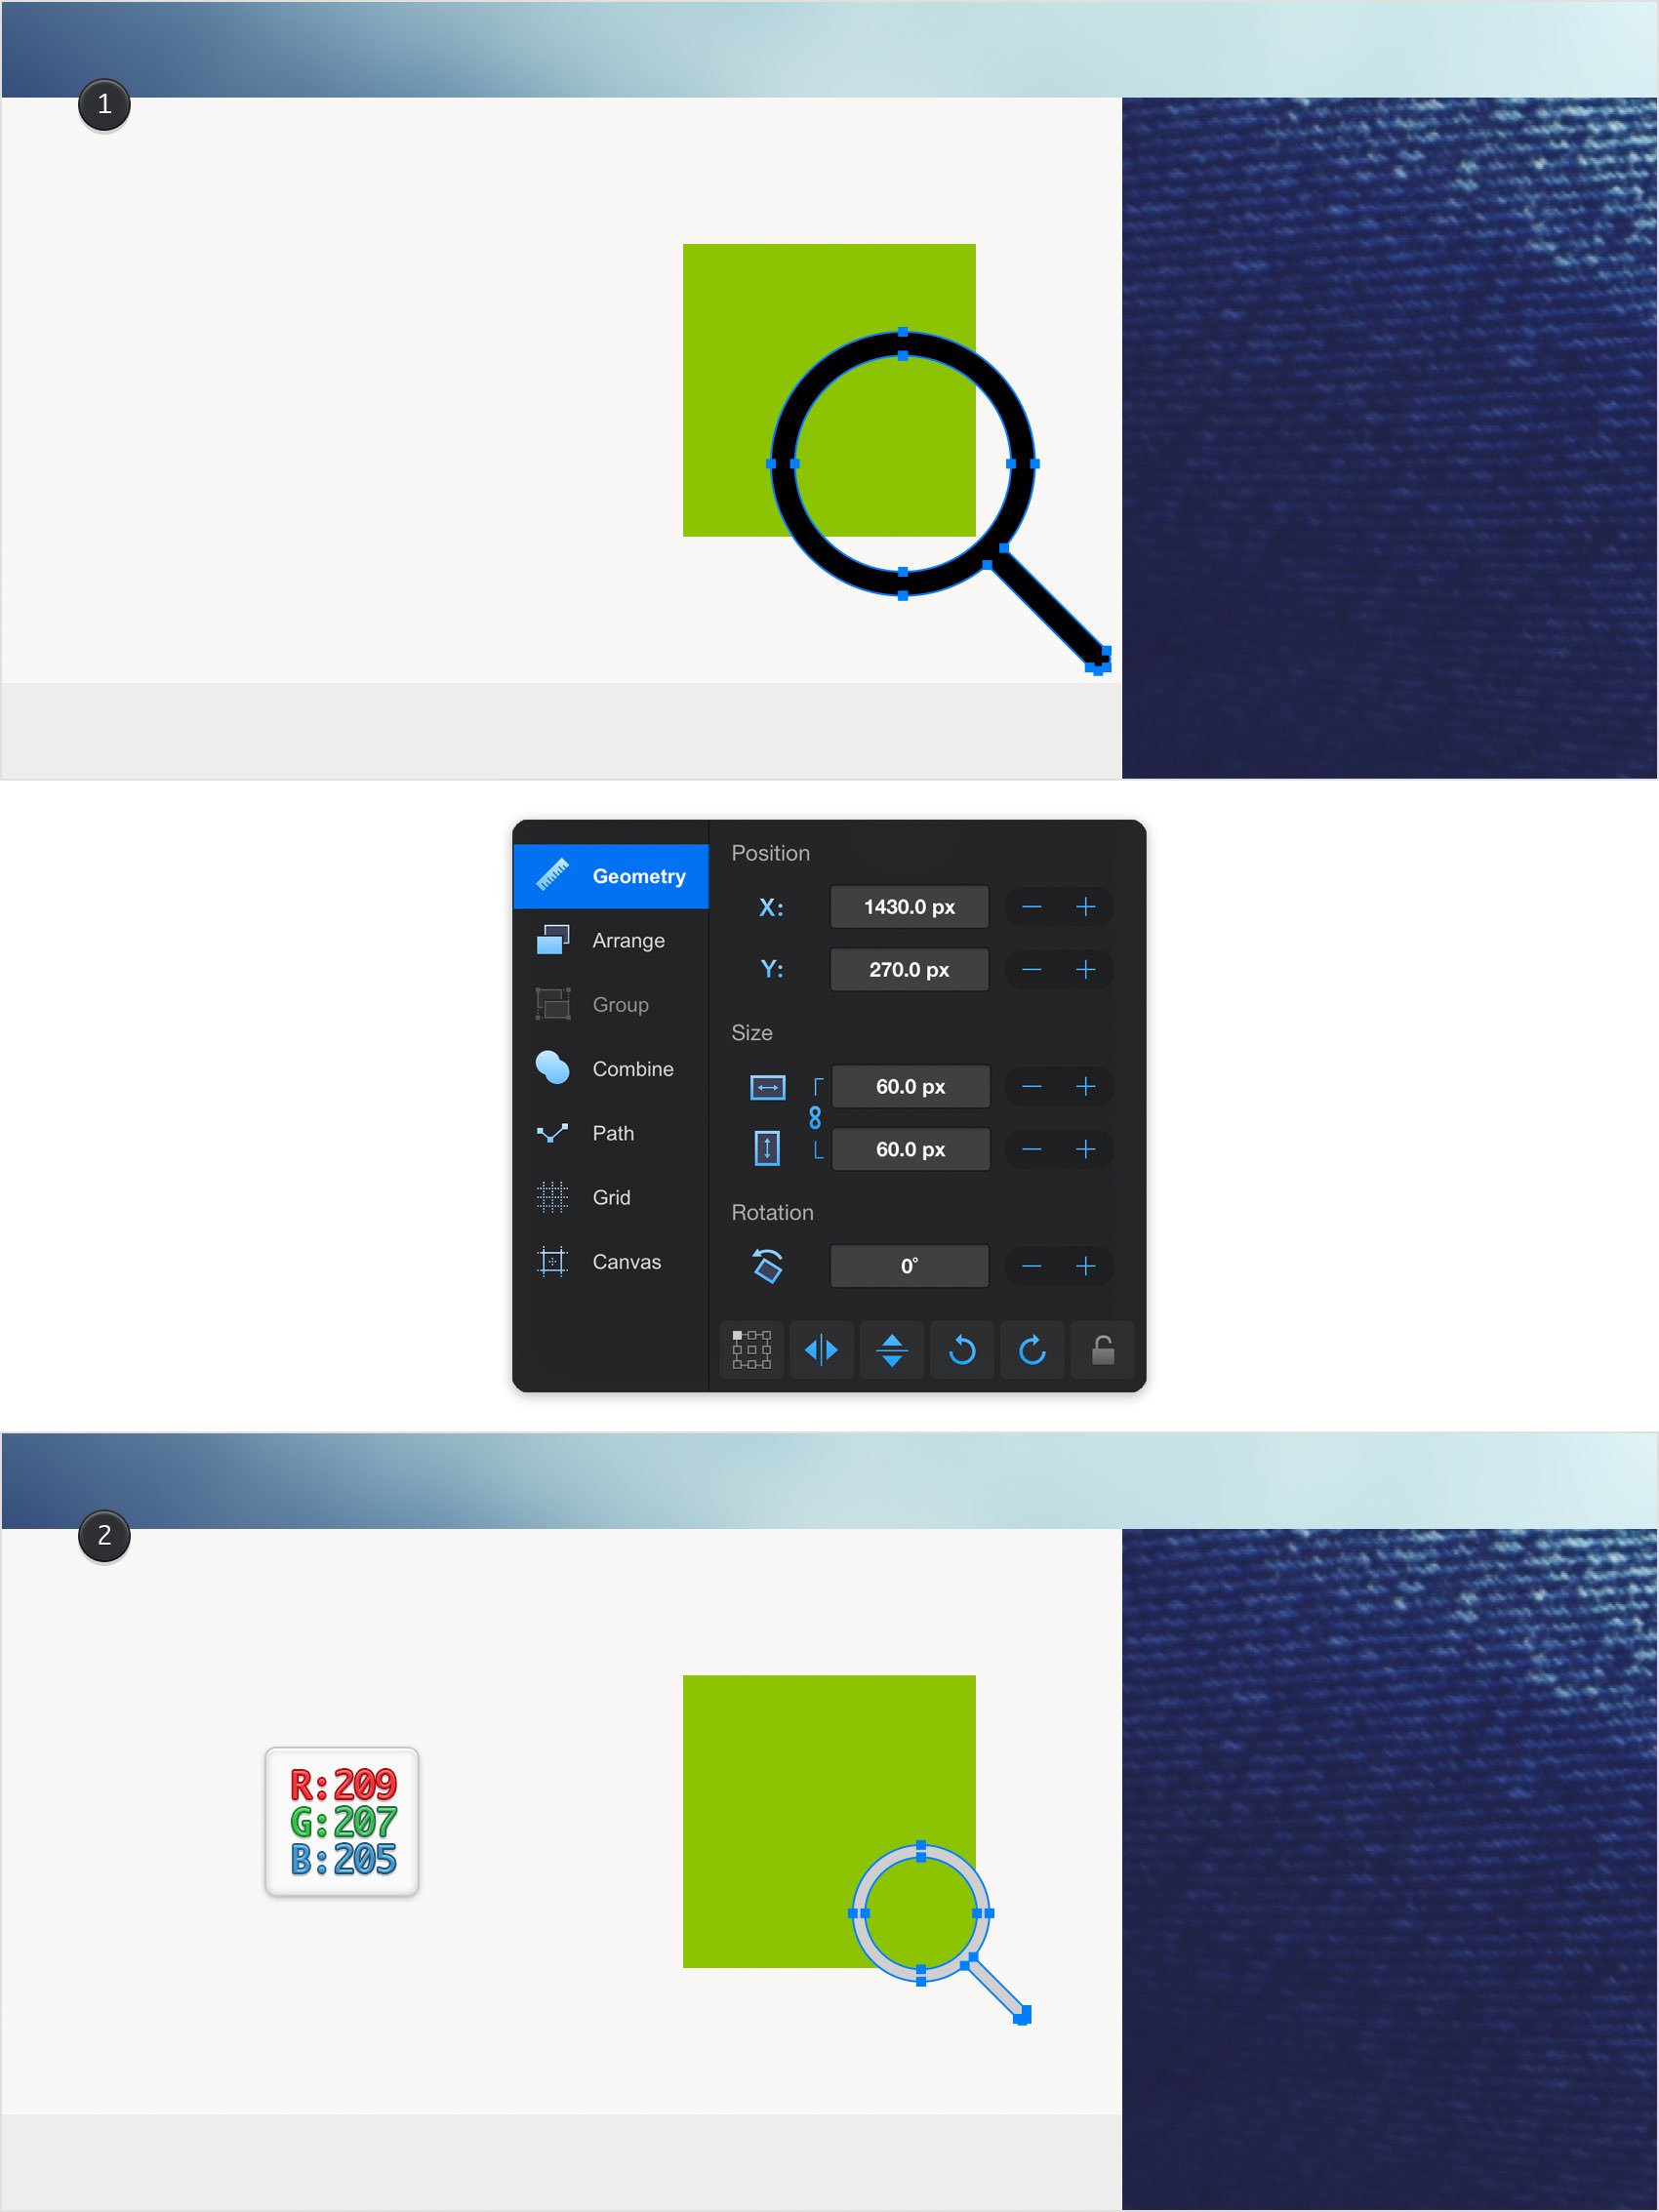
Select the search.svg file and drag it inside your Graphic document, on top of that top-right green square.
Ungroup this new shape, make sure that it stays selected and focus on the Geometry pane. Lock the aspect ratio and set the Width to 60 px. Move to your Toolbar and replace the existing Fill color with R=209 G=207 B=205.
Step 23
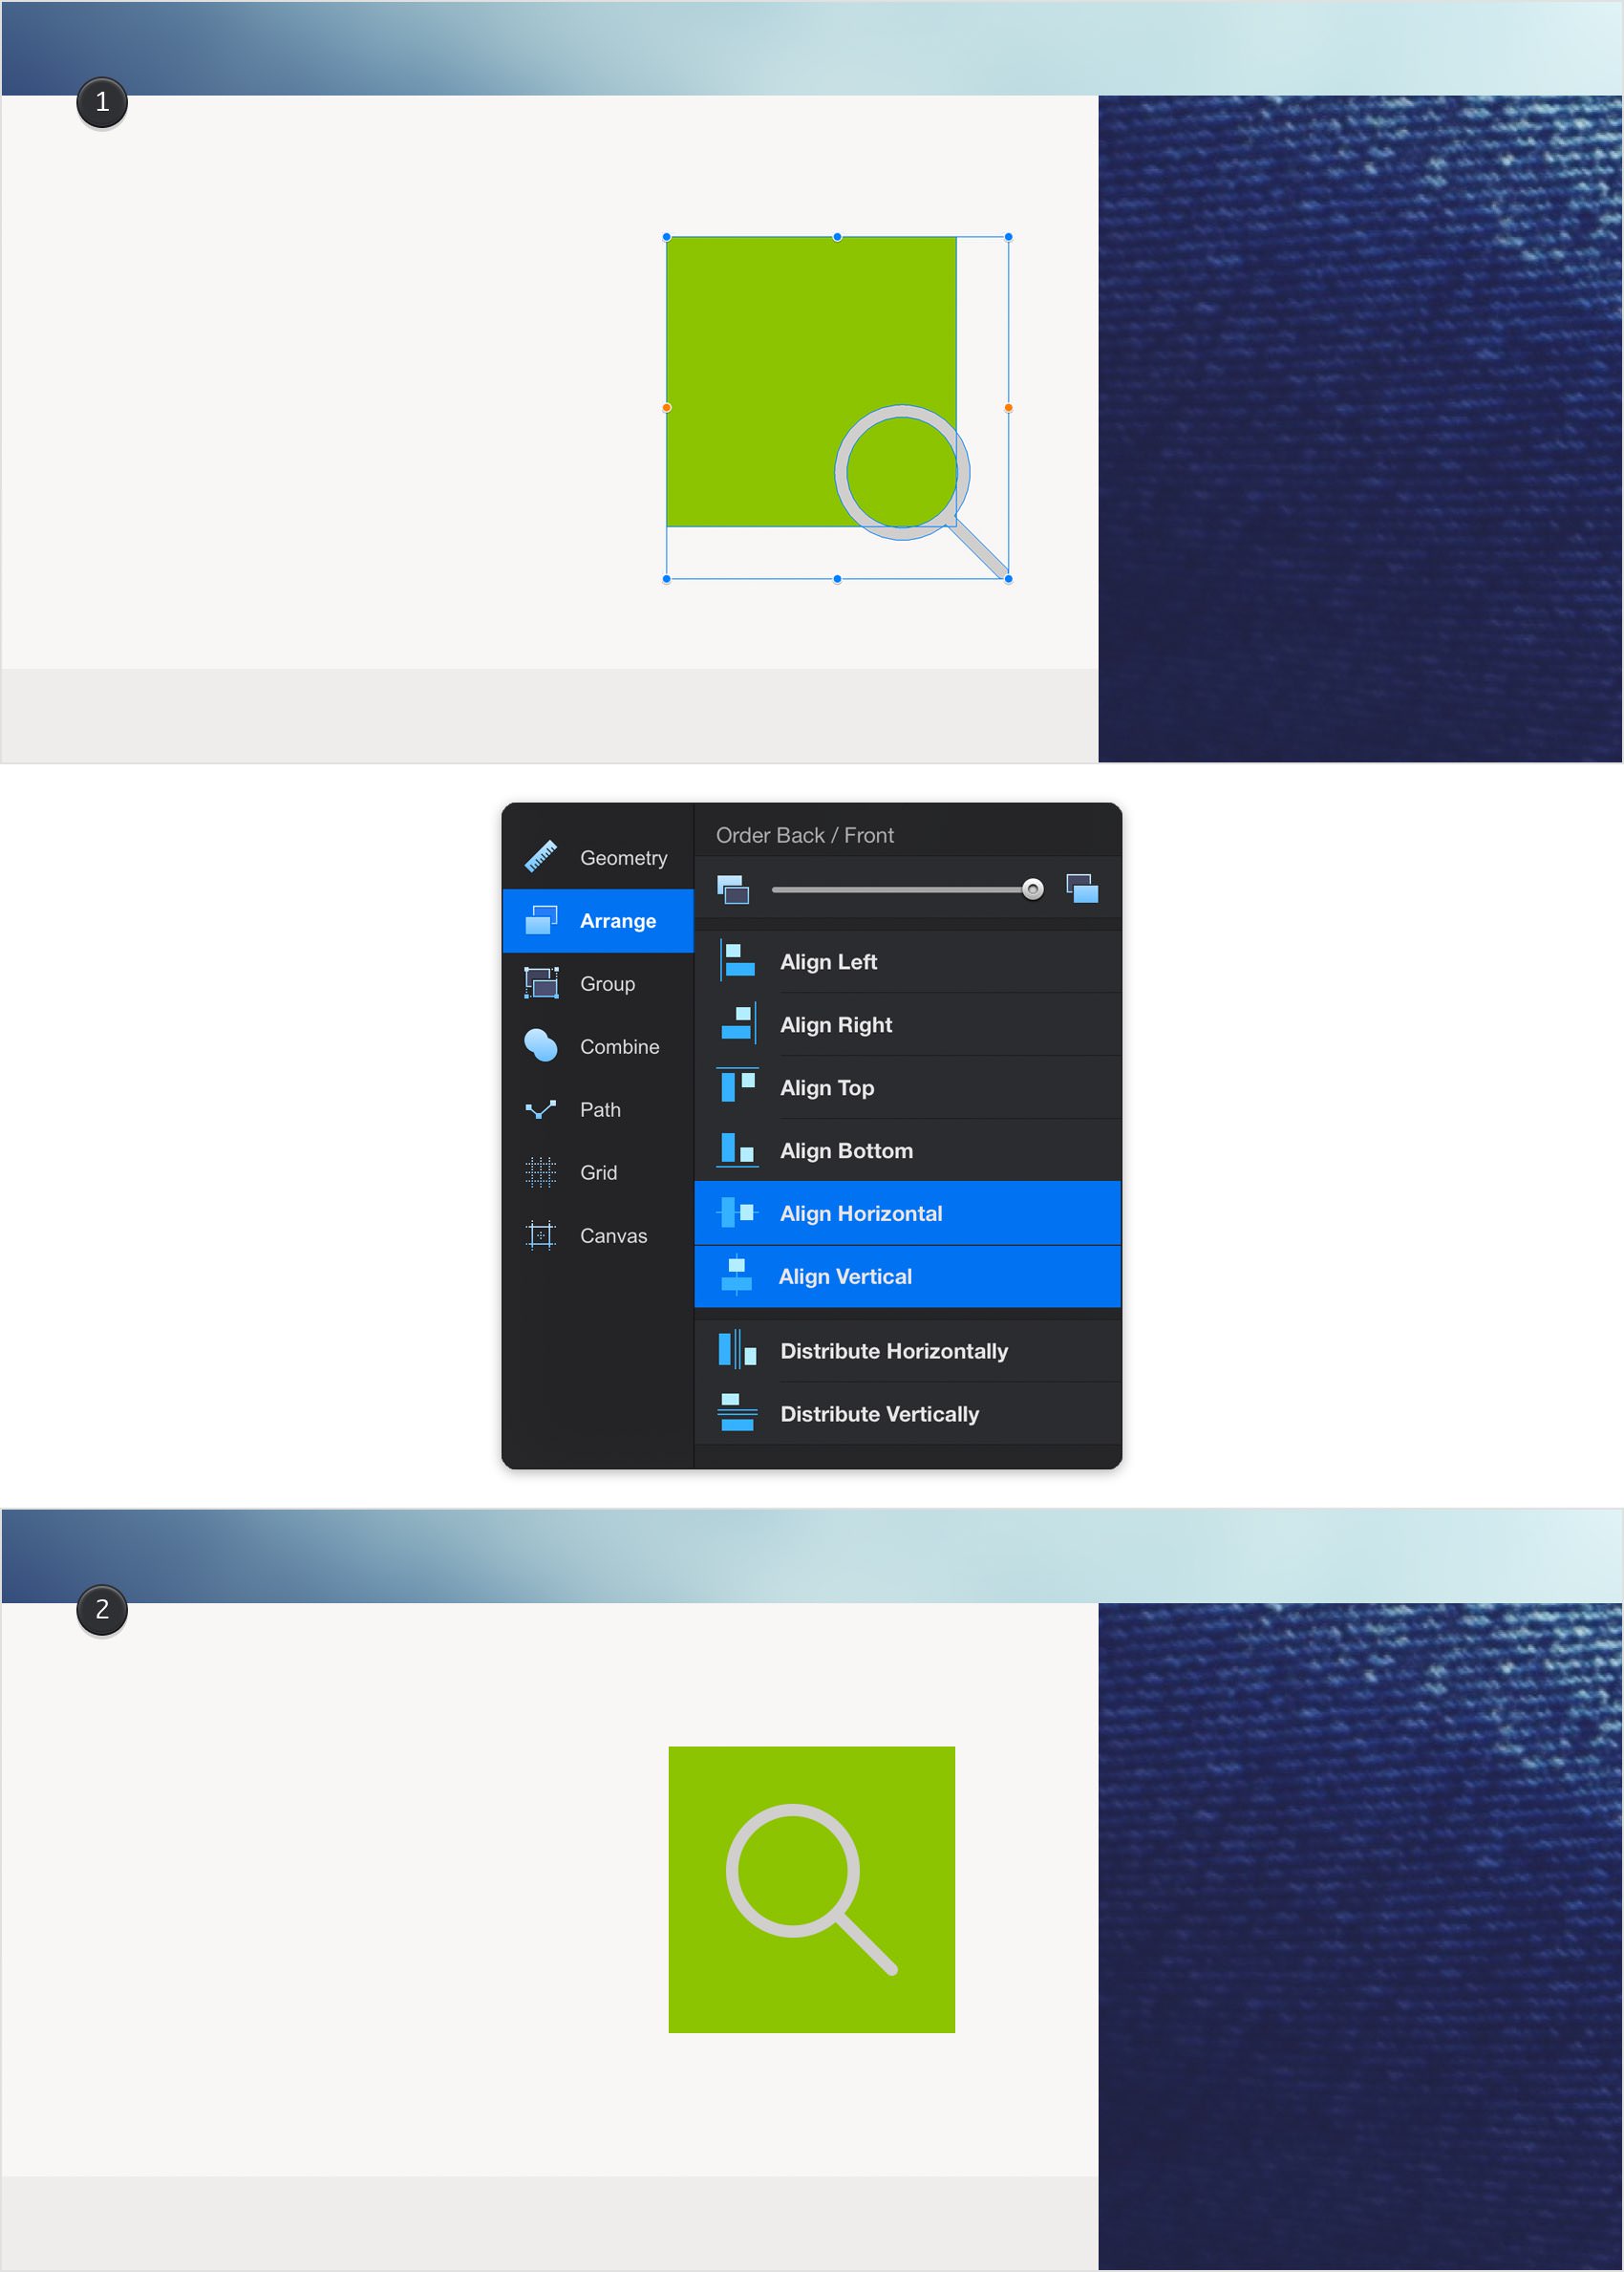
Using the Move Tool, select your magnifier icon along with that green square and open the Arrange pane. Tap the Align Horizontal and the Align Vertical commands to easily move your magnifier icon in the center of that green square.
Step 24
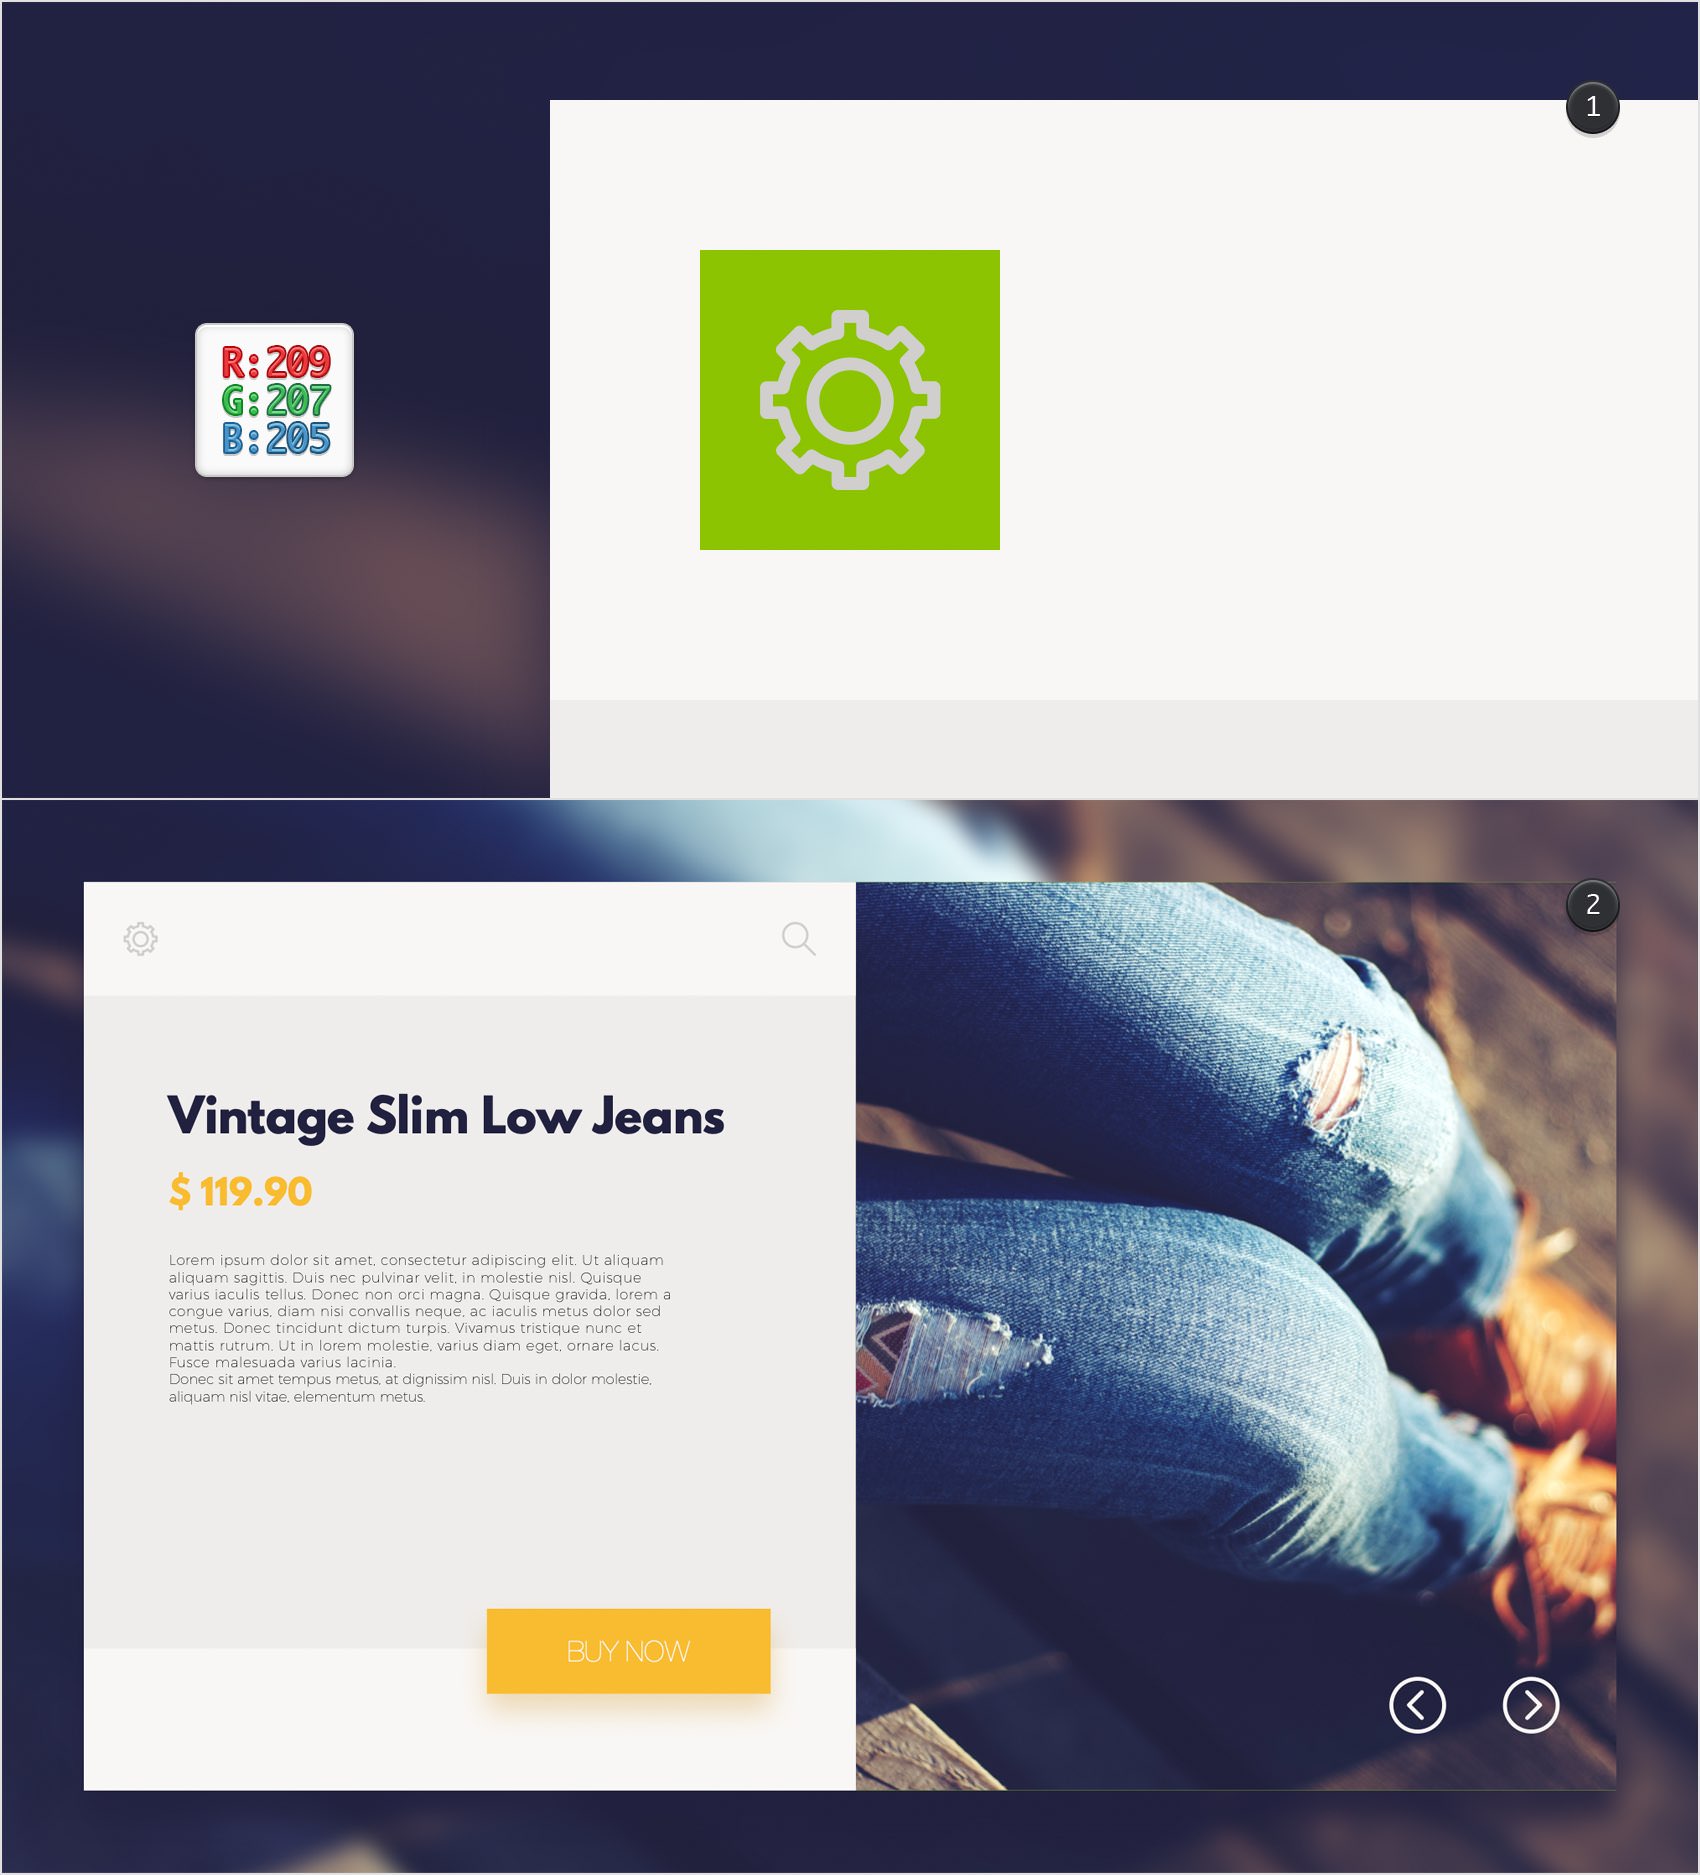
Select the settings-1.svg file and drag it inside your Graphic document, on top of that top-left green square. Ungroup the two shapes that make up this icon, turn them into a compound path and change the Fill color to R=209 G=207 B=205. Set the Width and Height of this icon to 60 px, and then move it in the center of the green square as shown in the first image.
Once you're done, select all four green squares and delete them using the ✕ button from left side of the Titlebar.
Step 25
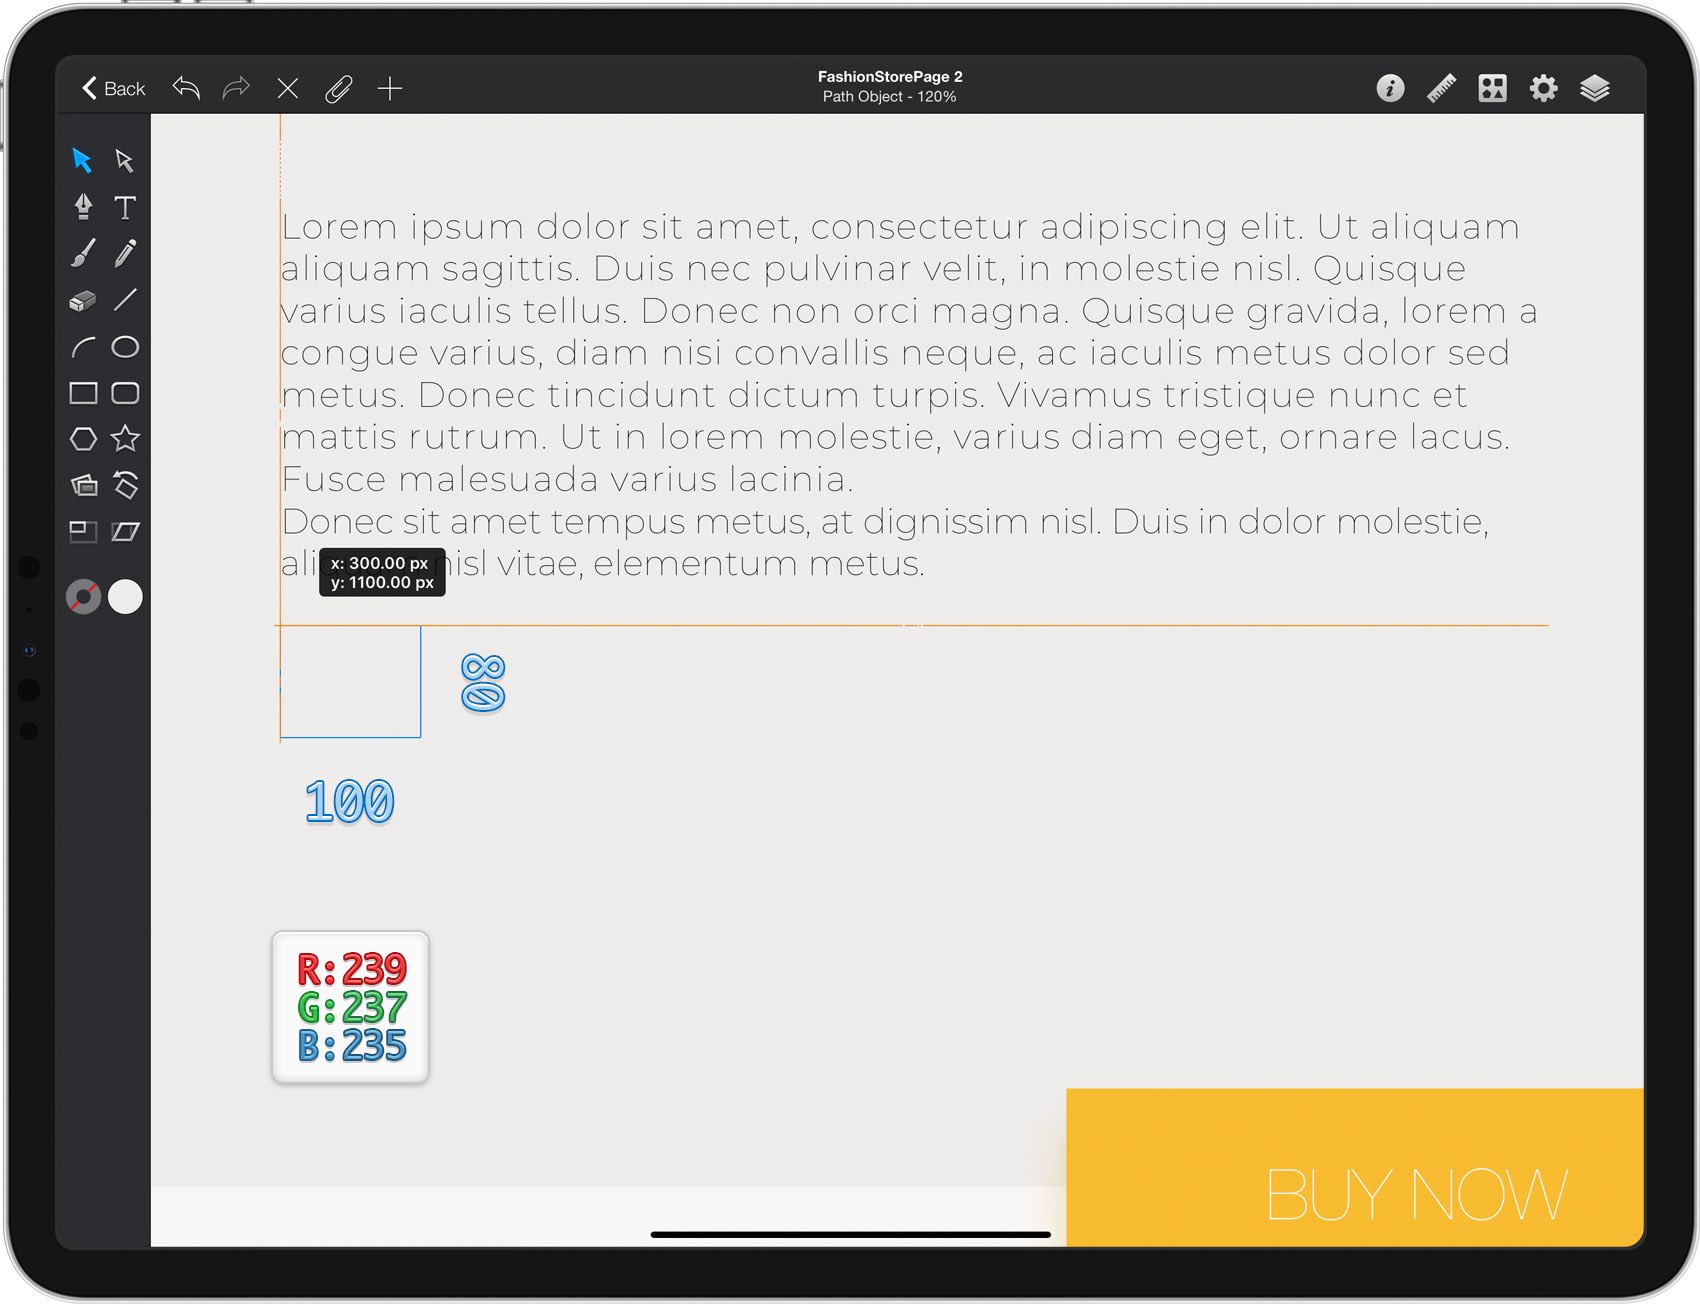
Focus on your Toolbar and set the Fill color to R=239 G=237 B=235. Pick the Rectangle Tool, create a 100 x 80 px shape and place it as shown in the following image.
Step 26
Make sure that your tiny new rectangle stays selected and open the Label pane.
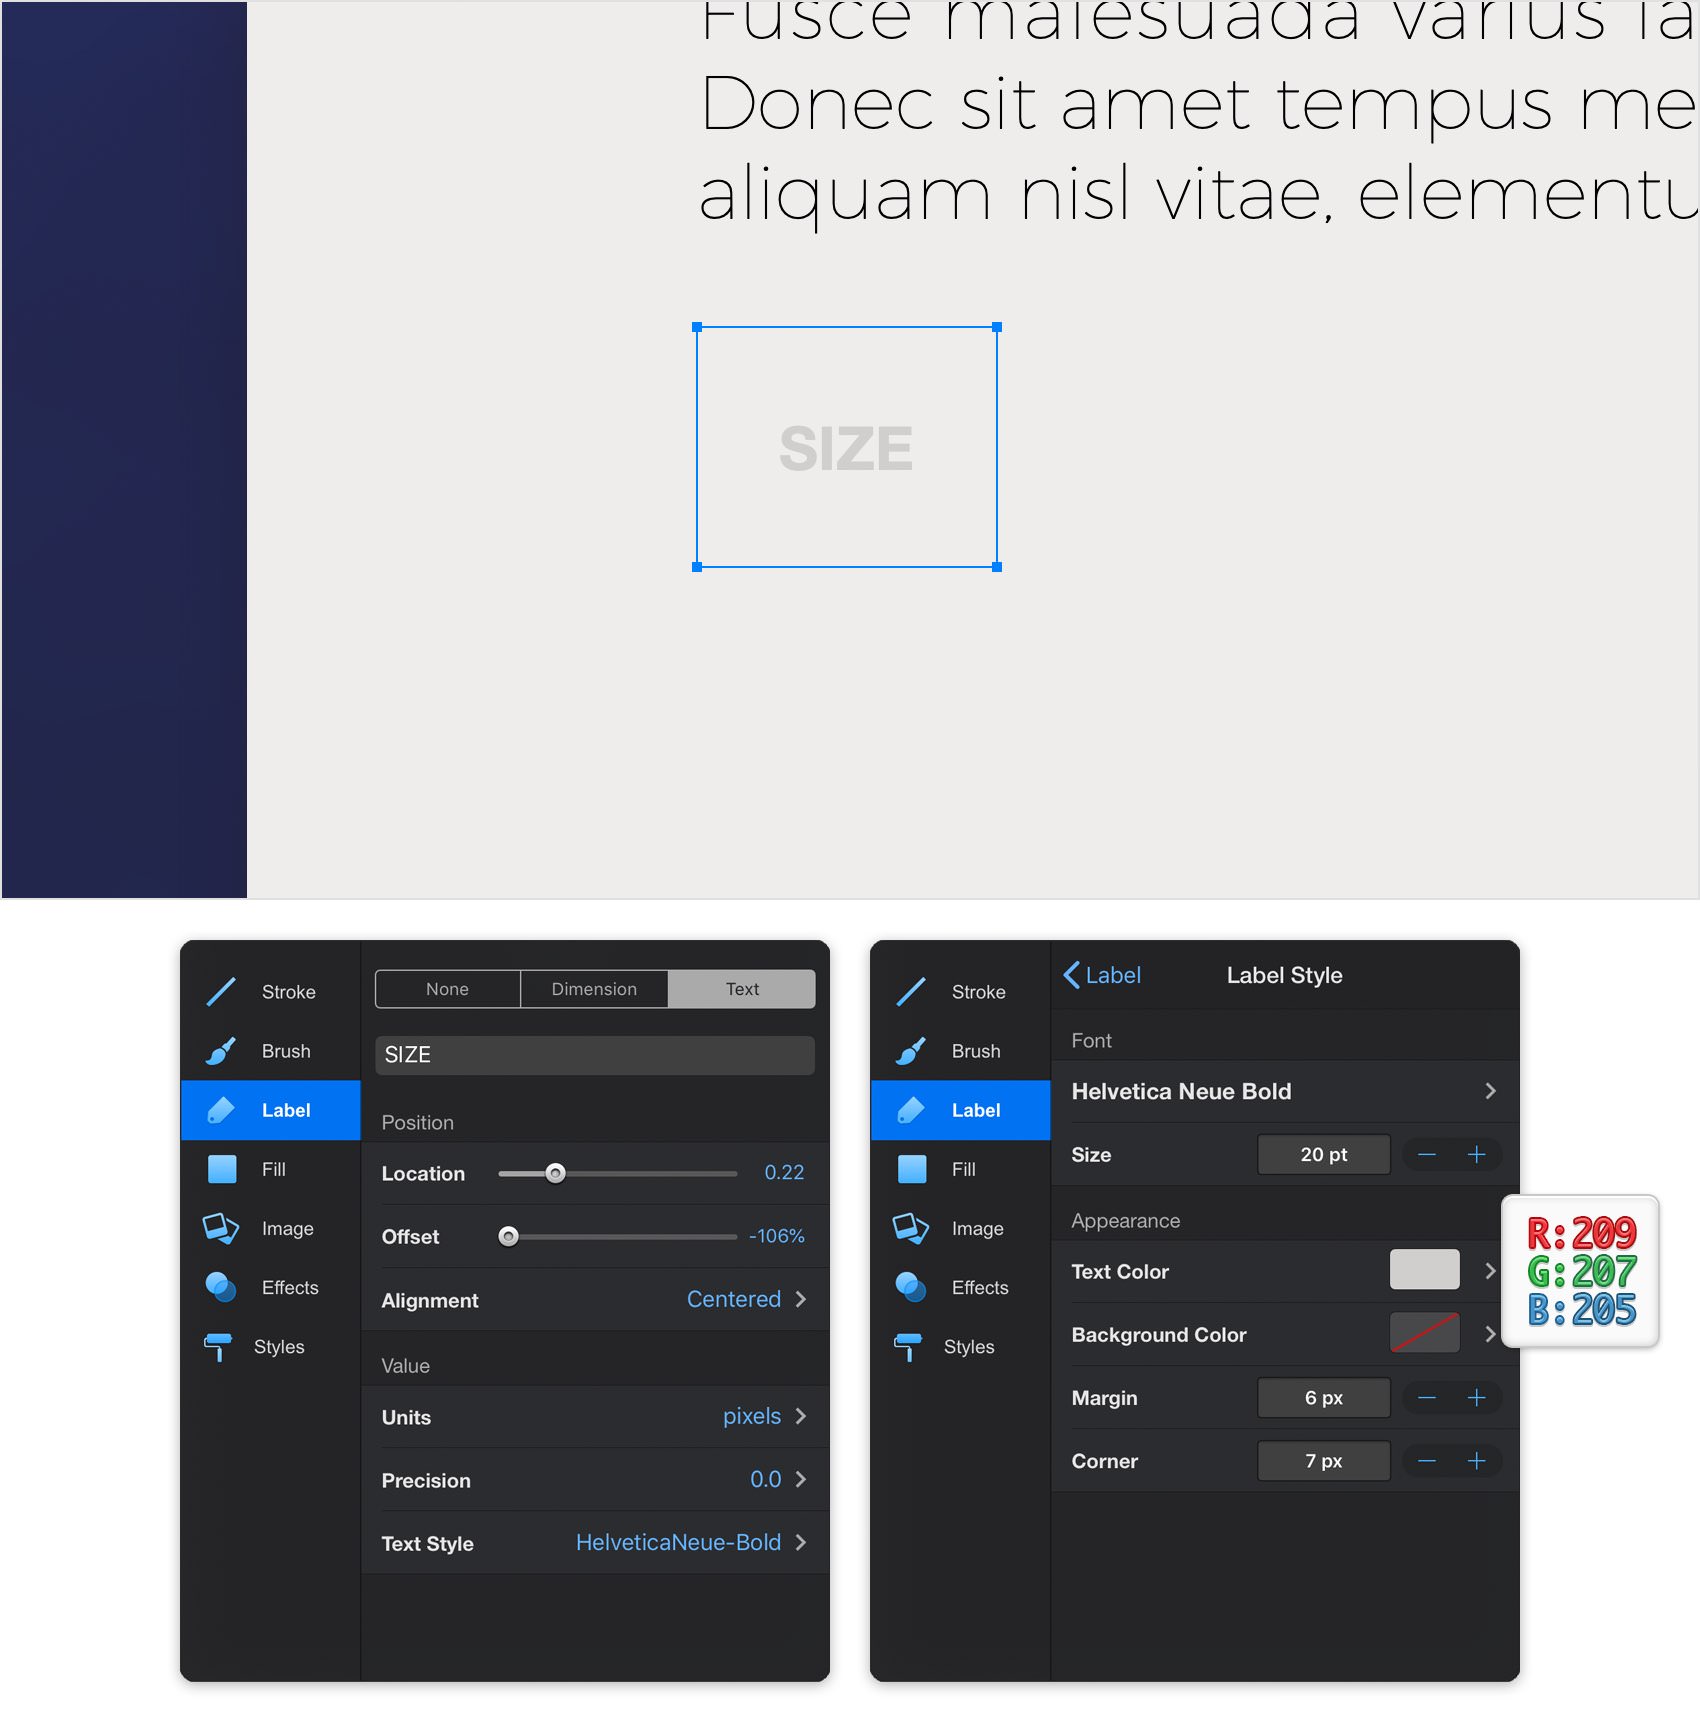
Add a Text Label and enter the "SIZE" piece of text. Set the Alignment to Centered and then open the Label Style pane. Select the Helvetica Neue font, change the Style to Bold, set the Size to 20 pt and adjust that Text Color to R=209 G=207 B=205. In the end things should look like in the following image.
Step 27
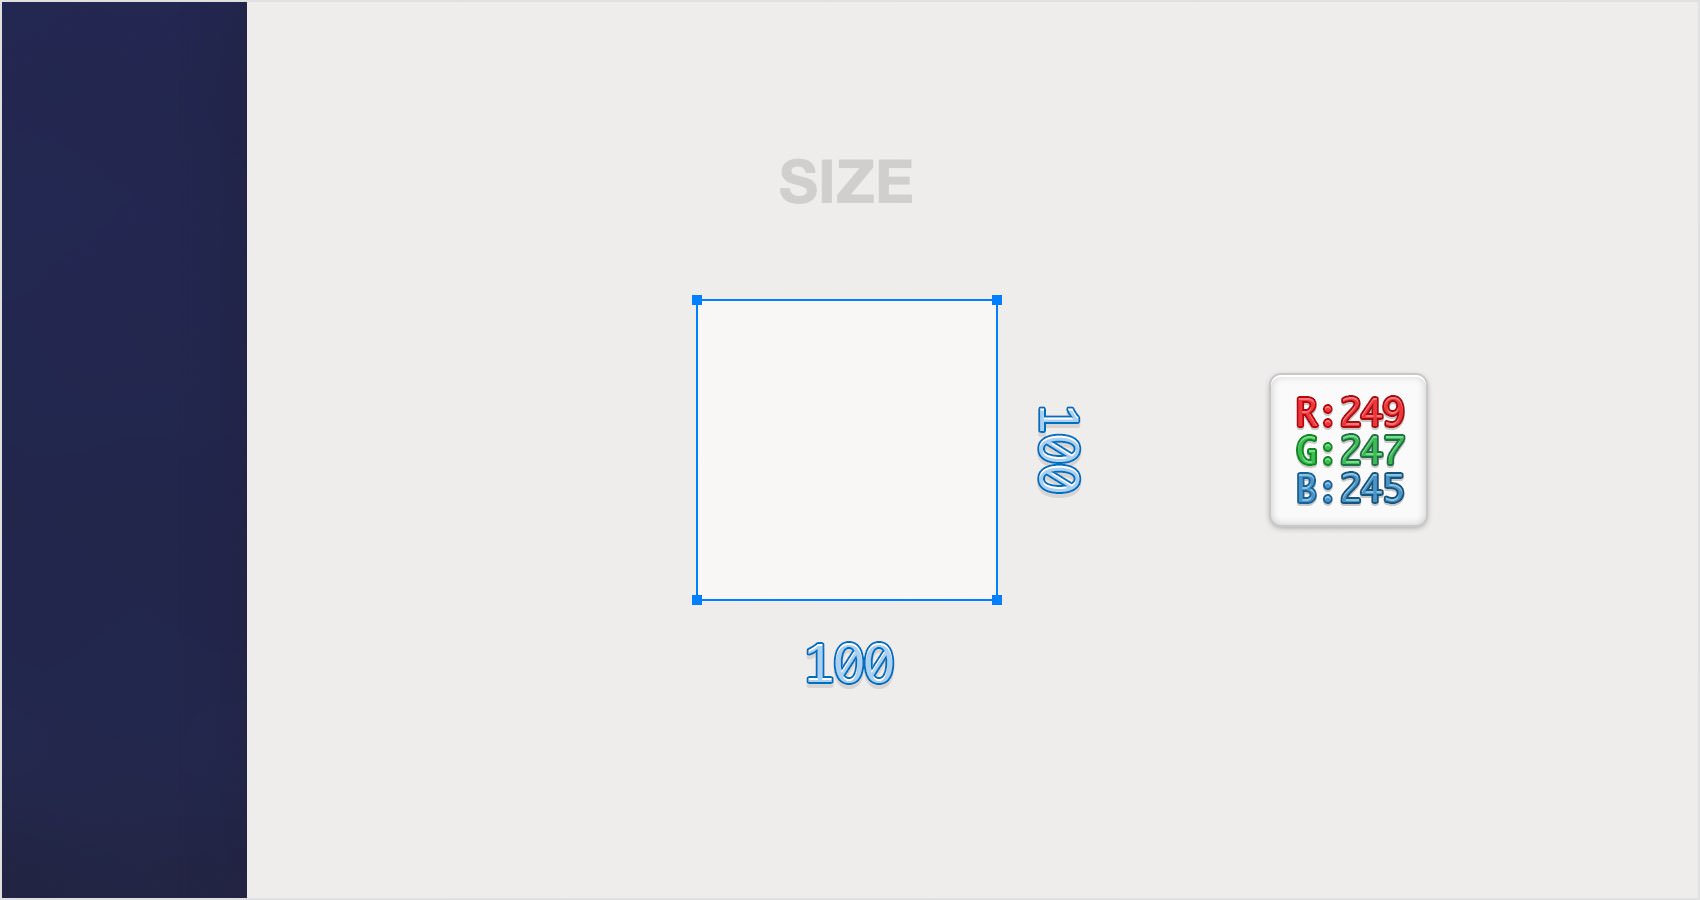
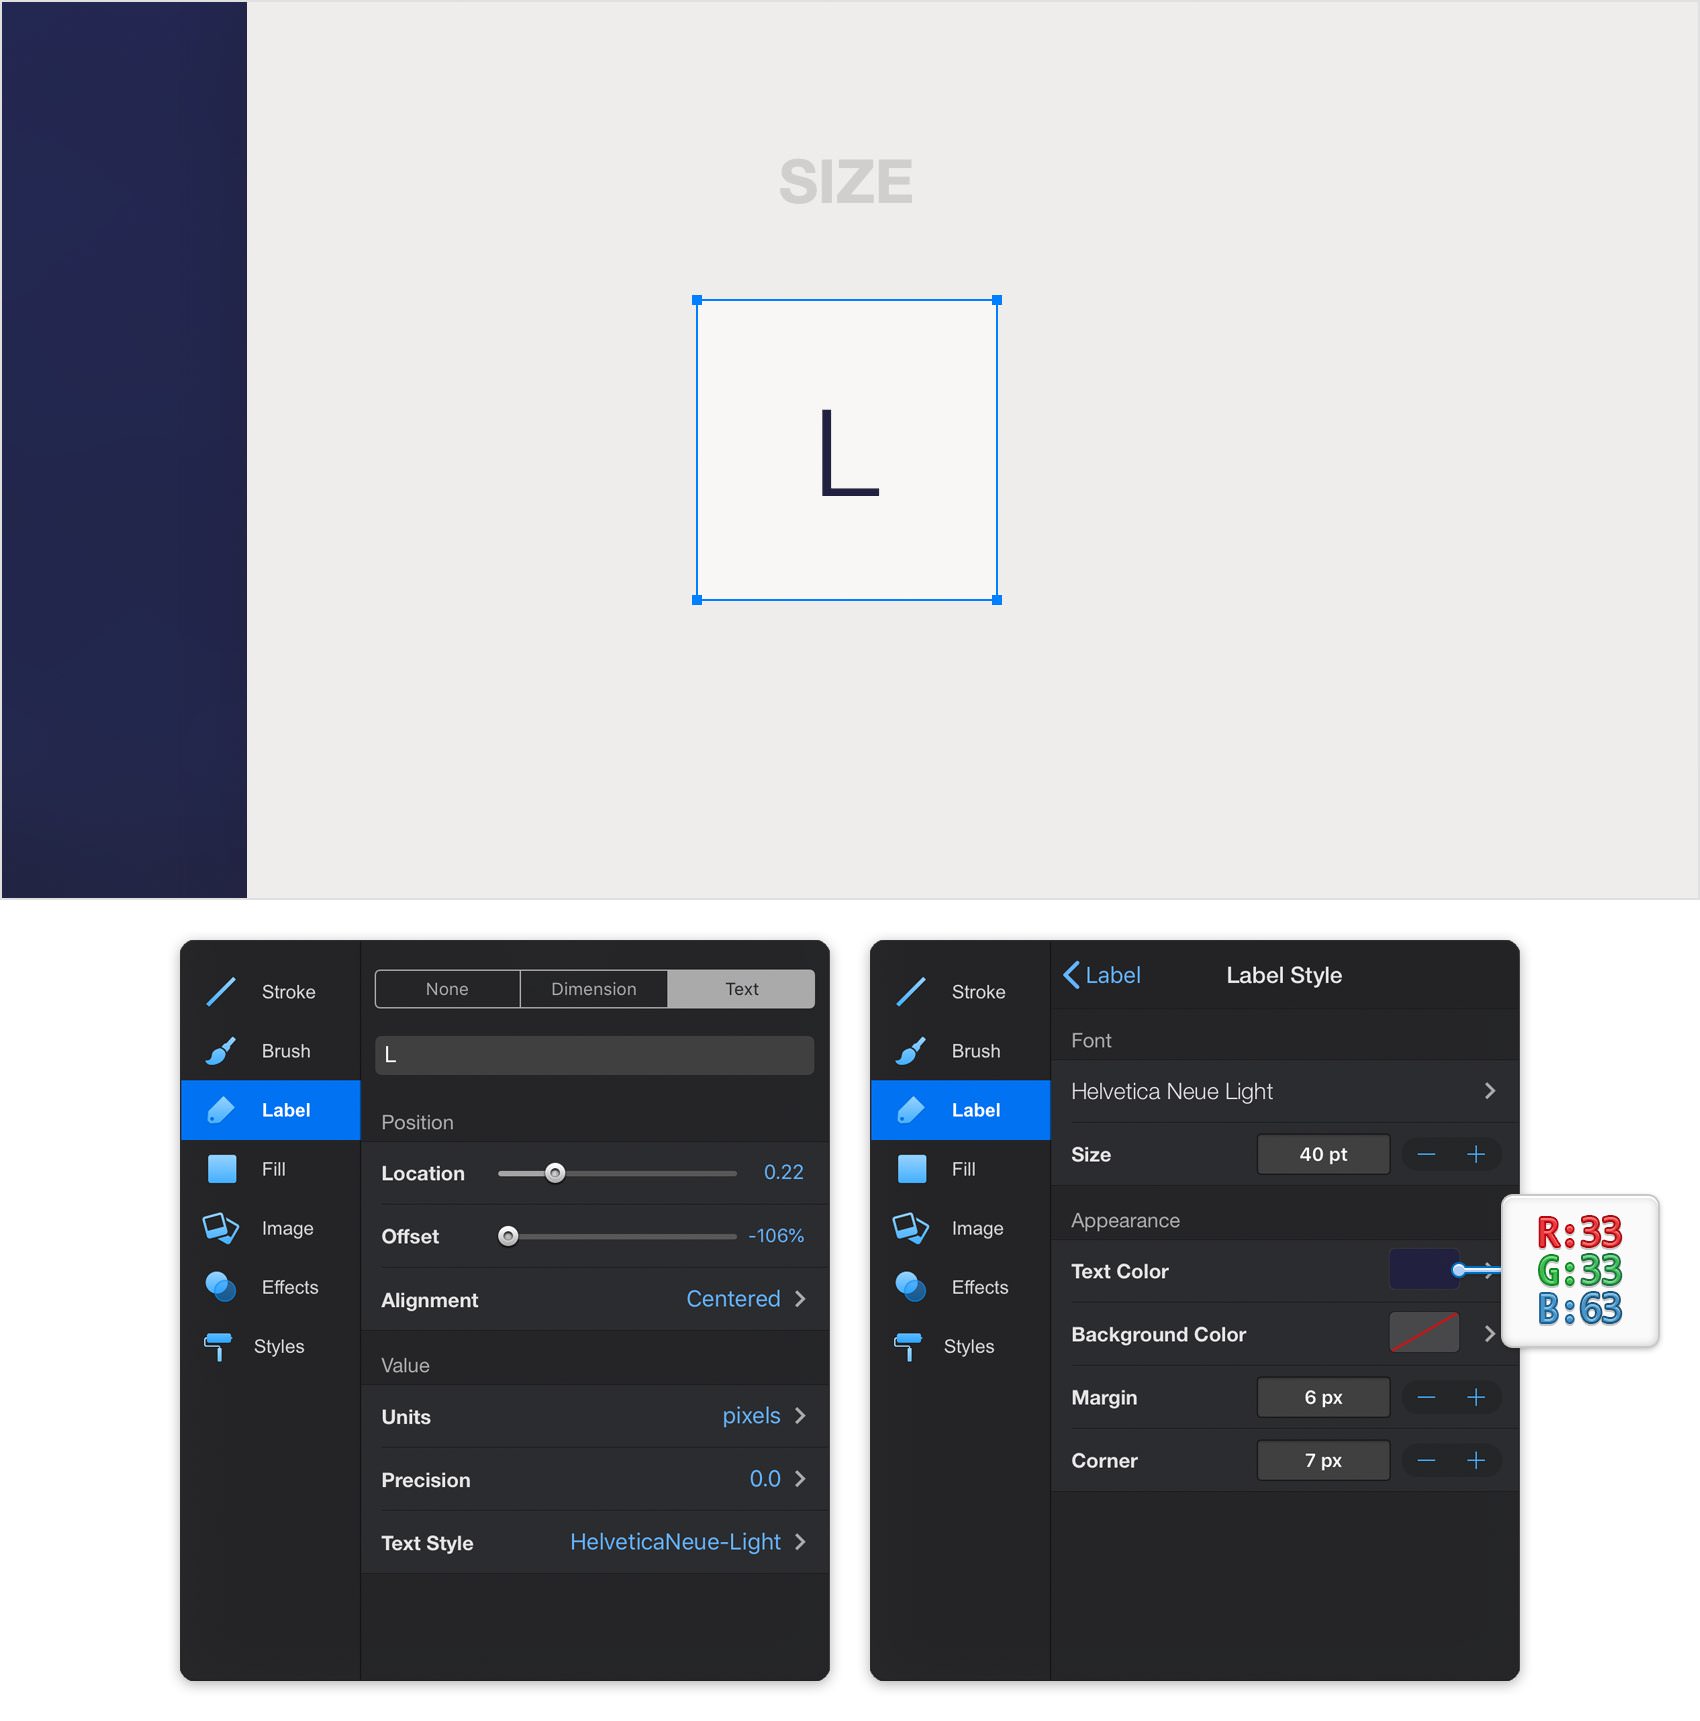
Focus on your Toolbar and set the Fill color to R=249 G=247 B=245. Pick the Rectangle Tool, create a 100 px square and place it as shown in the following image.
Step 28
Make sure that your new square stays selected and open the Label pane.
Add a Text Label and enter the "L" piece of text. Set the Alignment to Centered and then open the Label Style pane. Select the Helvetica Neue font, change the Style to Light, set the Size to 40 pt and adjust that Text Color to R=33 G=33 B=63. In the end things should look like in the following image.
Step 29
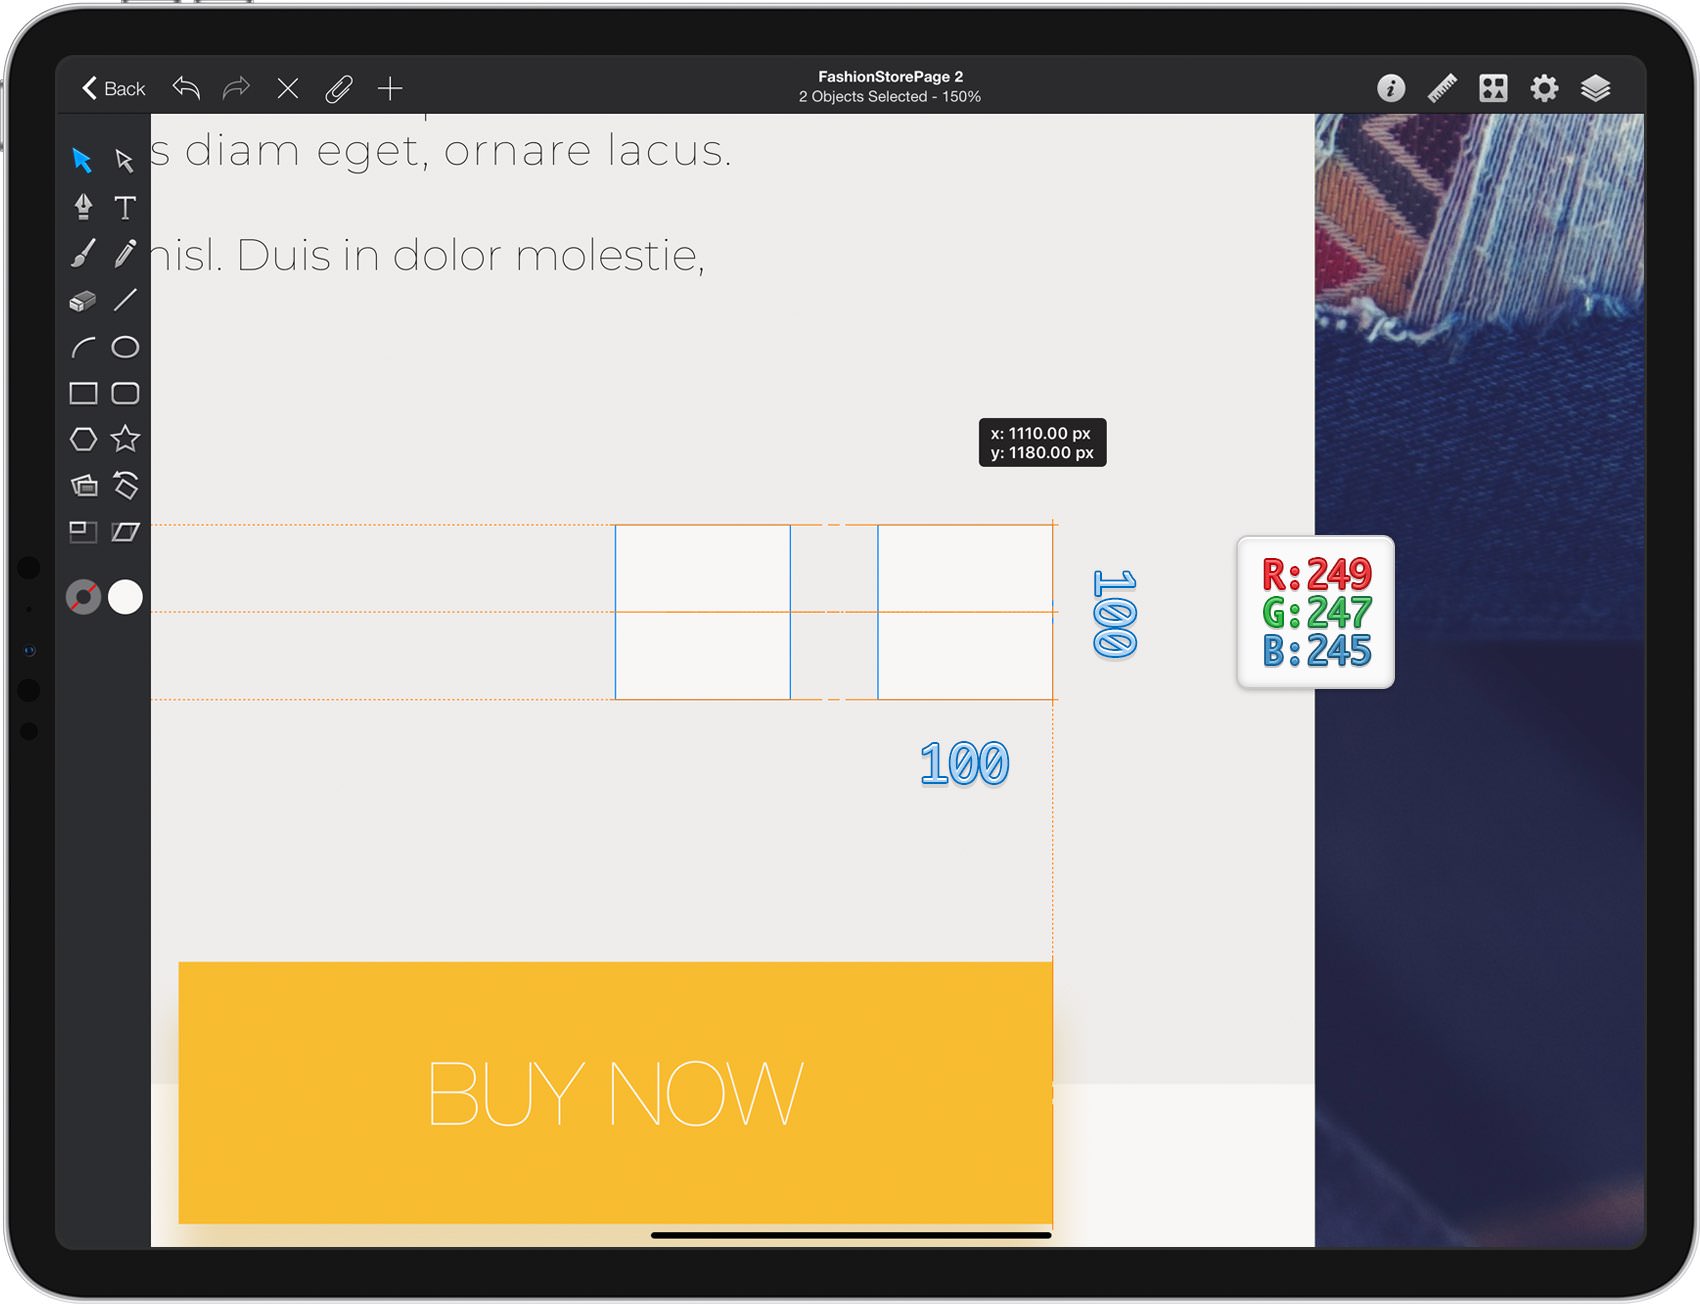
Using the Rectangle Tool, create another two 100 px squares and place them as shown in the following image.
Step 30
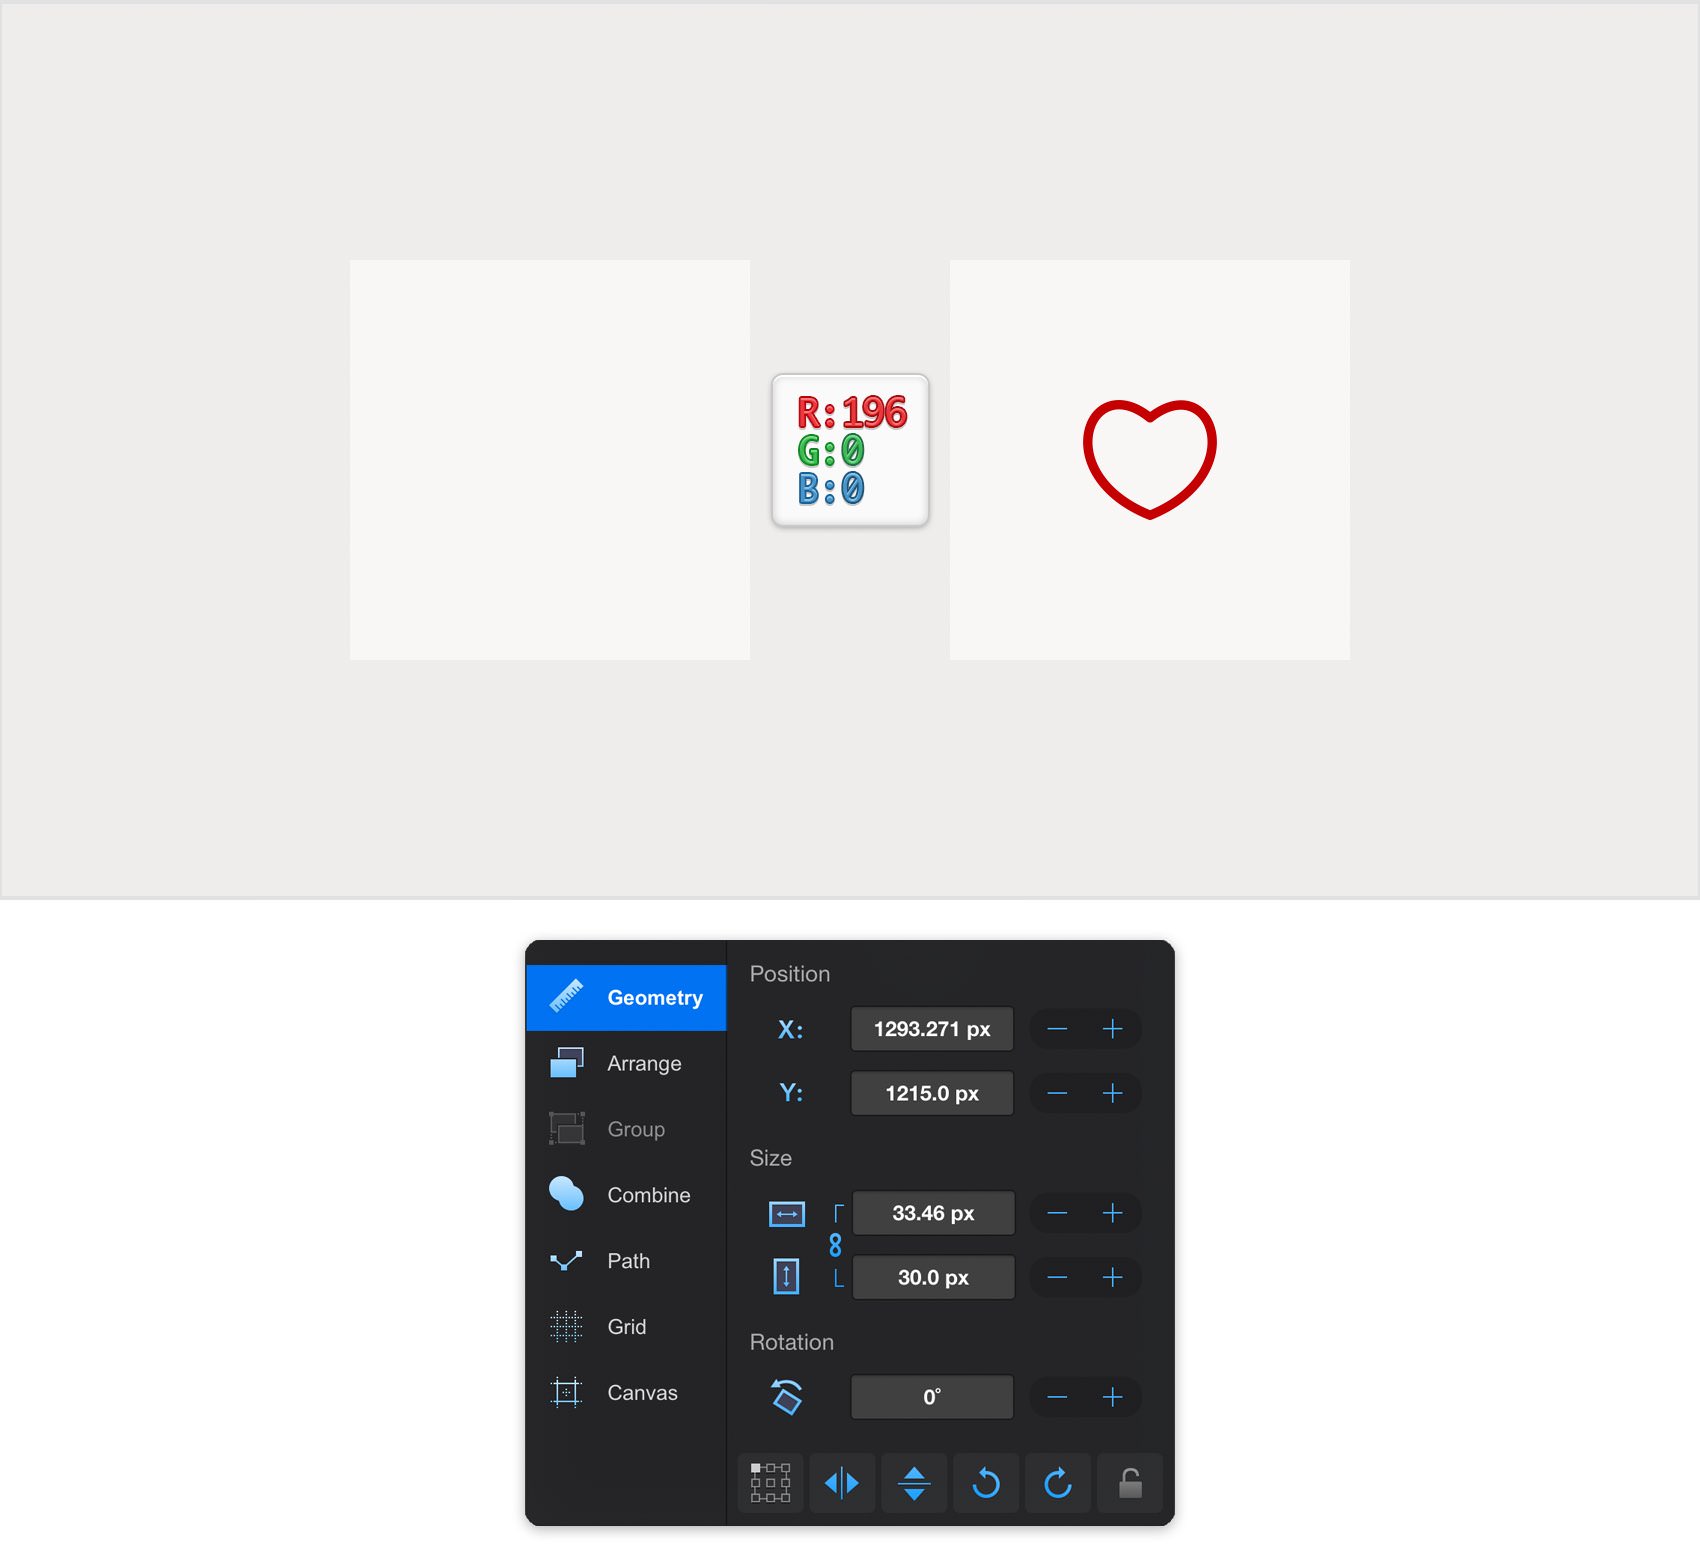
Select the heart.svg file and drag it inside your Graphic document, on top of that right 100 px square.
Ungroup this new shape and change its Fill color to R=209 G=207 B=205. Open the Geometry pane and lock the aspect ratio. Set the Height of this icon to 30 px and then move it in the center of the square as shown below.
Step 31
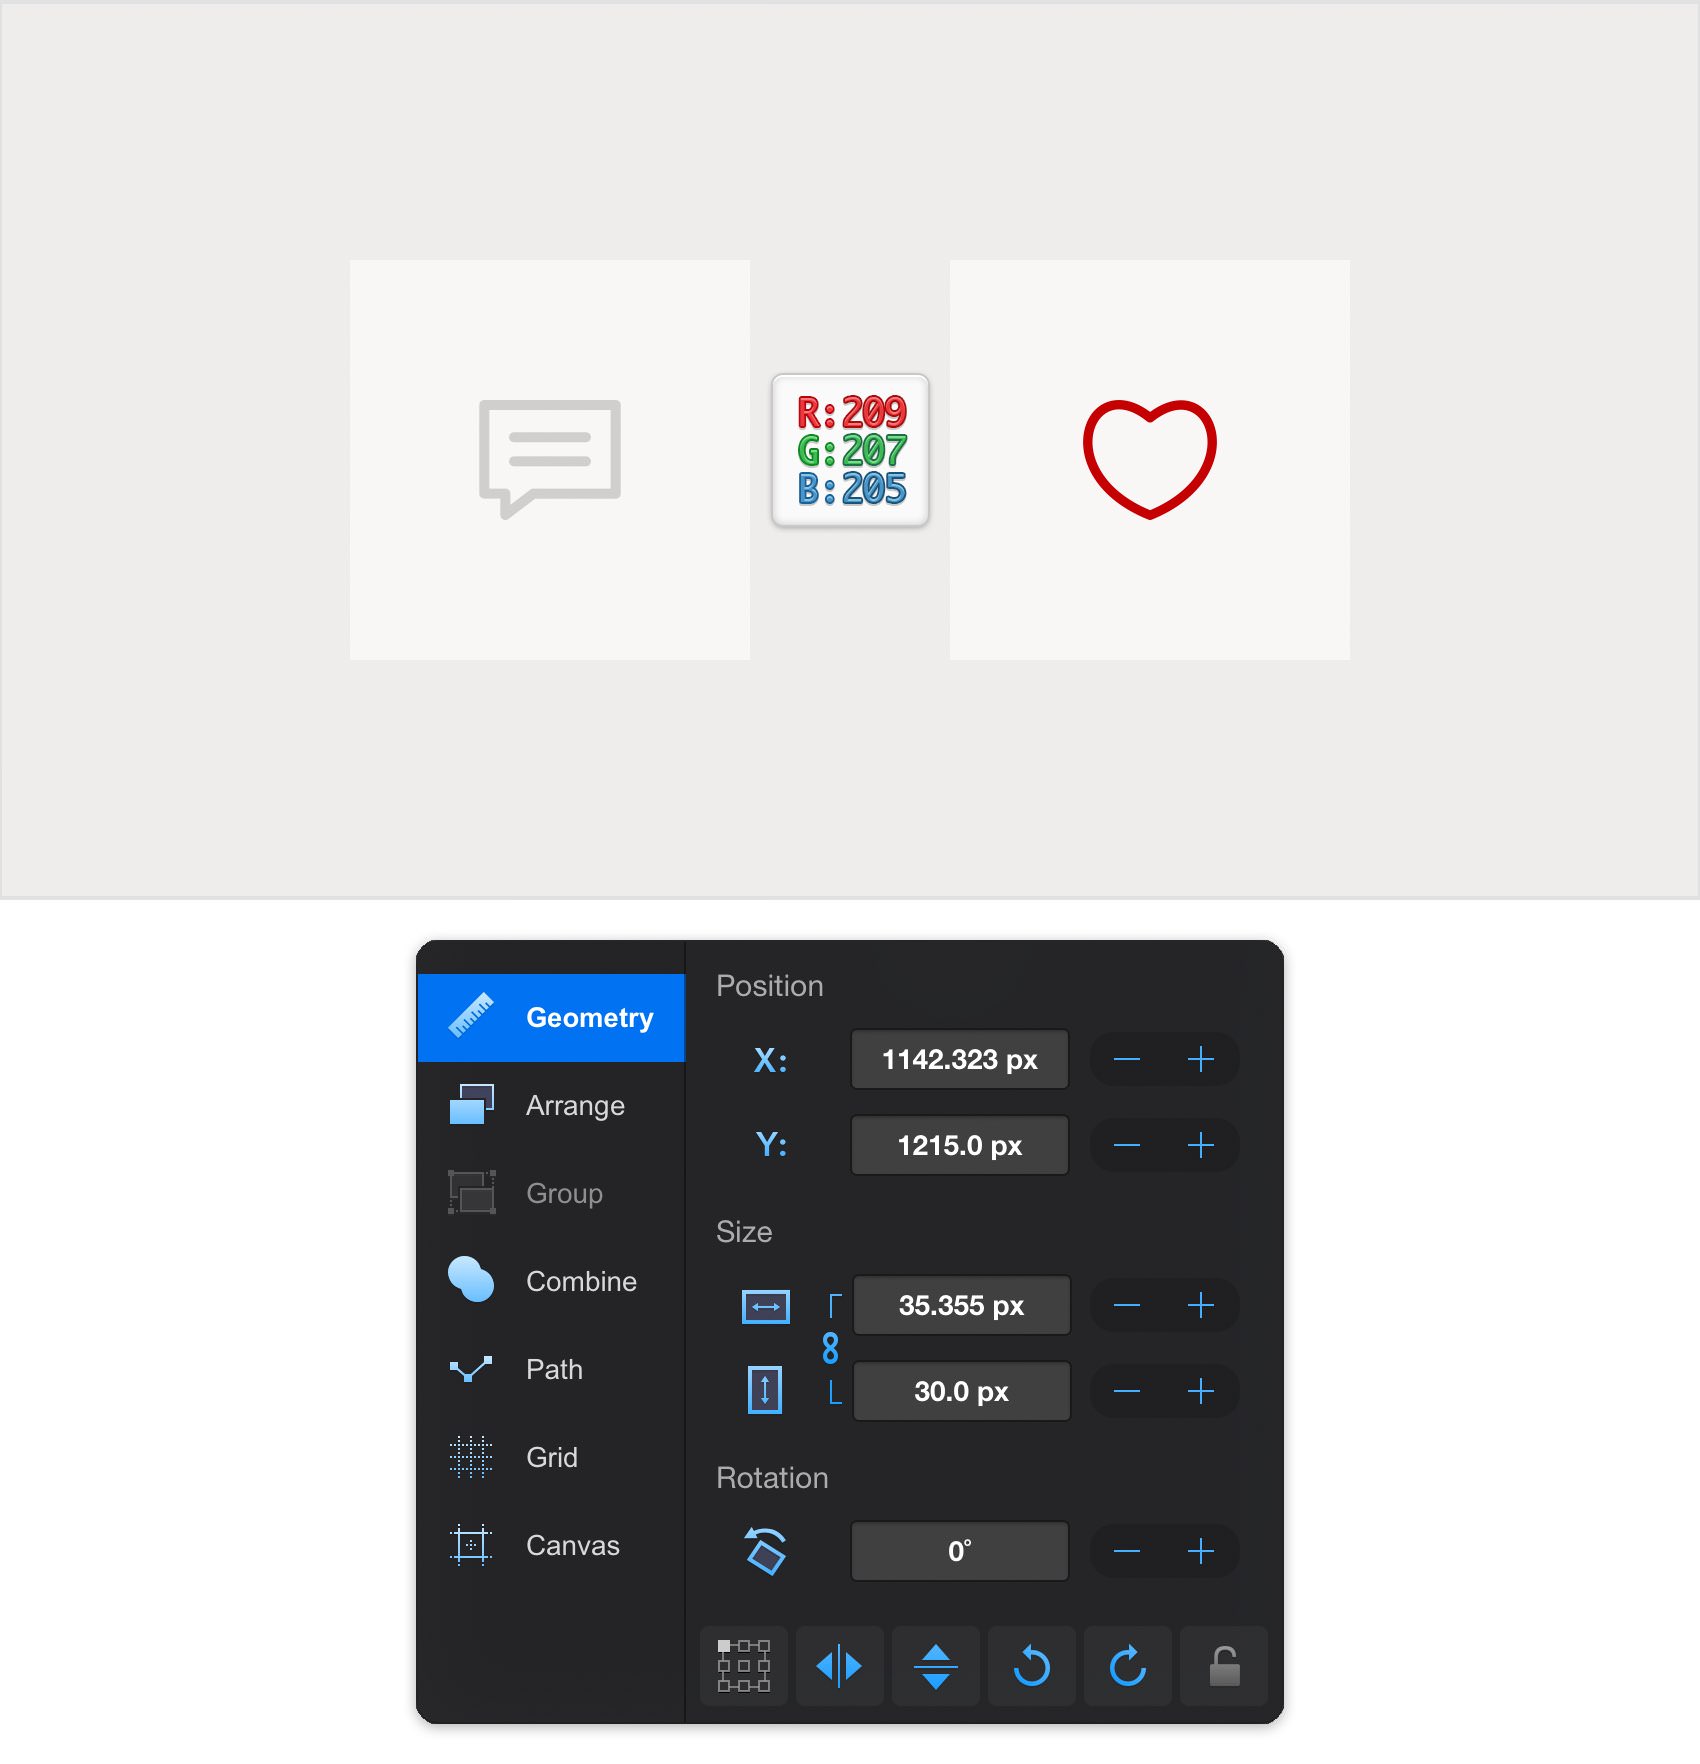
Select the speech-bubble.svg file and drag it inside your Graphic document, on top of that left 100 px square.
Ungroup the three shapes that make up this icon, turn them into a compound path and change the Fill color to R=209 G=207 B=205. Open the Geometry pane and lock the aspect ratio. Set the Height of this icon to 30 px and then move it in the center of the square as shown below.
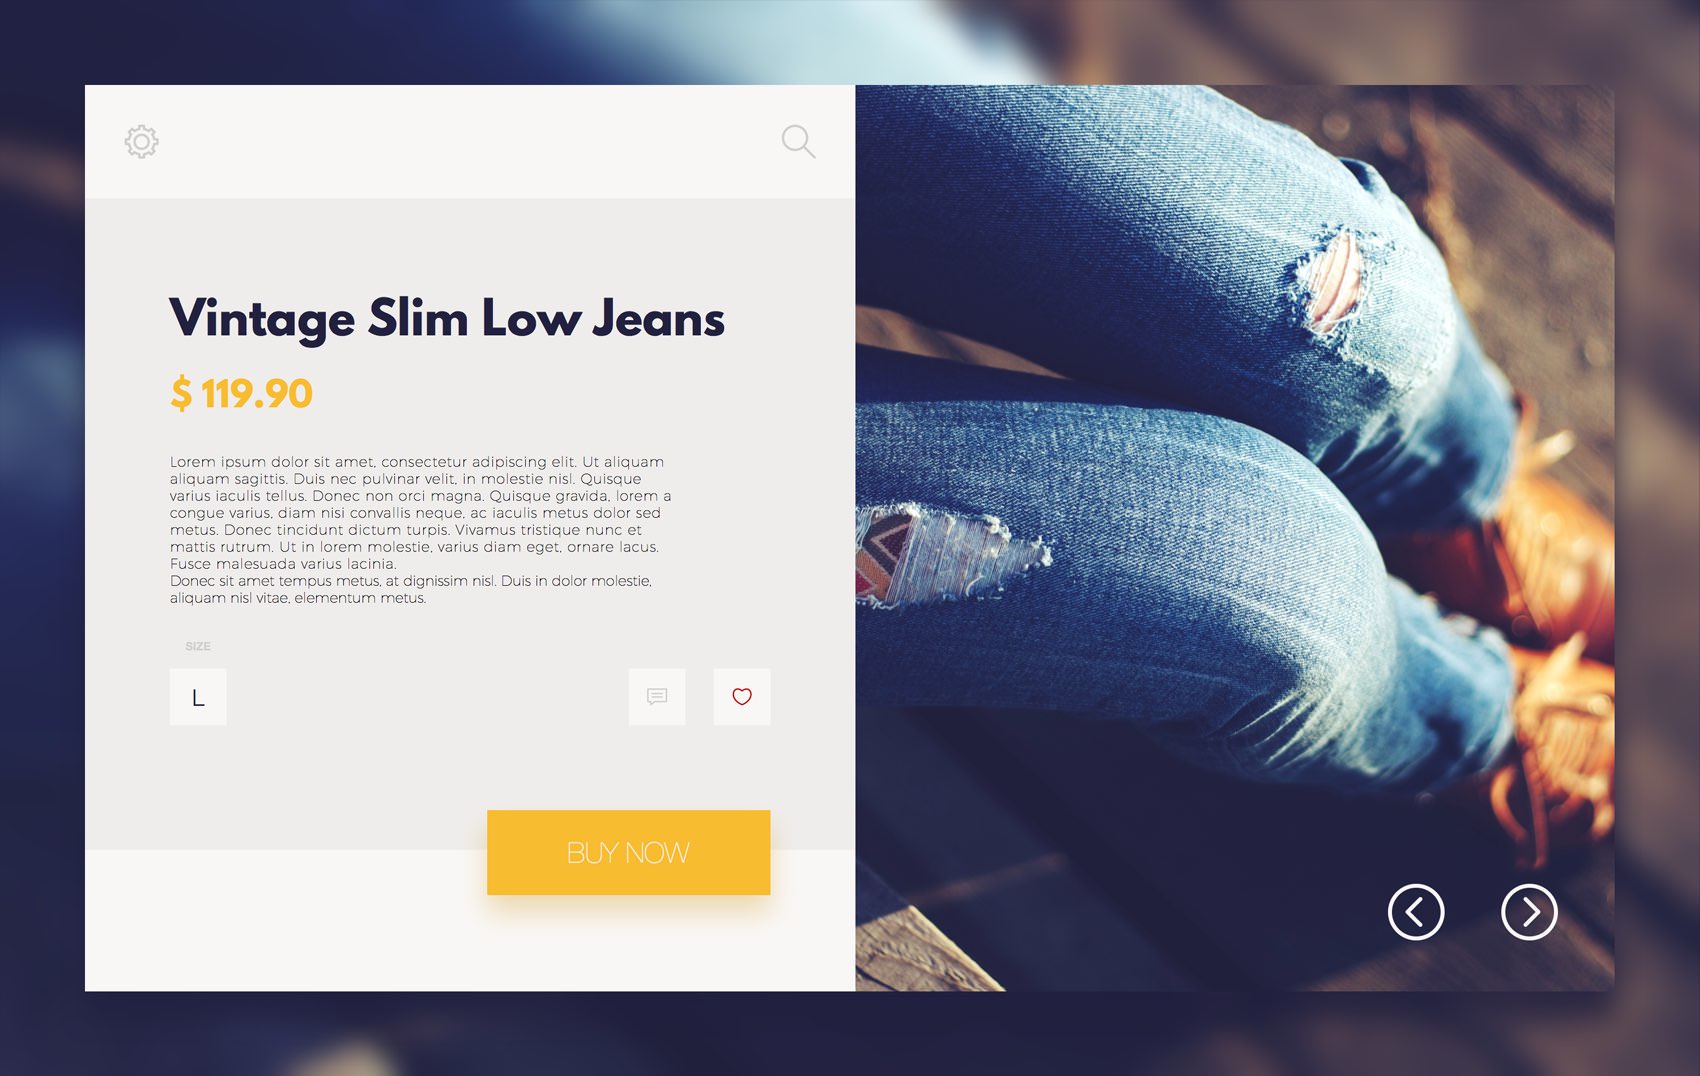
Finished Design
Congratulations, you've finished the tutorial!
Hope you've enjoyed learning some of the techniques and processes presented in these steps. As always, feel free to adjust the final design and make it your own.
Download Graphic File:
fashionstorepage.idraw