

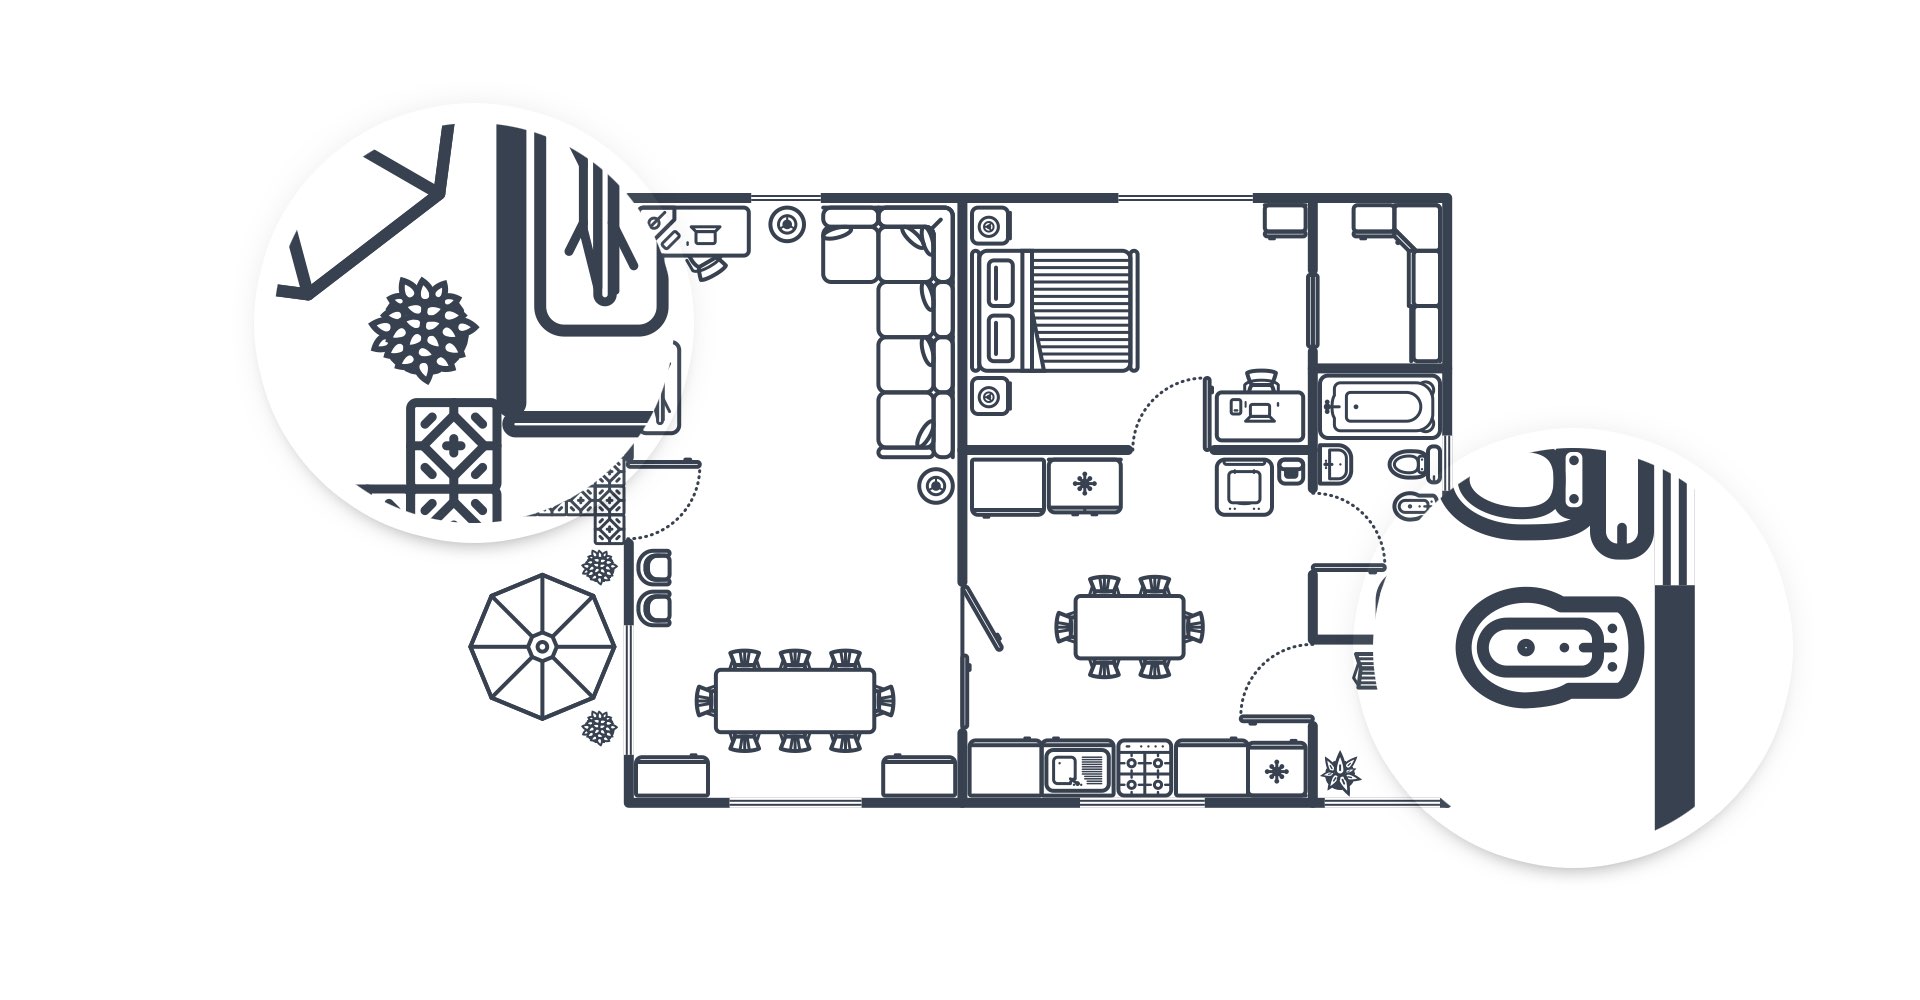
Create a Set of Outdoor Floor Plan Shapes
In the following tutorial you will learn how to create a set of outdoor floor plan shapes and how to save them inside a shape library.
For starters, you will learn how to set up a simple grid and how to use the canvas scale settings. Moving on you will learn how to take full advantage of the Snap to Grid feature and how to work with basic tools.
You will learn how to easily save colors and styles and how to use them throughout the tutorial. You will learn how to create, save and use a pattern or how to adjust and cut objects.
Finally, you will learn how to create a new shape library, how to save your symbols and how to import or export existing shape libraries.
Step 1
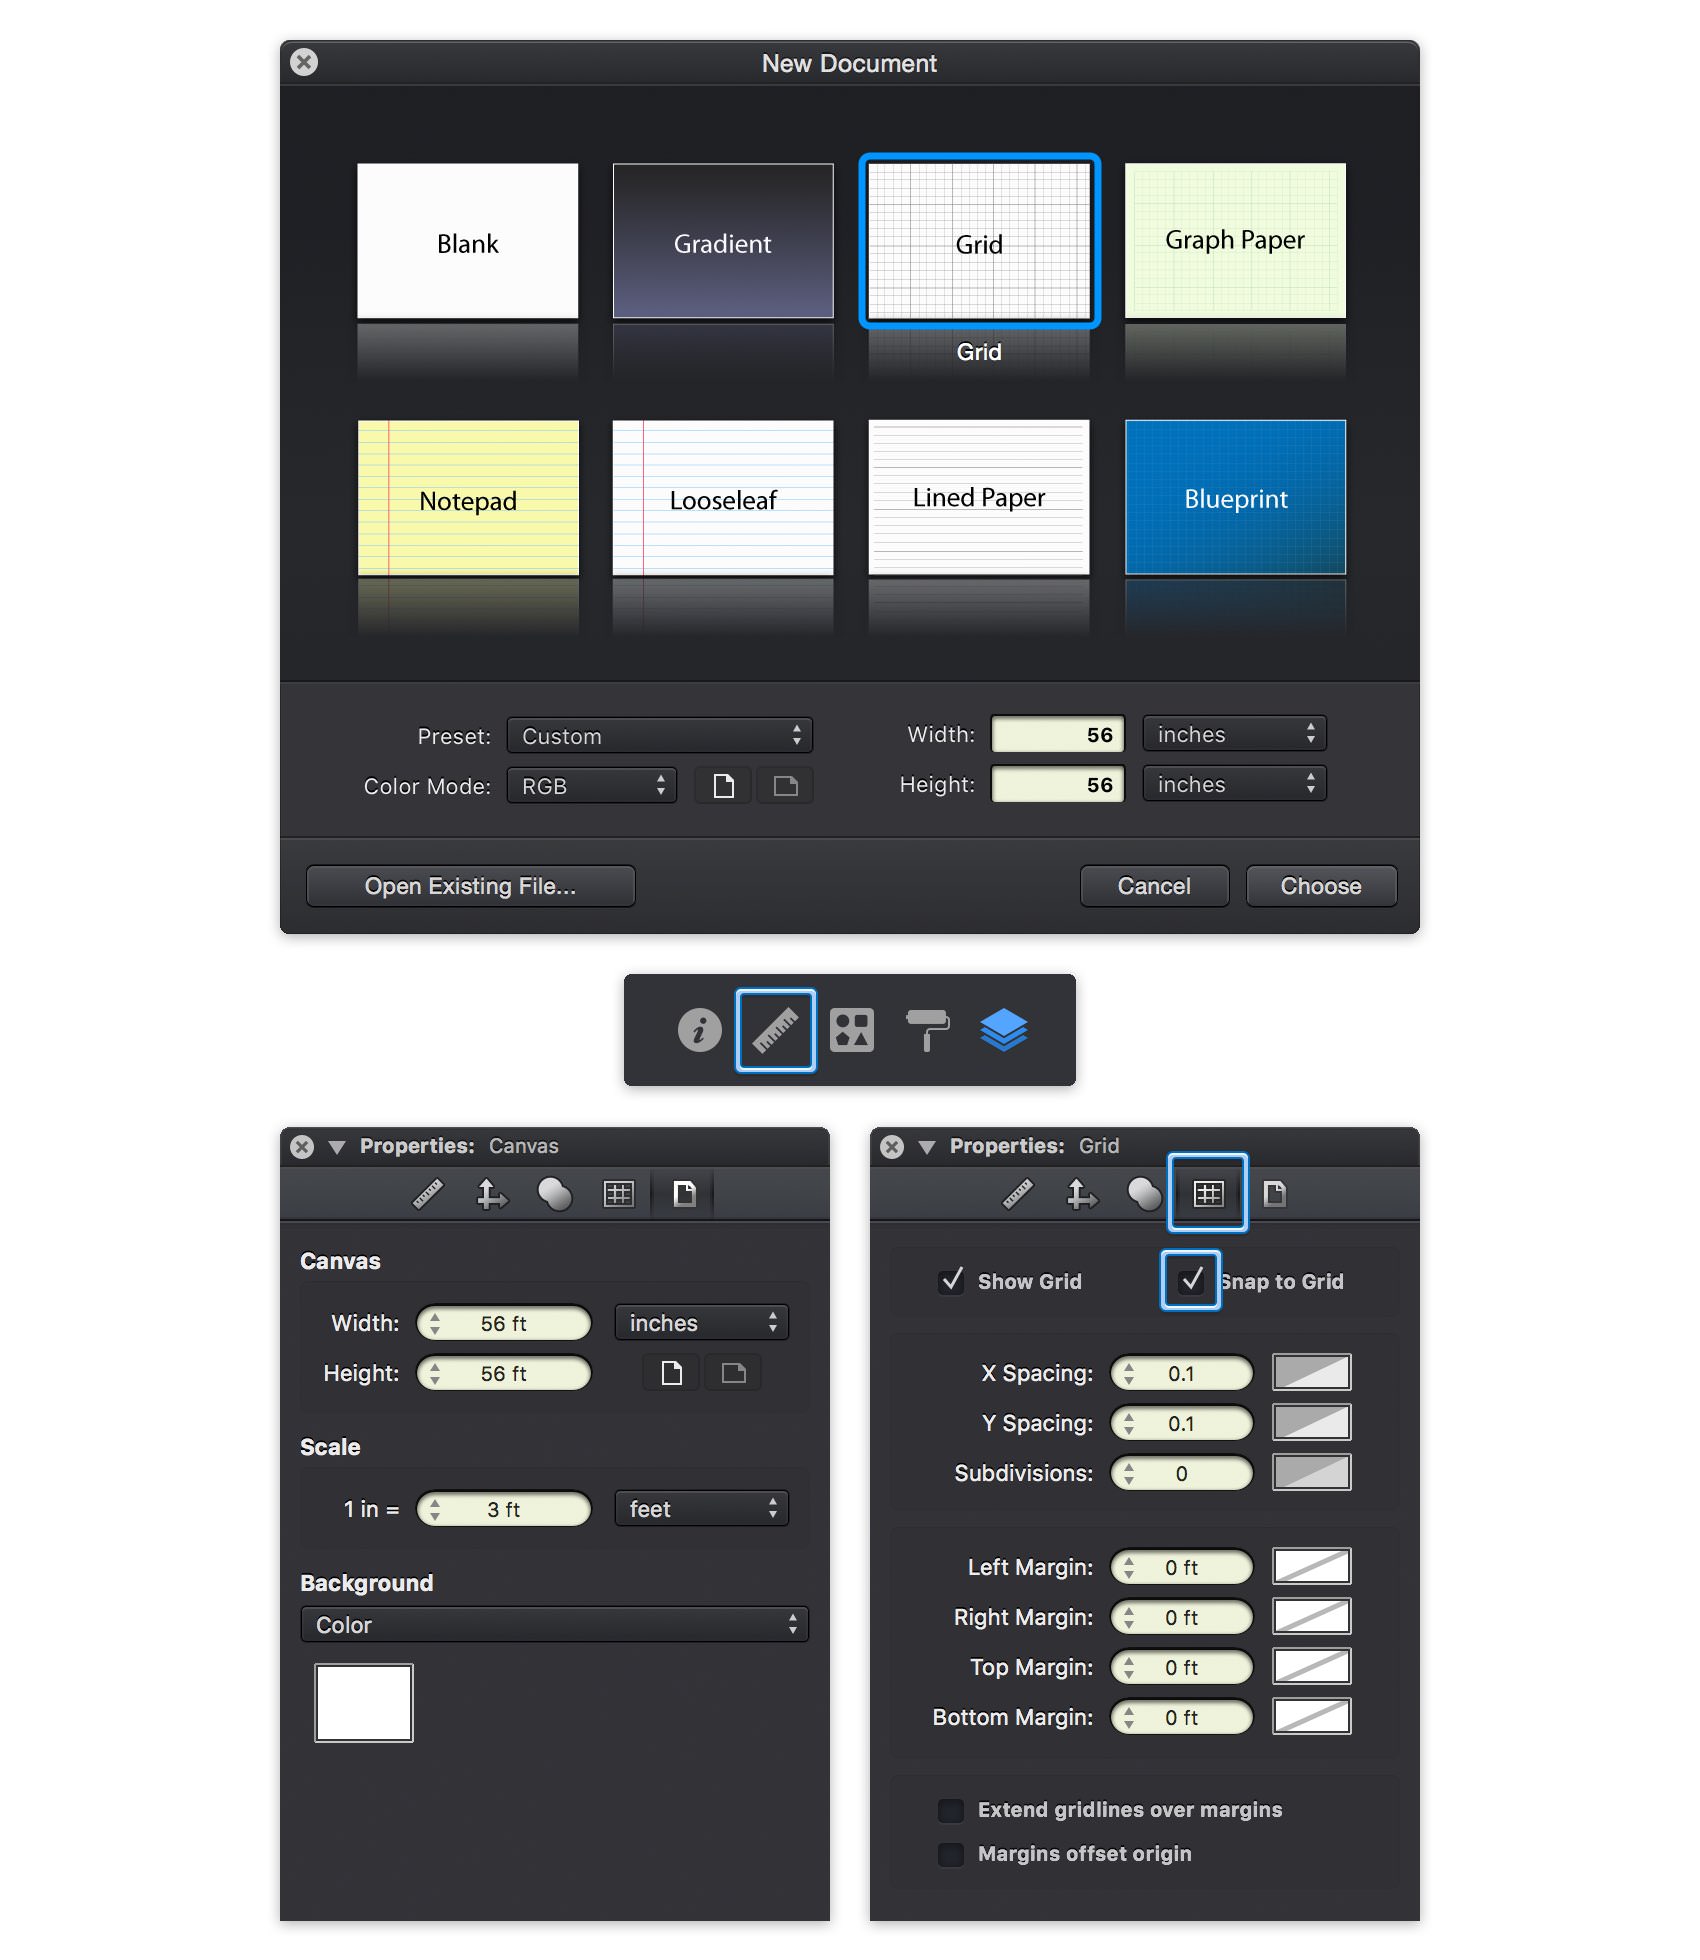
For this tutorial we'll create a new 56 x 56 inches document. Go to File > New or hit the Command + N keyboard shortcut to bring up the New Document window. Select the Grid document style, select inches for the document unit, and then set the document dimensions to 63 inches wide by 63 inches high.
We're about to create a ‘to-scale’ technical design using the canvas scale settings. open the Canvas pane from the Properties panel, change the scale unit from inches to feet and set one inch to stand for three feet. The actual paper size of the document will not change, only the displayed values and units are adjusted by this setting. If the Properties pane is not currently visible, you can easily open it using the ruler icon that lies above the Layers panel.
Next, you need to adjust the document's grid. Switch to the Grid pane in the Properties panel. Change the grid X Spacing and Y Spacing to 0.1, set the Subdivisions to 0 and then enable the Snap to Grid feature.
Keep in mind that you can quickly enable or disable the grid and the Snap to Grid feature using the Command + ' and Command + Shift + ' keyboard shortcuts.
Step 2
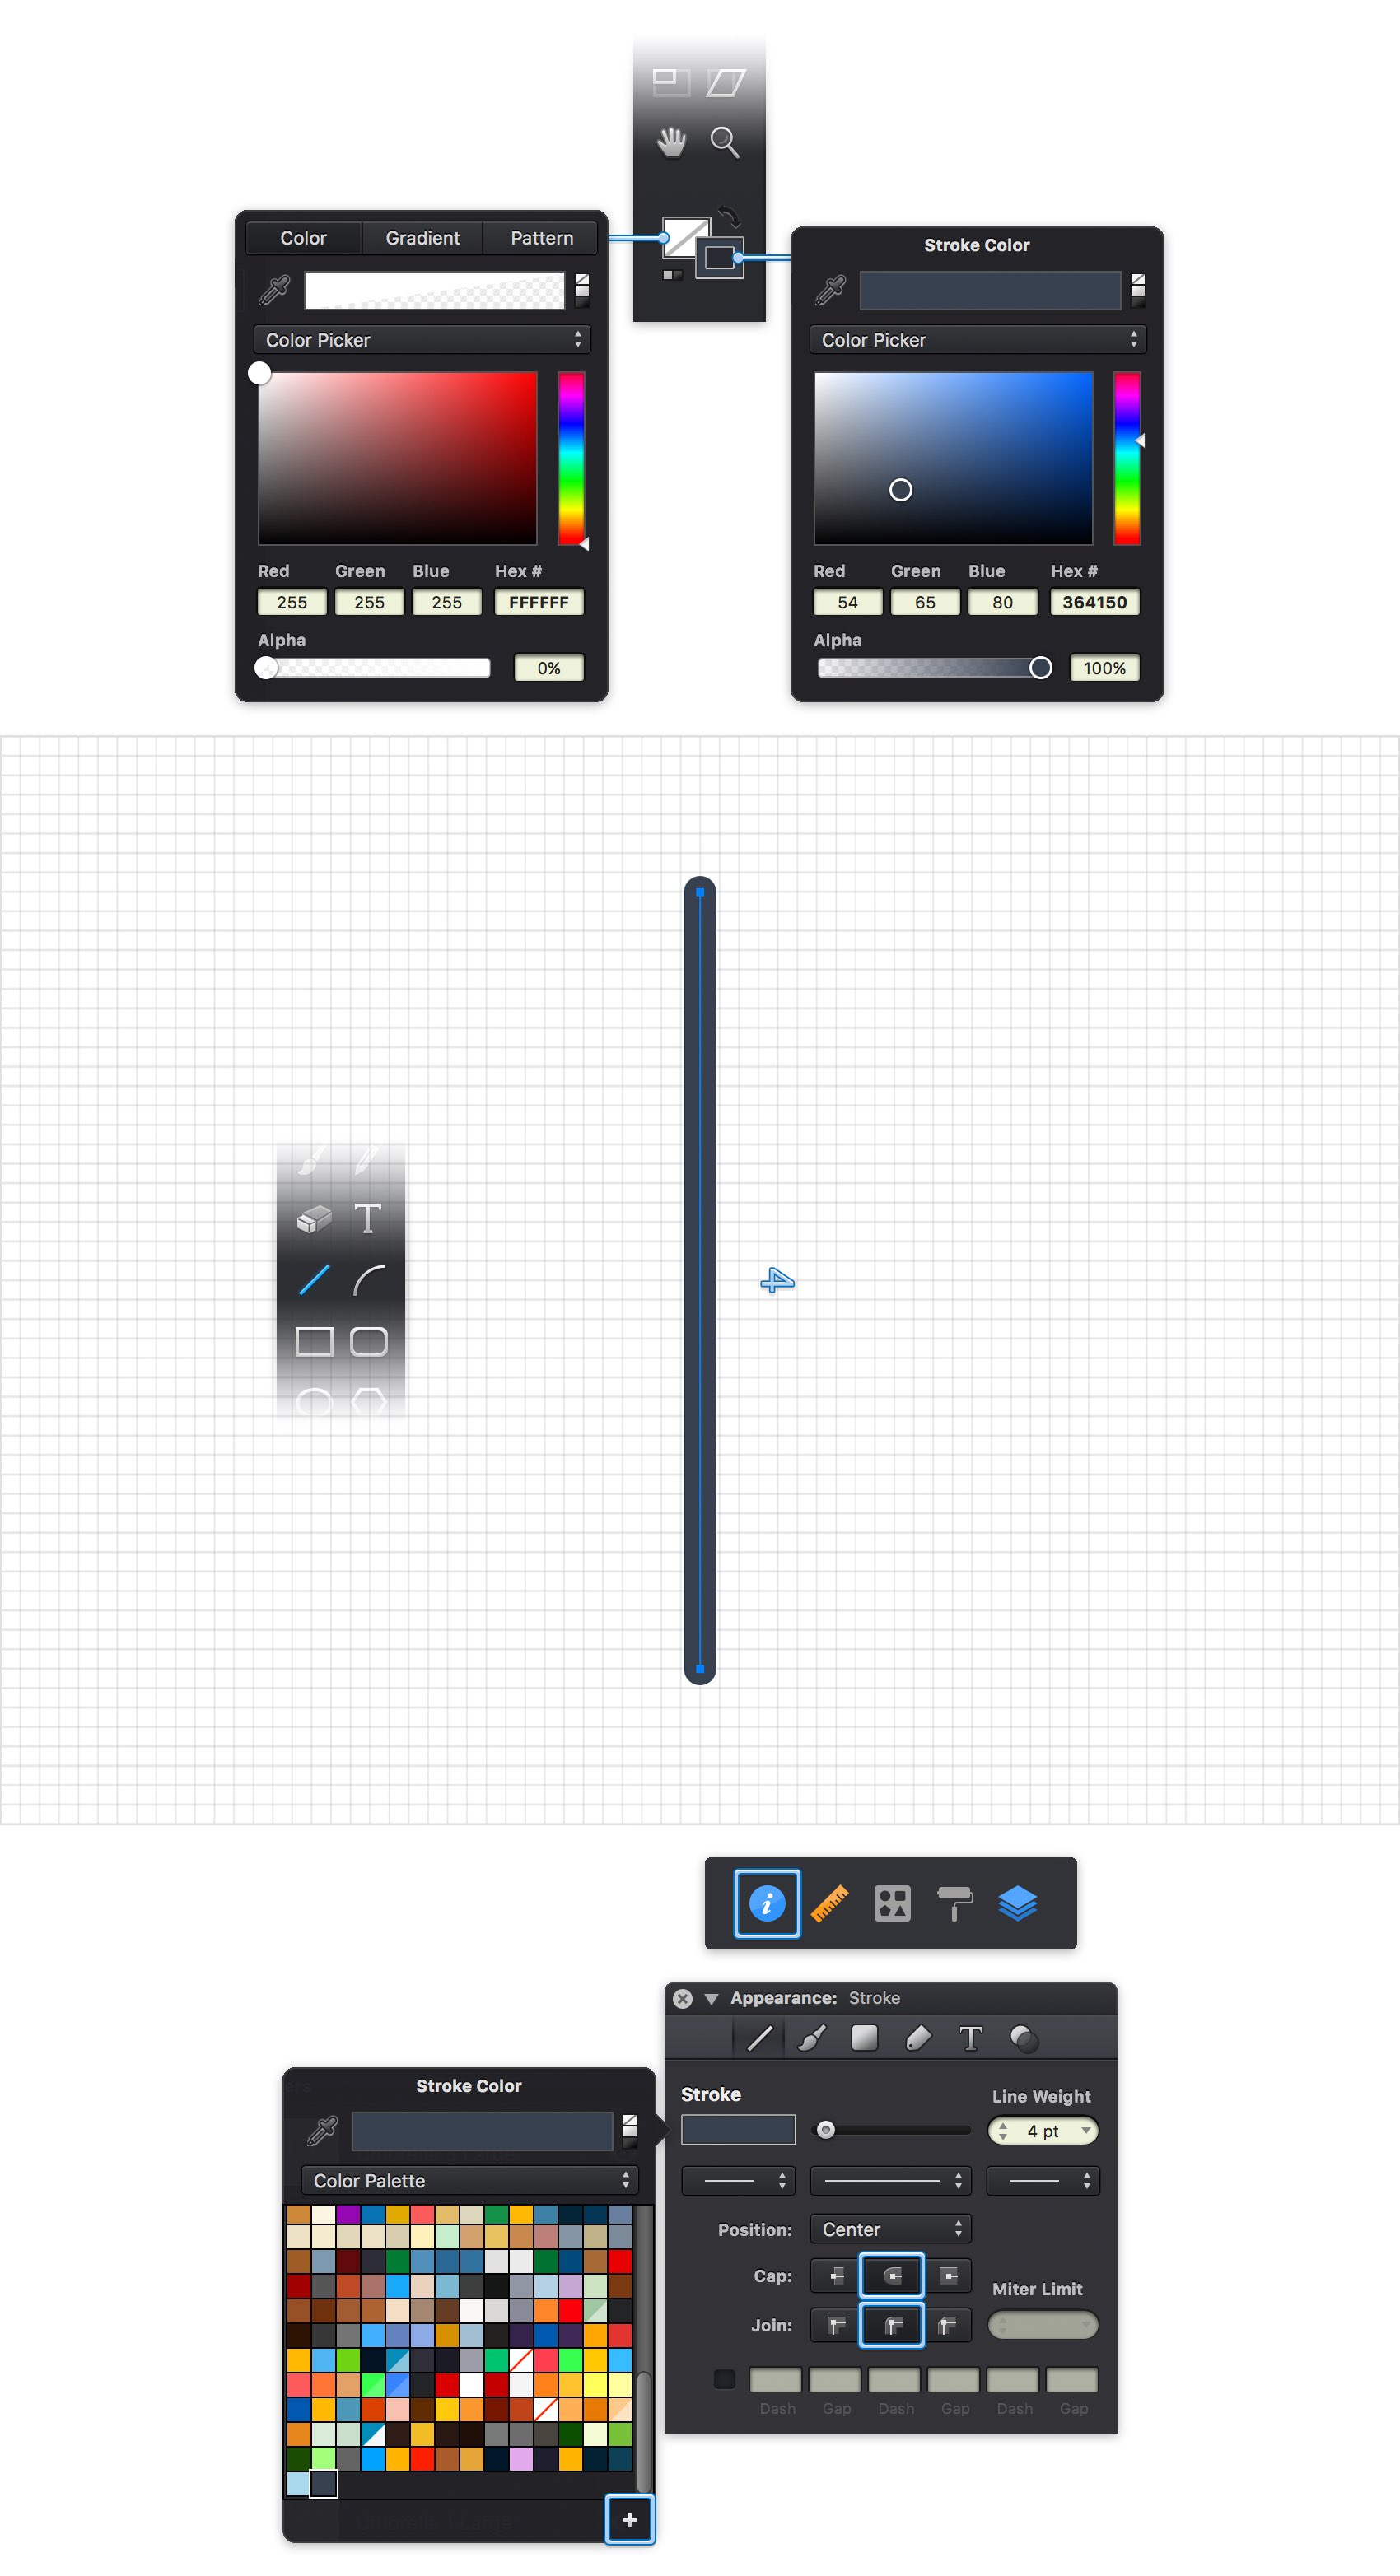
Focus on the Toolbar and notice that by default the Fill color is set to white while the Stroke color is set to black. Click the Stroke color well and replace the existing color with R=54 G=65 B=80, and then click the Fill color well and drag the Alpha slider to 0%, which will make the fill invisible.
Pick the Line Tool (L), move to your canvas and create a 4 ft vertical line - the grid and the Snap to Grid feature will ease your work. Hold the Shift key while dragging to easily create a perfect straight path. Make sure that this path stays selected and go to the Stroke pane from the Appearance panel. Drag the Line Weight slider to 4 pt, make sure that the Position is set to Center, and then check the Round Cap and Round Join buttons.
You should also save the stroke color used for this shape as you are about to use it throughout the entire tutorial. click the color well from the Stroke pane (or the Stroke color well from your Toolbar), switch from the Color Picker to the Color Palette and click that plus button to add your active color to the existing set of color.
Step 3
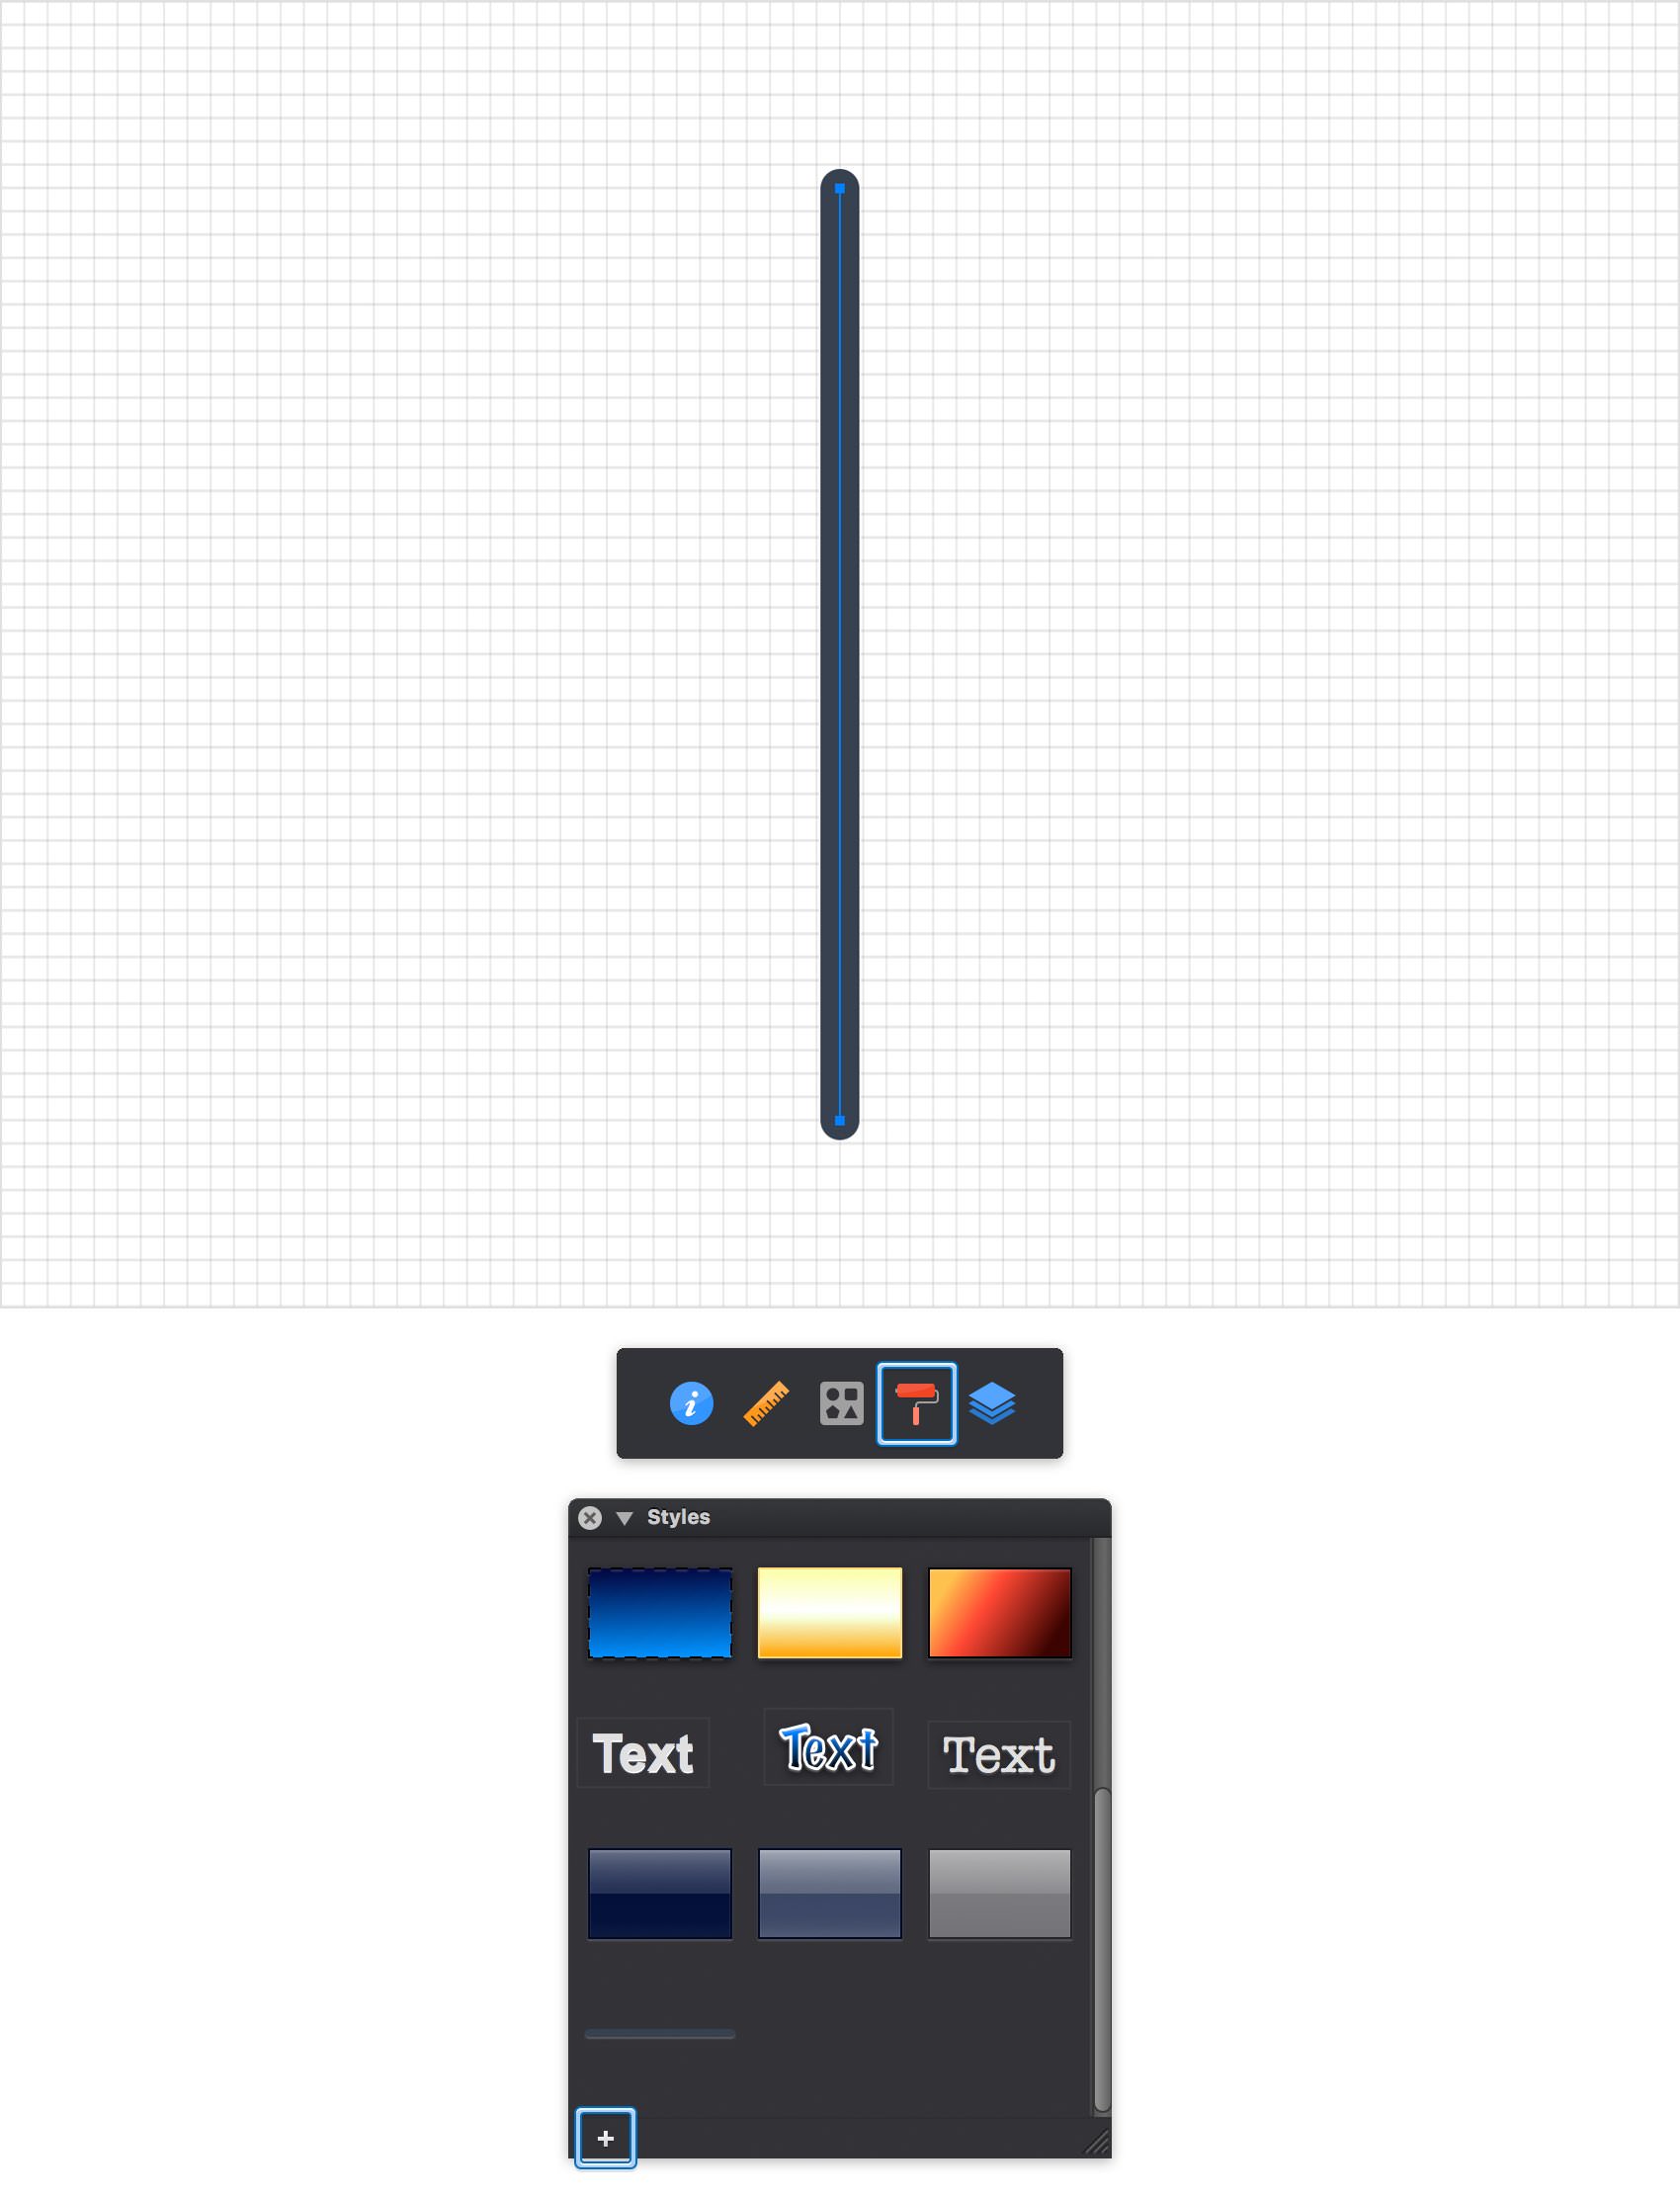
Make sure that your path is still selected, open the Styles panel and click that plus button to save the attributes used for your selected shape. Using this style, you will be able to quickly apply the appearance attributes of this path to other paths.
Step 4
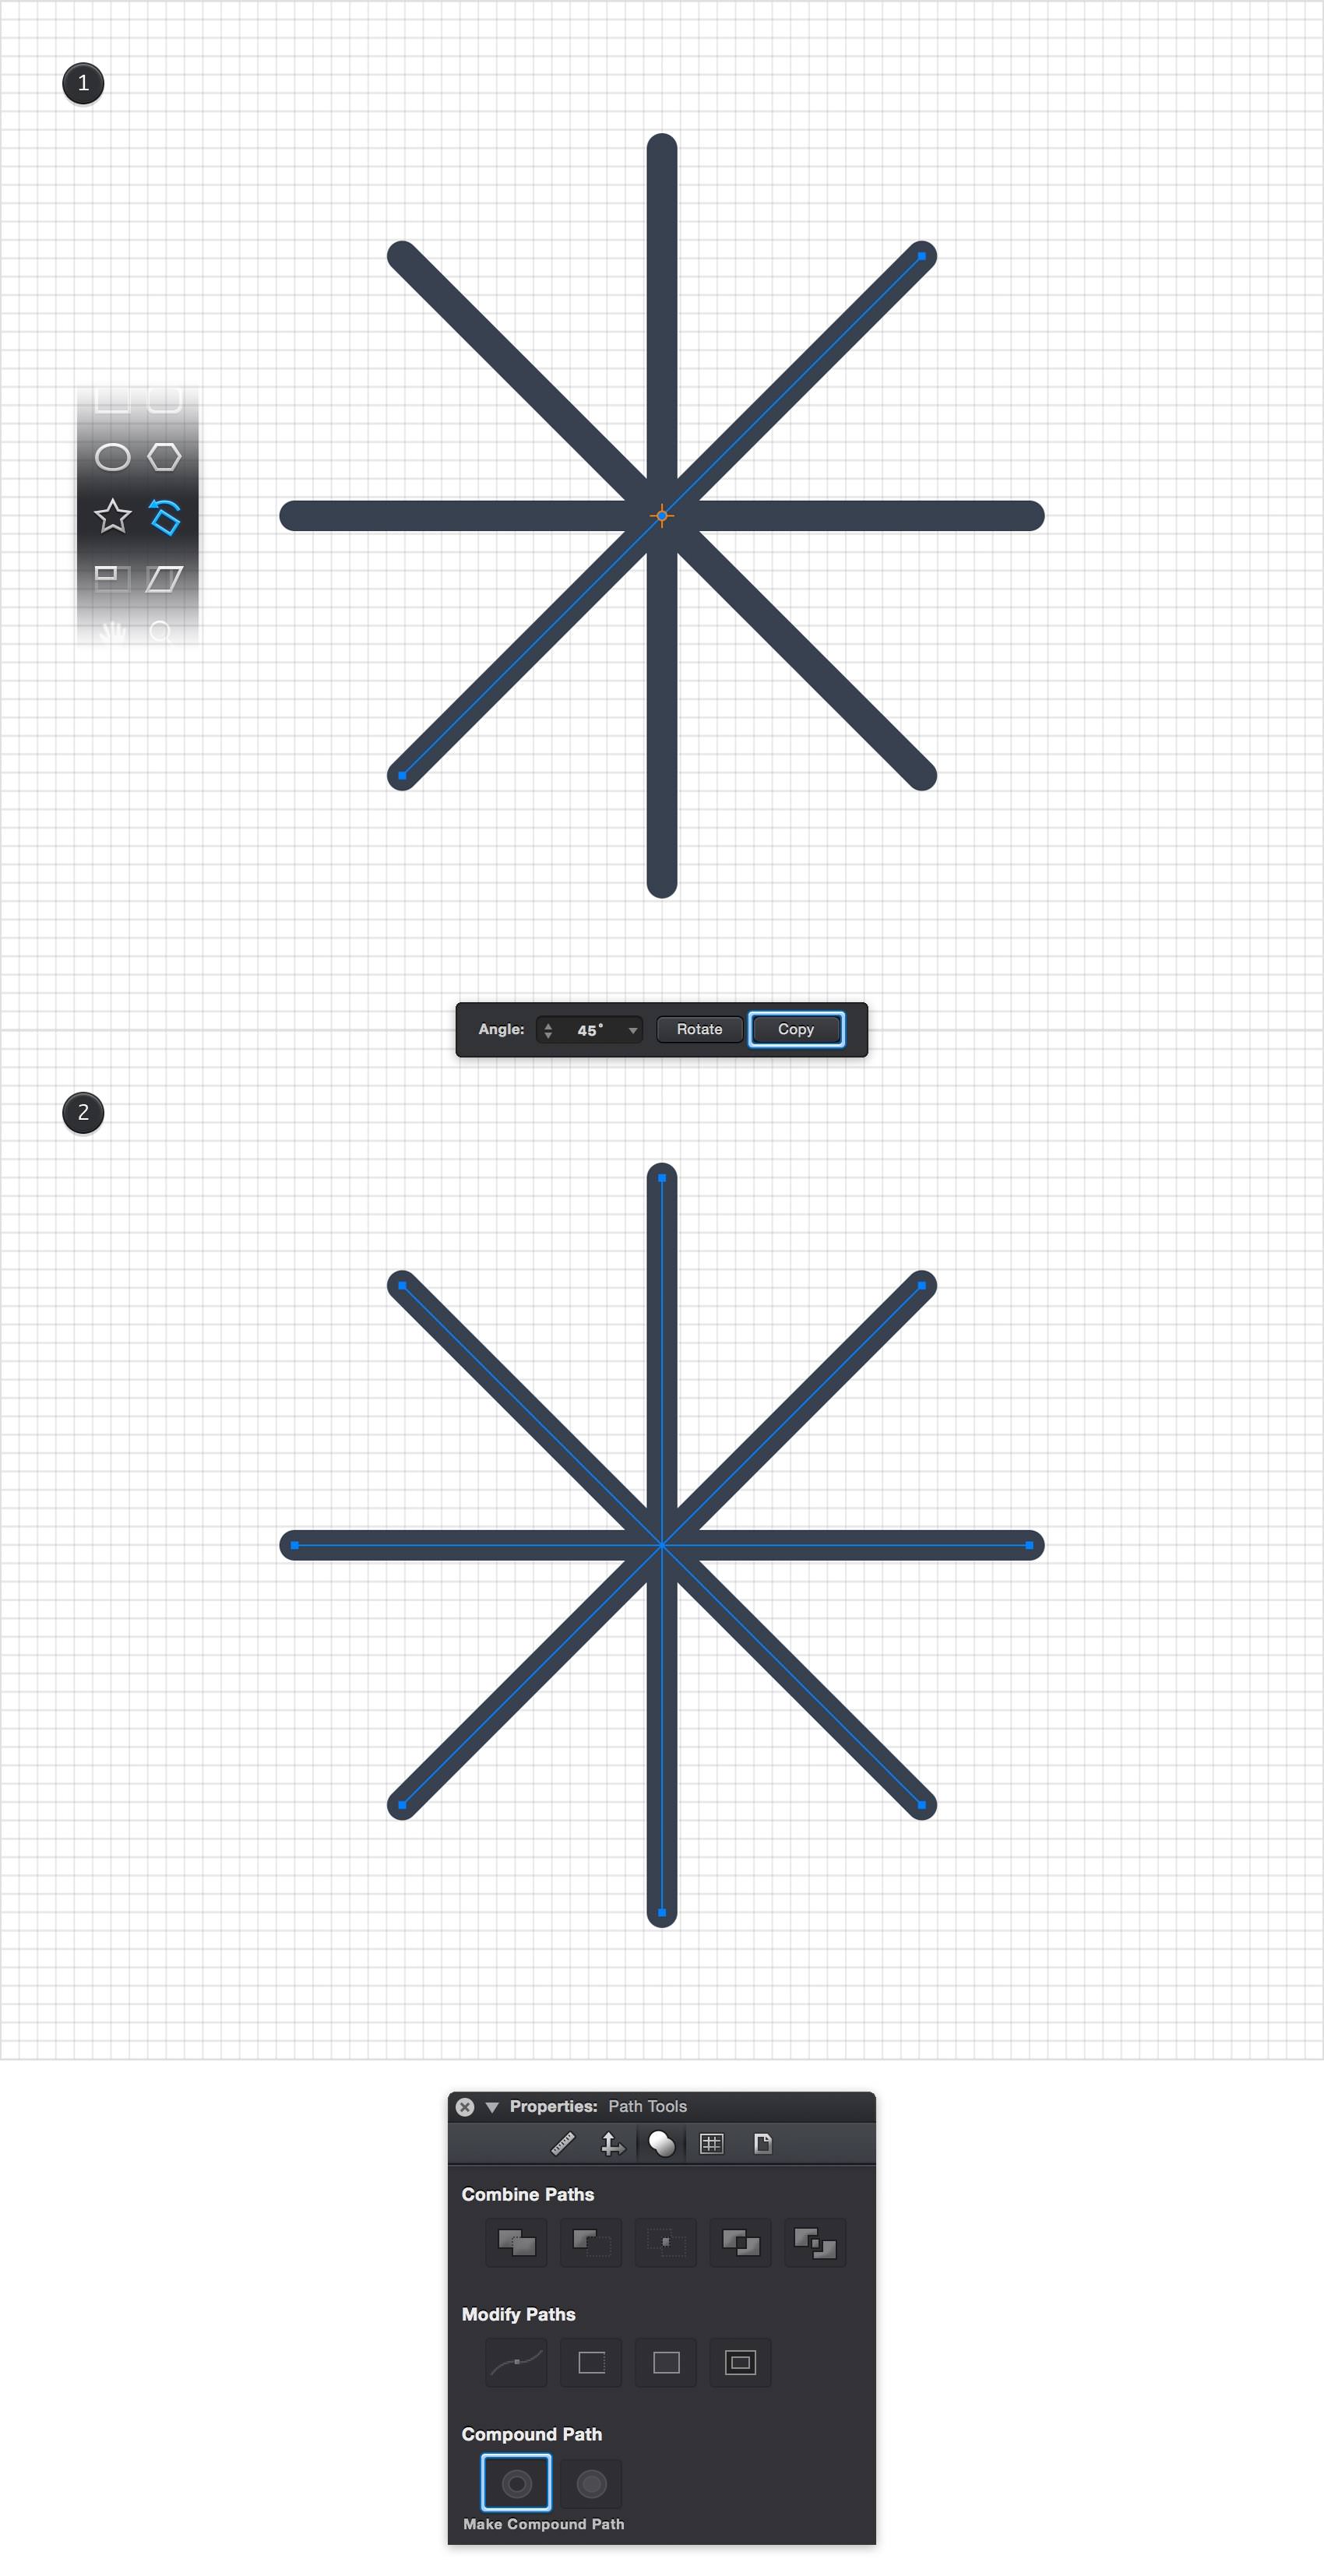
Make sure that your path is still selected, pick the Rotate Tool (R) and focus on the Tool Options bar. Set the Angle to 45 degrees and then click that Copy button three times. Select all four paths made so far, go to the Path Tools pane from the Properties panel and click the Make Compound Path command.
Step 5
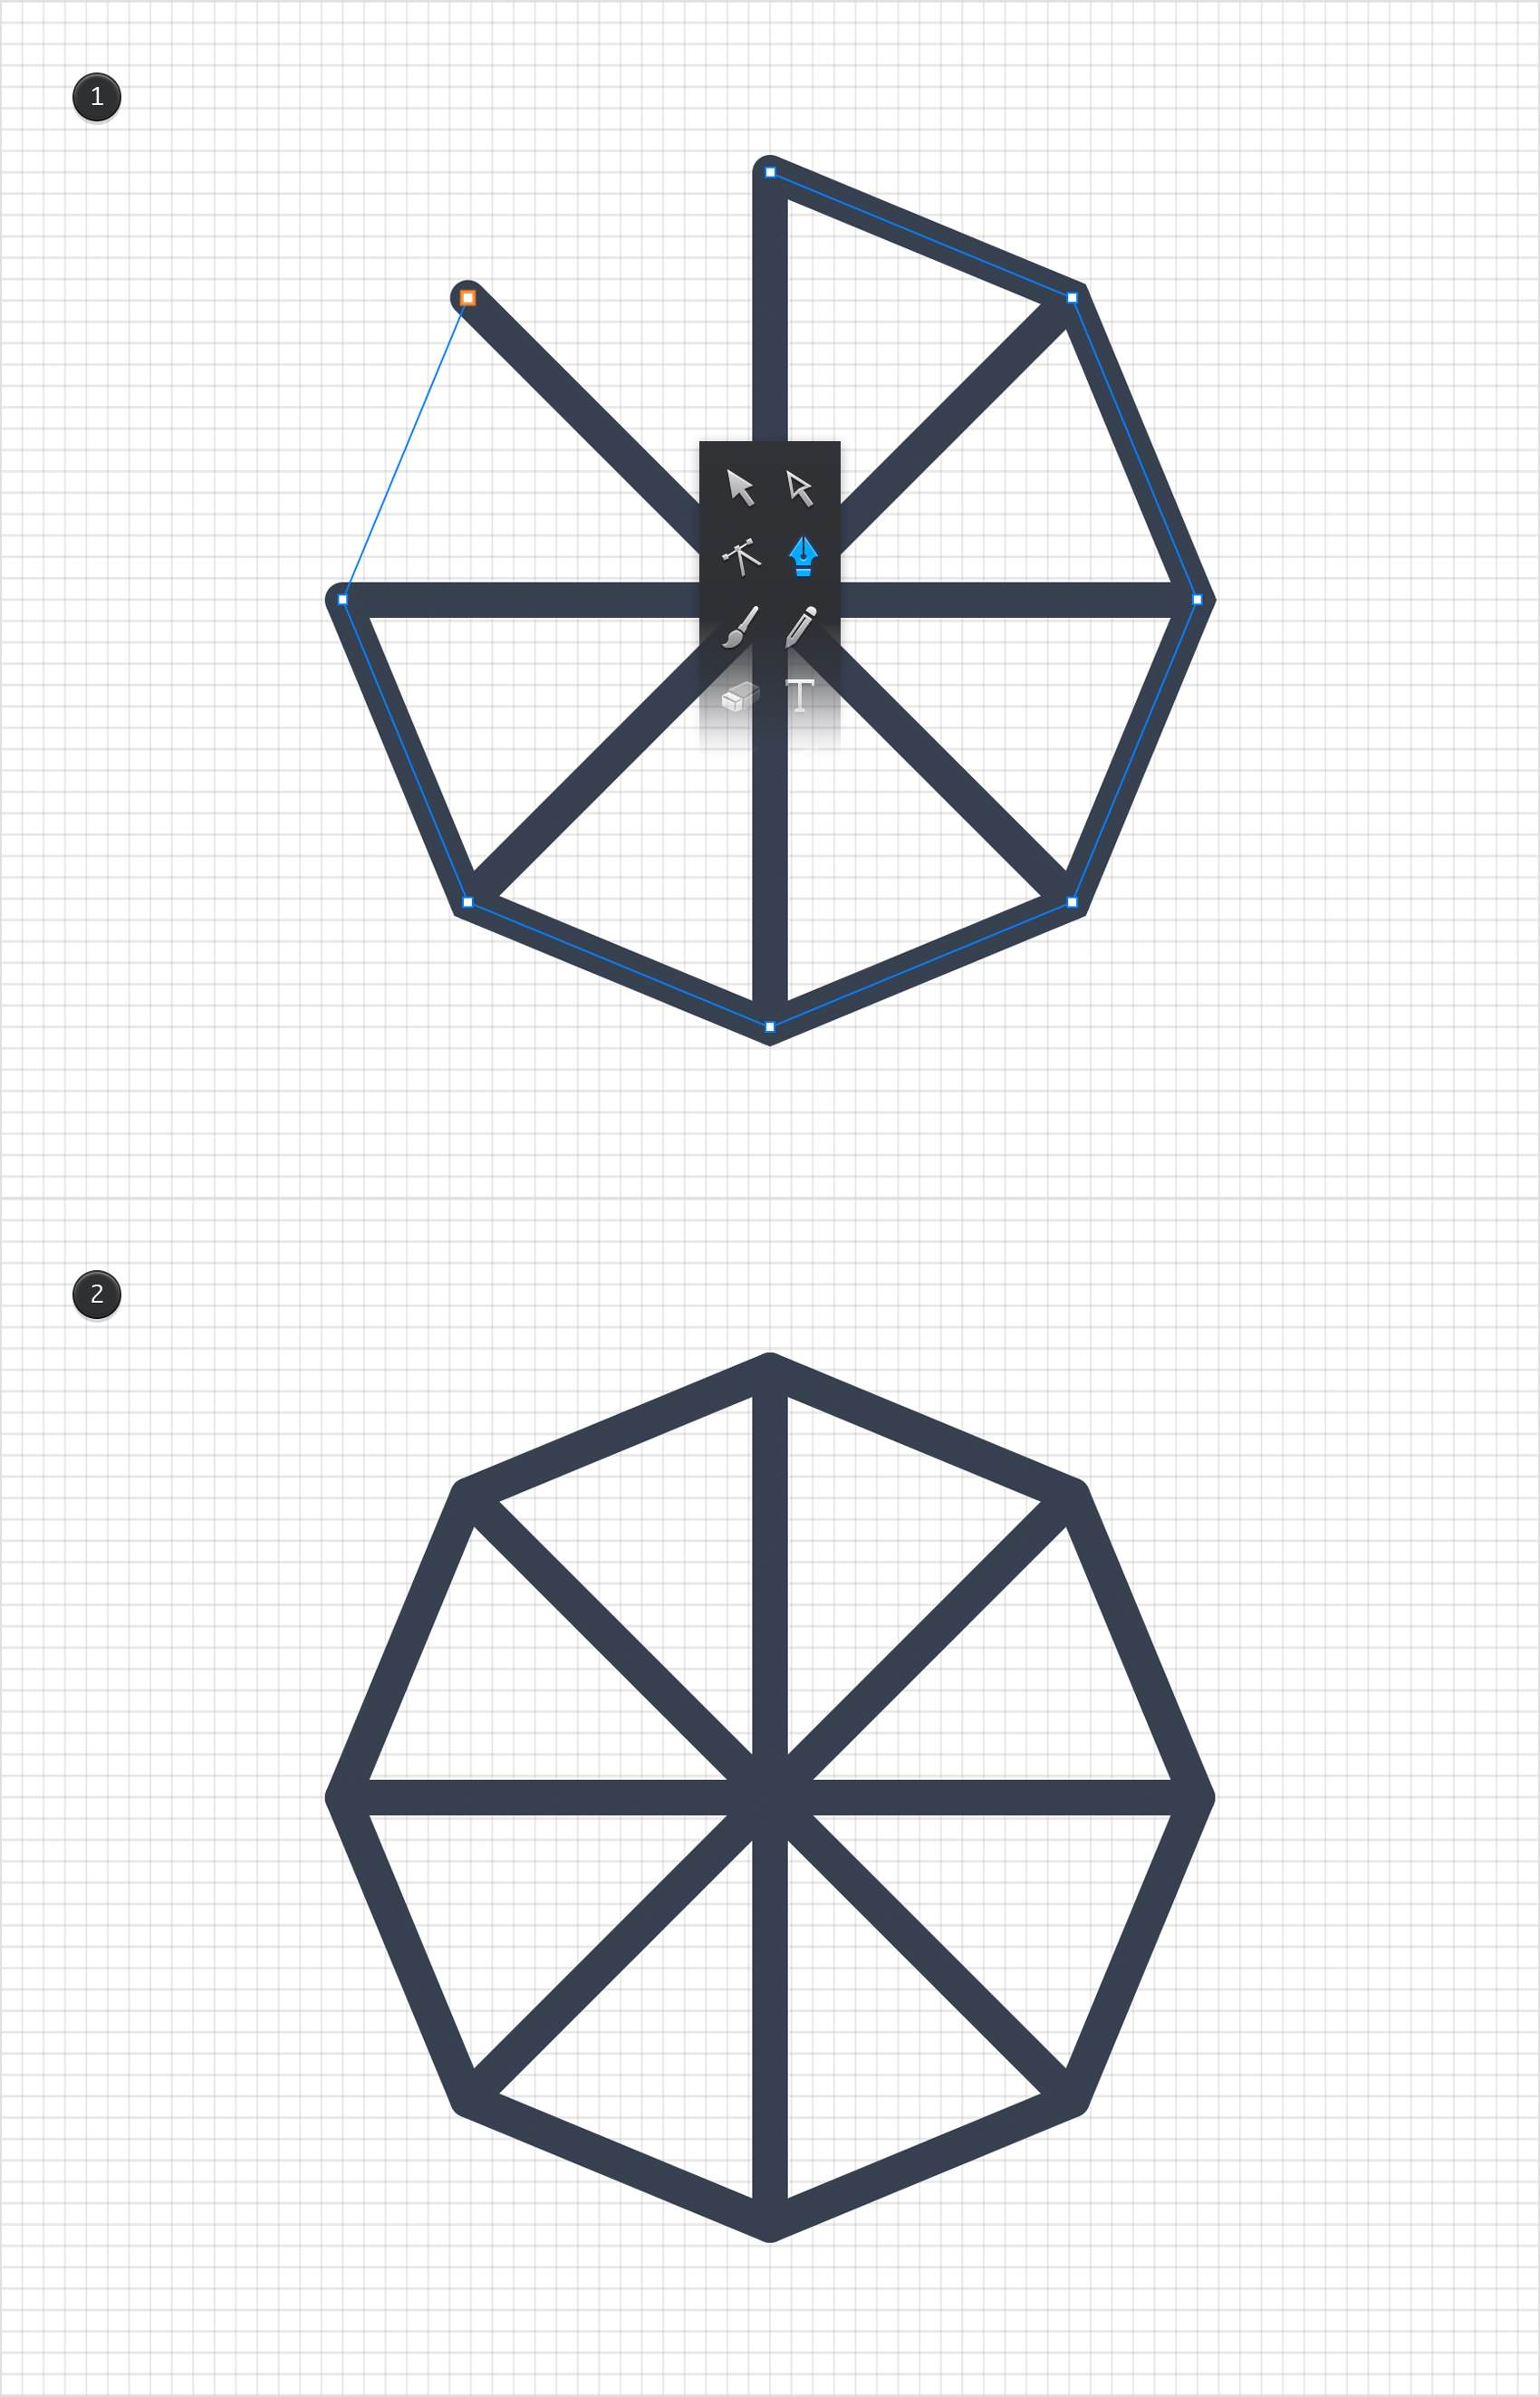
Disable the Snap to Grid (Command + Shift + ') feature and enable the Snap to Point (Option + Command + ') feature.
Using the Pen Tool (P), create a simple octagon as shown in the following image. Select this new shape and apply your style from the Styles panel.
Step 6
Enable the Snap to Grid (Command + Shift + ') feature and disable theSnap to Point (Option + Command + ') feature.
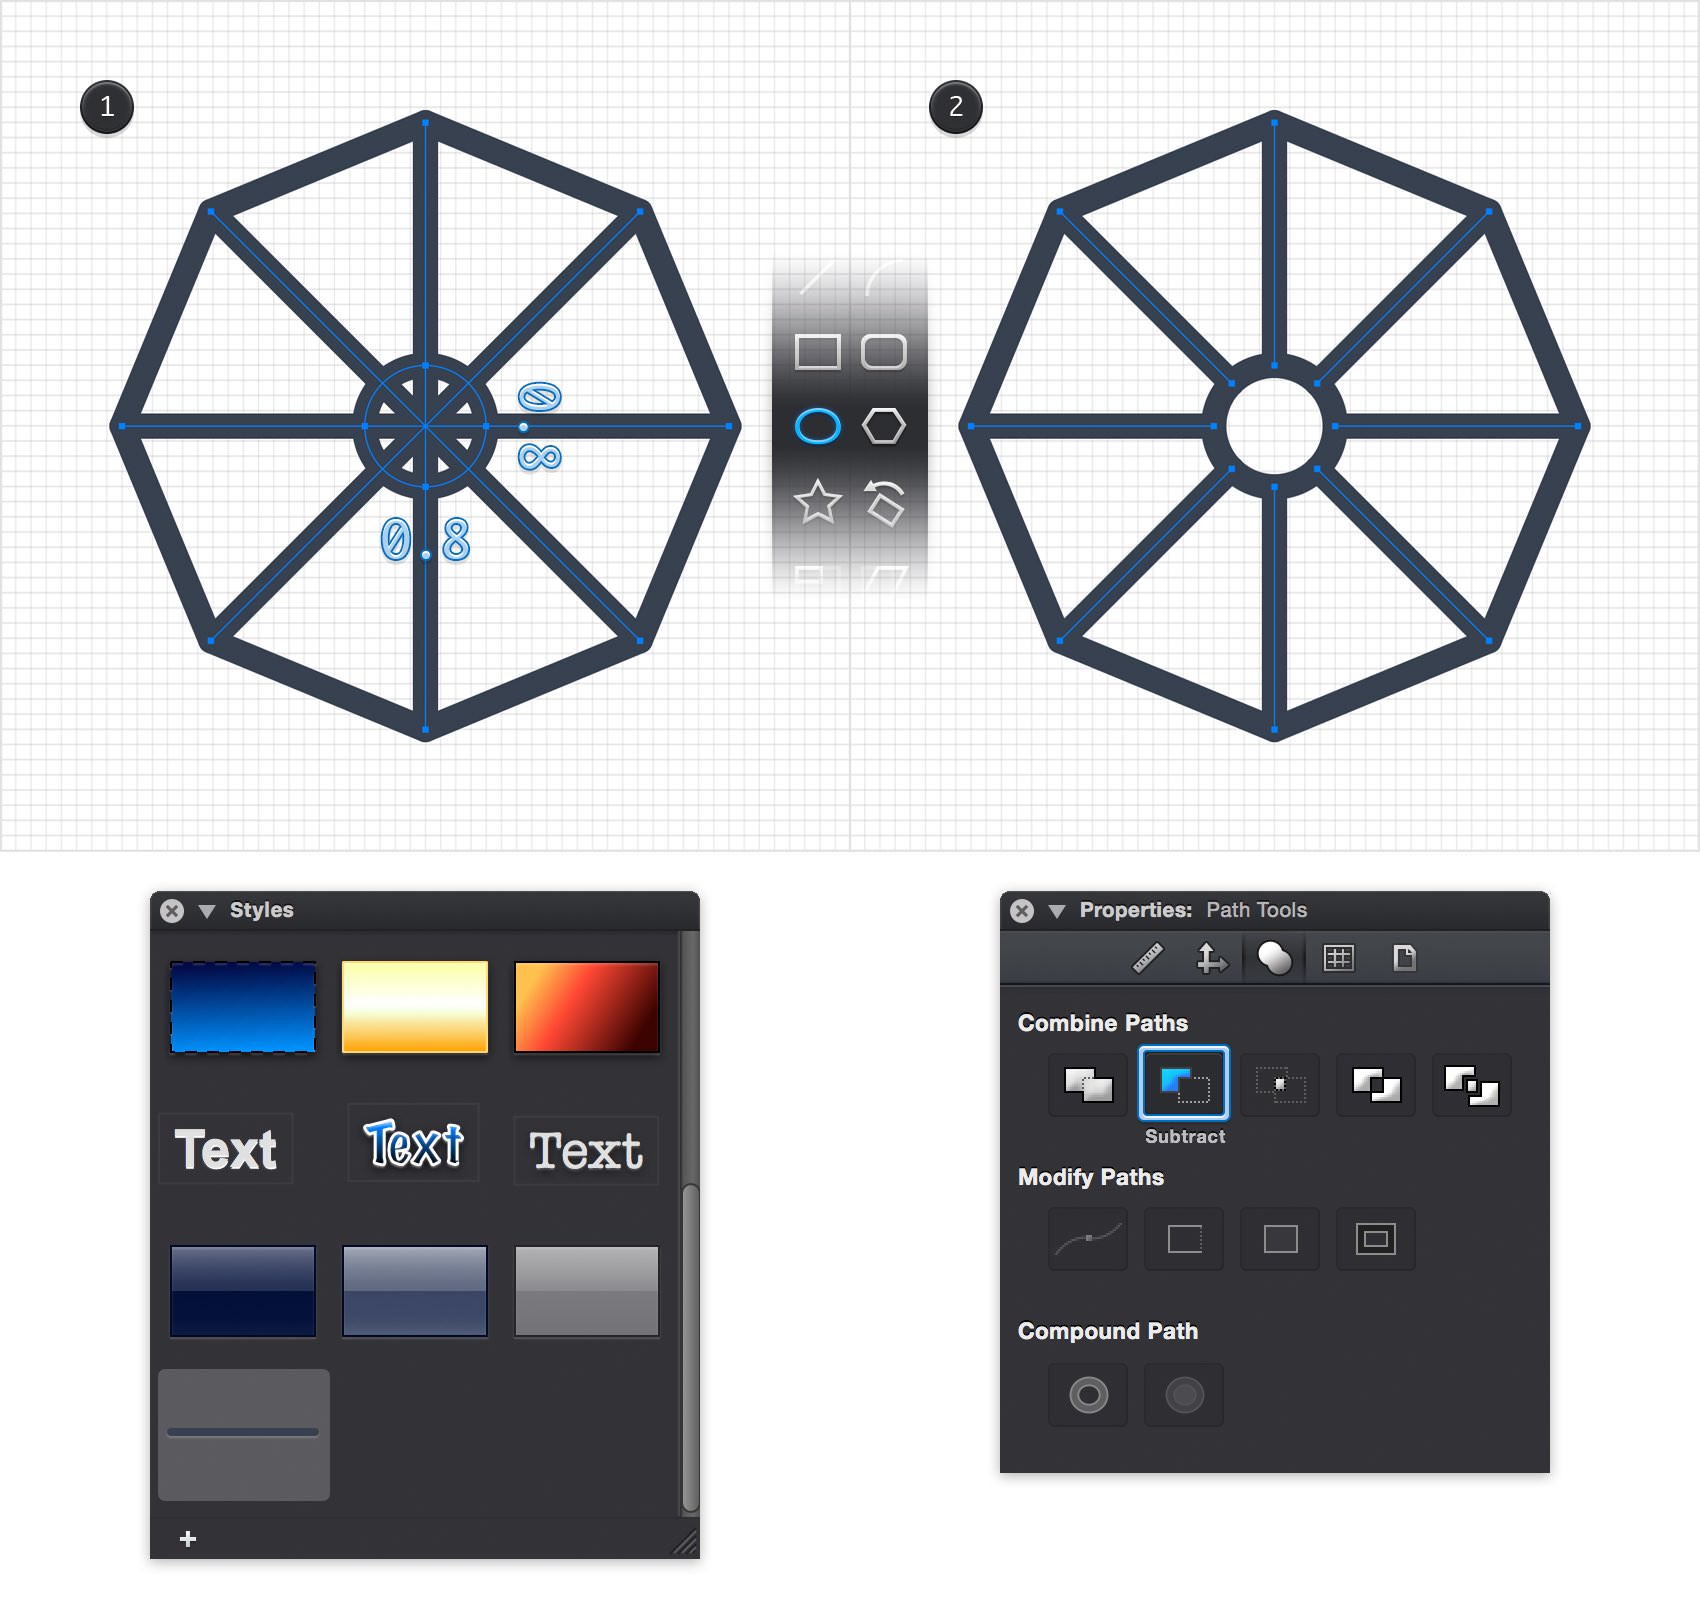
Using the Ellipse Tool (O), create a 0.8 ft circle, place it as shown in the first image and apply your style from the Styles panel. Make sure that this new shape is selected and add a copy in the same location using the Command + C > Command + Shift + V keyboard shortcut.
Pick the Move Tool (V), hold the Shift key and select the copy of your circle along with that compound path. Go to the Path Tools pane from the Properties panel and click the Subtract command.
Step 7
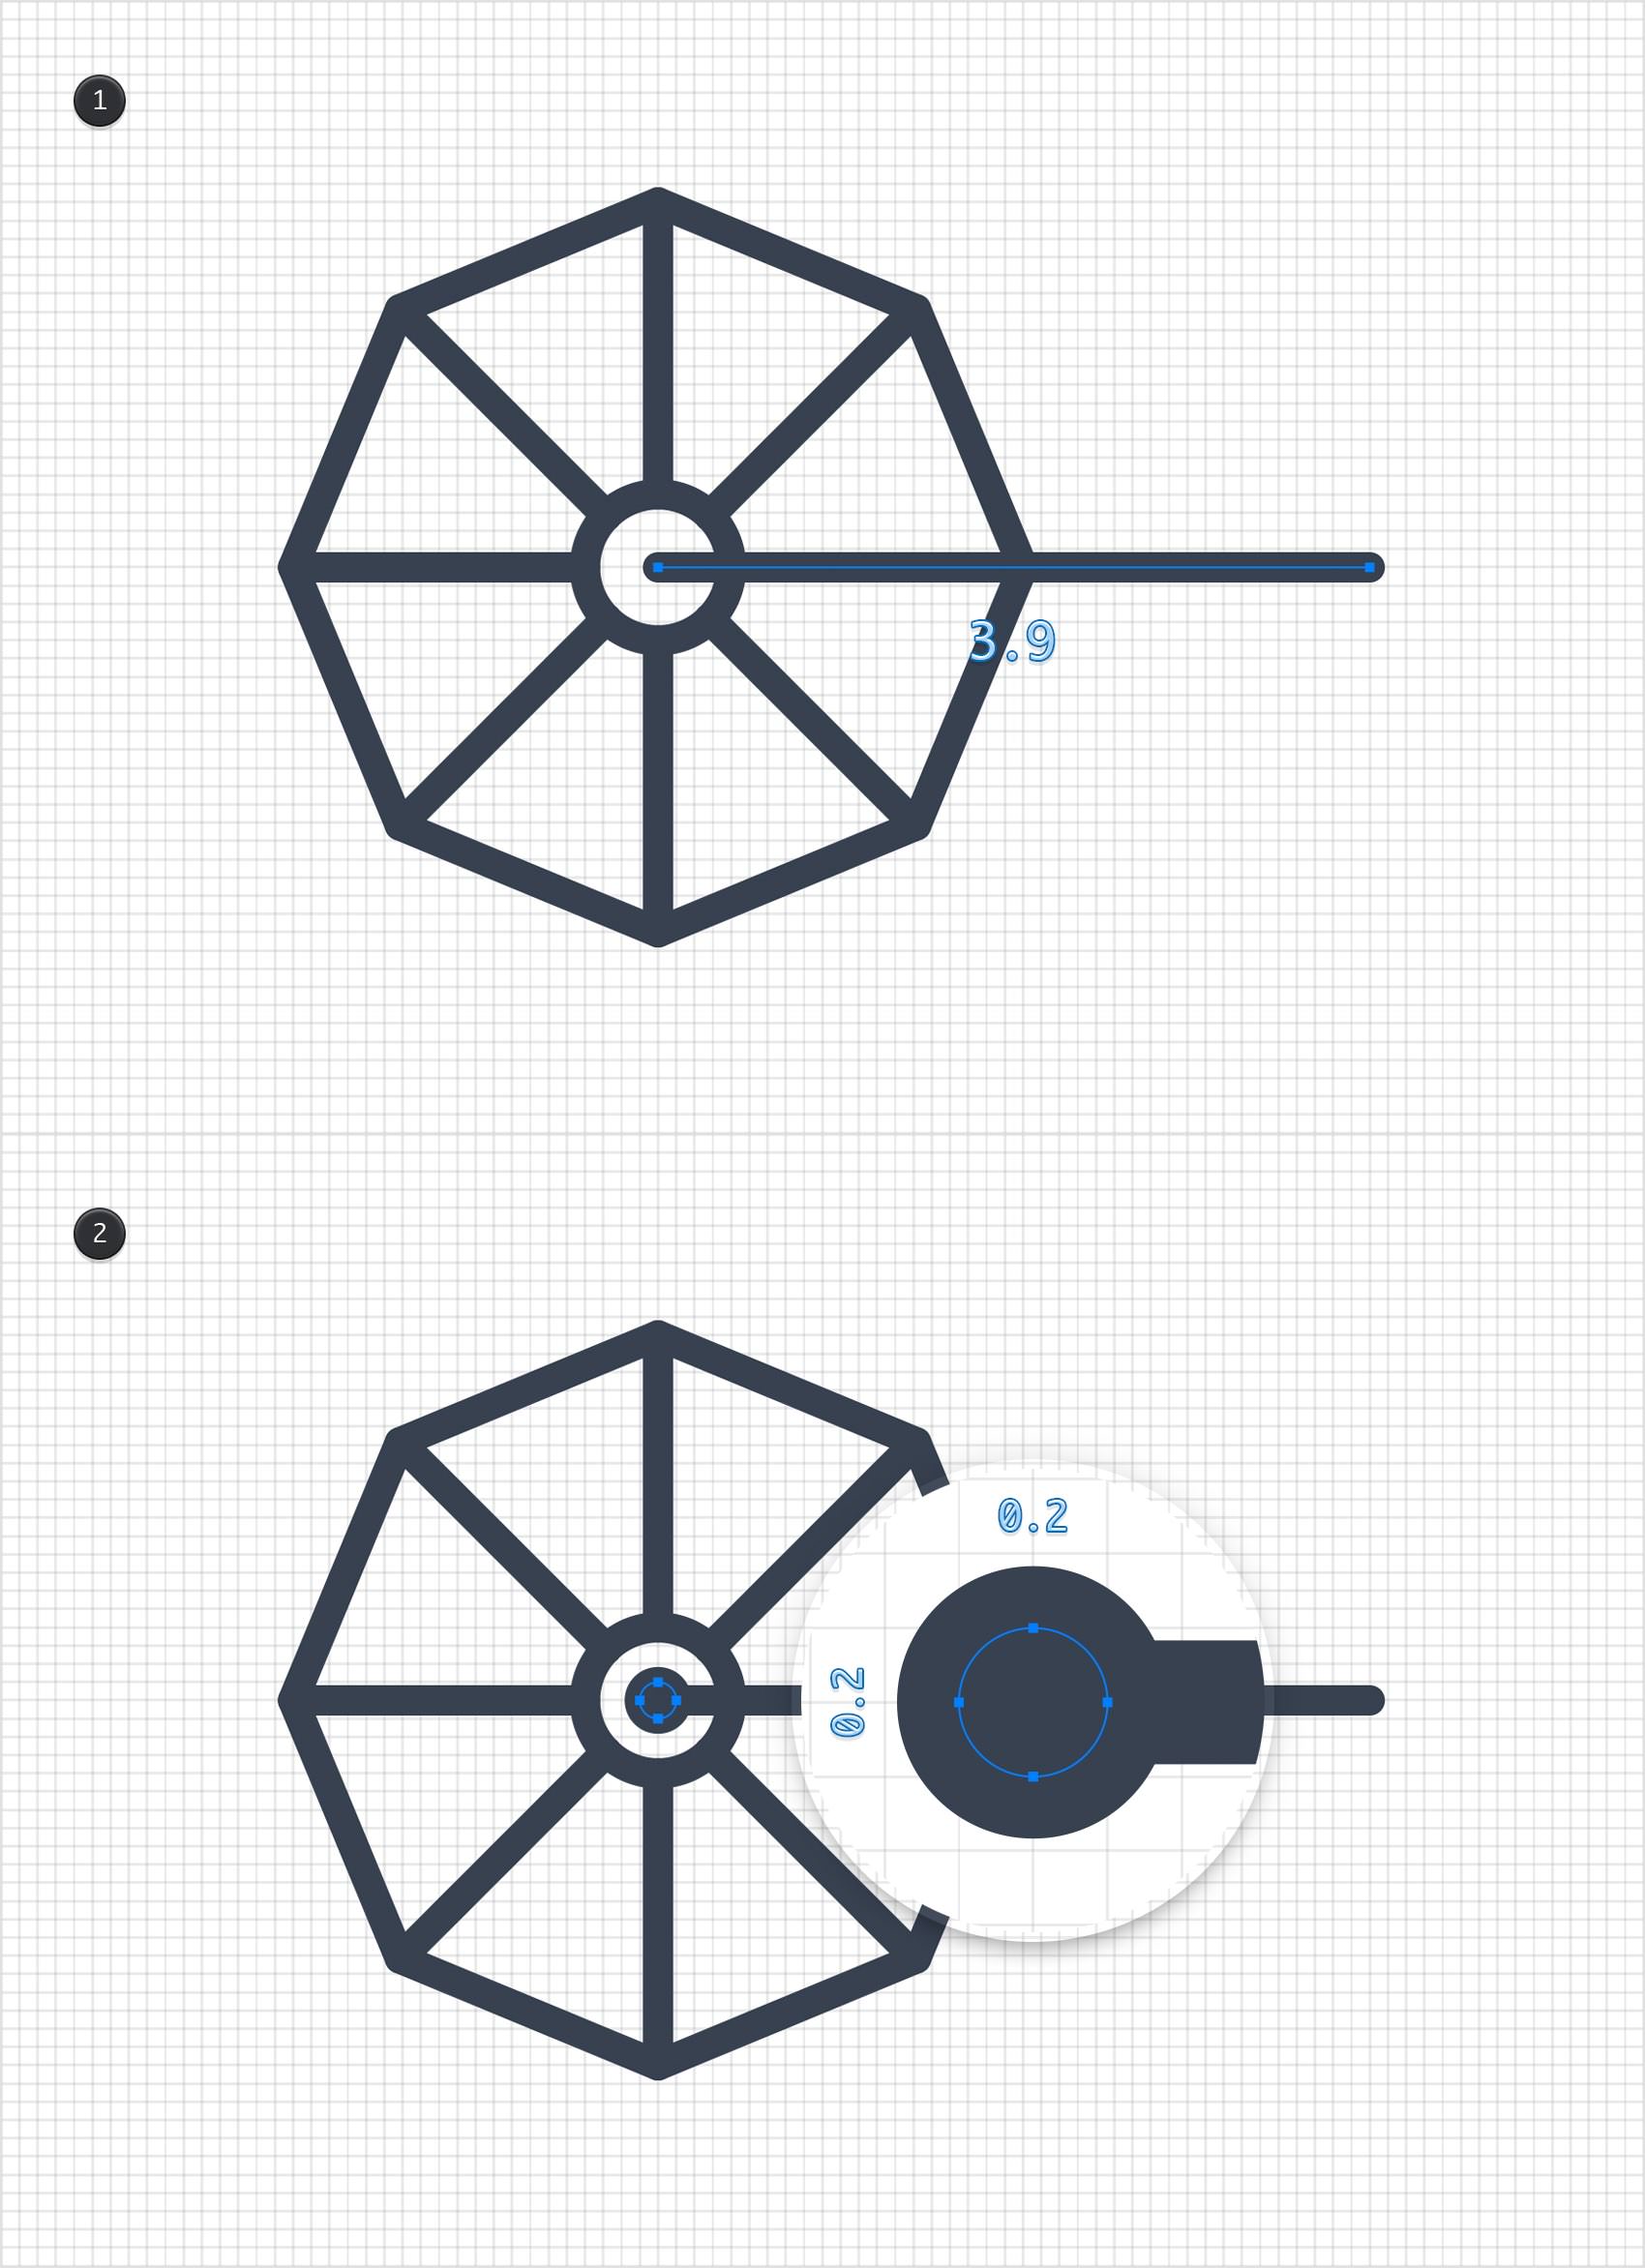
Pick the Line Tool (L) and create a 3.9 ft path. Place it as shown in the first image and apply your style from the Styles panel.
Switch to the Ellipse Tool (O) and create a 0.2 ft circle. Place it as shown in the second image and apply that same style.
Step 8
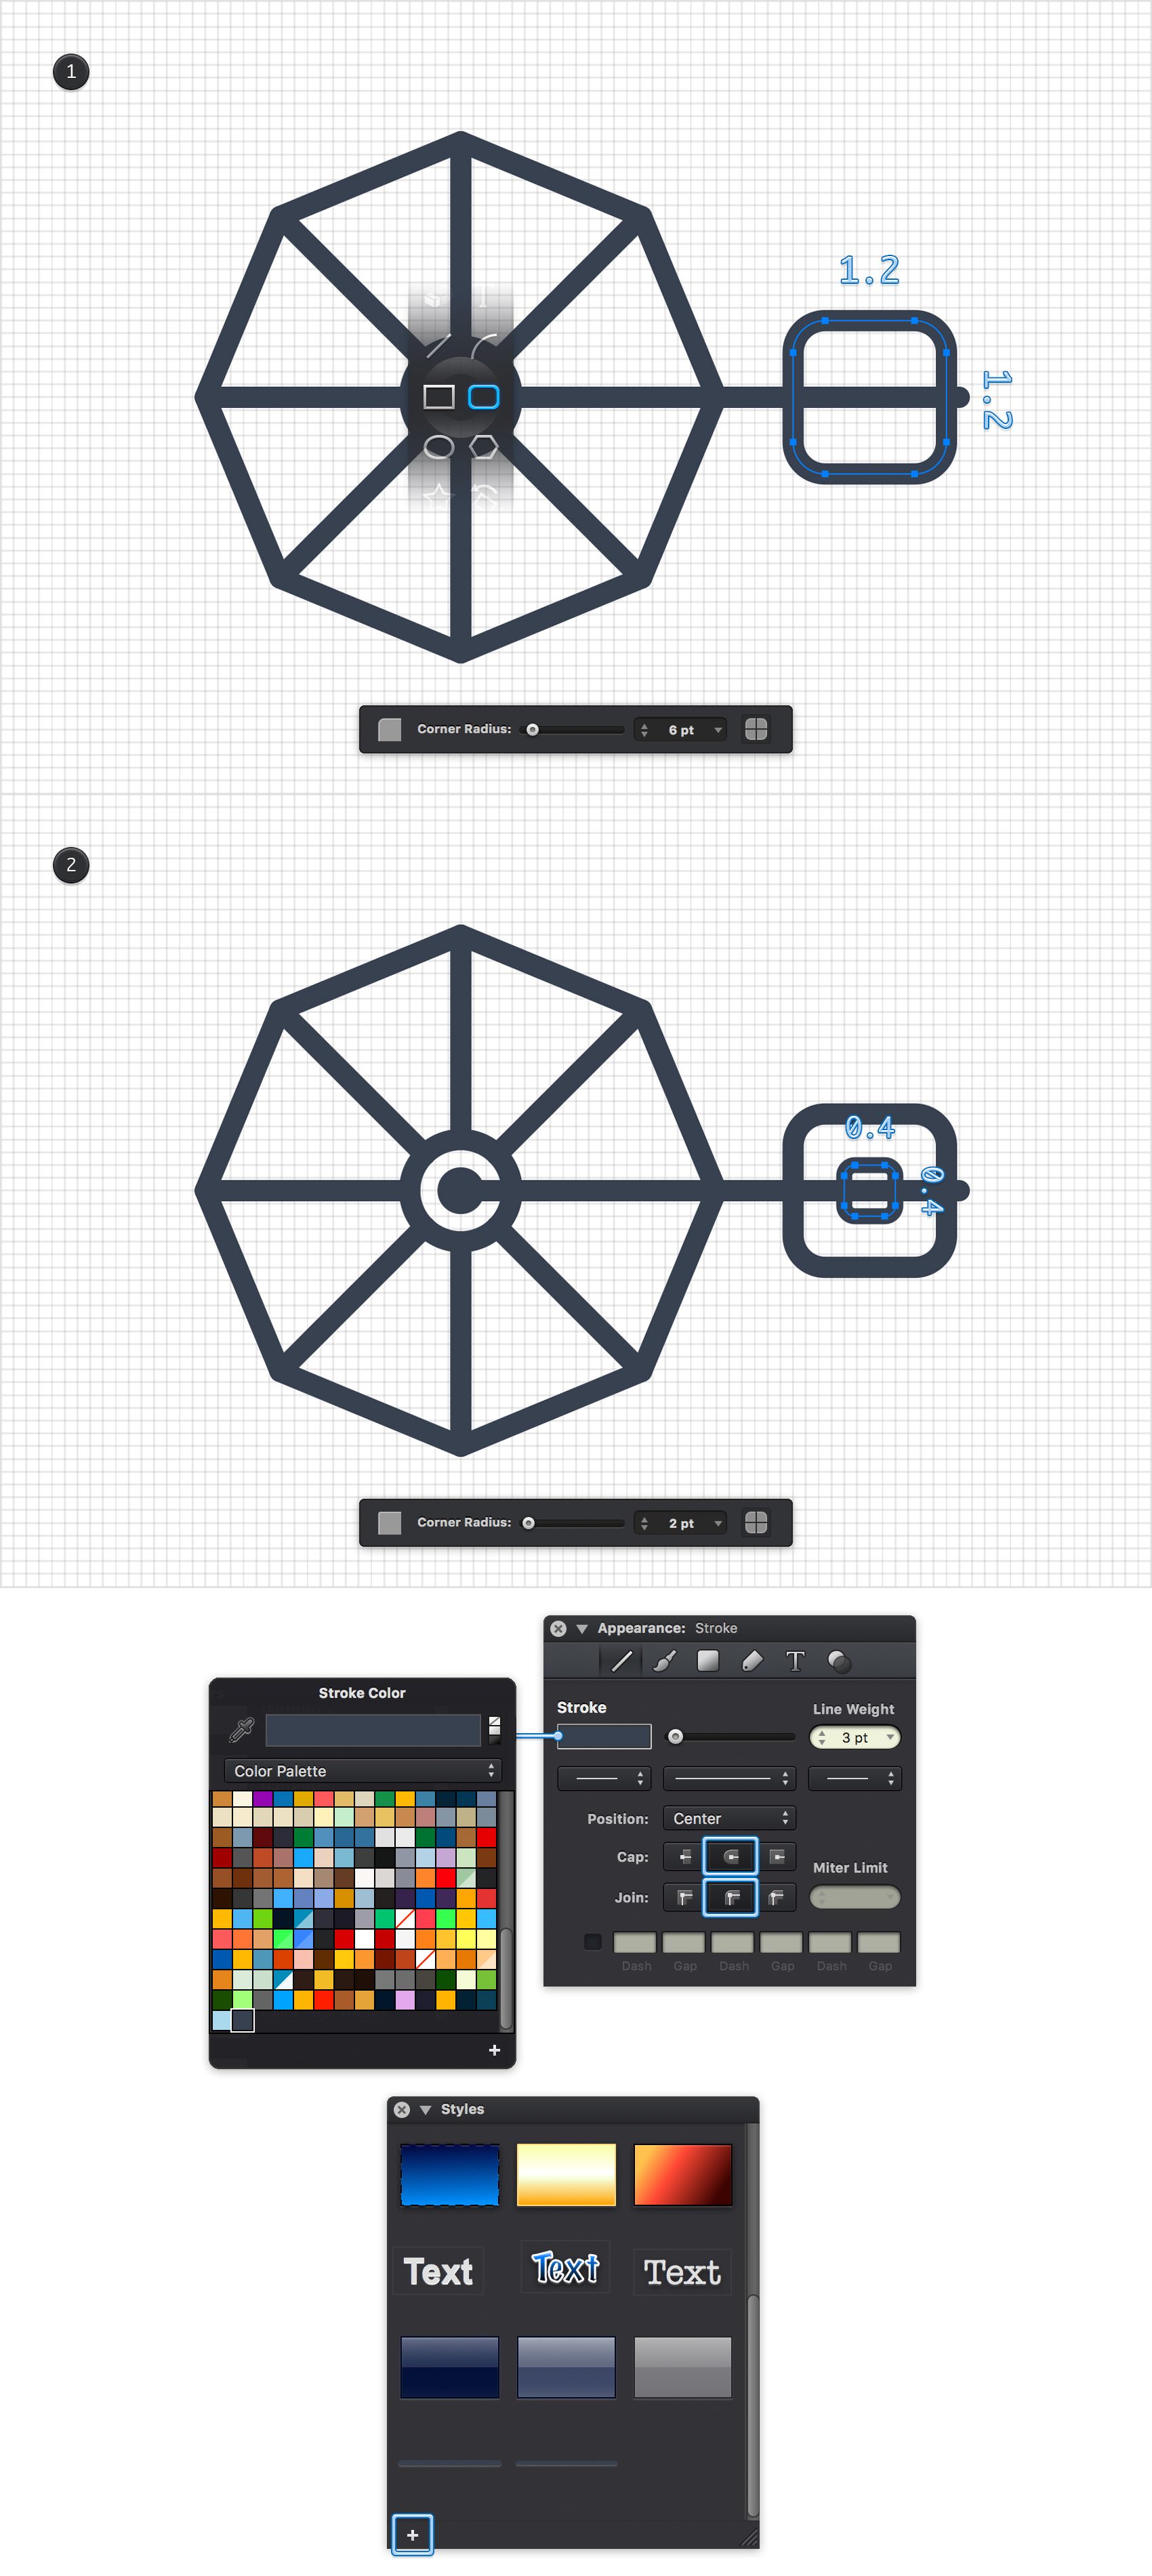
Pick the Rounded Rectangle Tool (Shift + M), focus on the Tool Options bar and drag that Corner Radius slider to 6 pt. Move to your canvas, create a 1.2 x 1.2 ft, place it as shown in the first image and apply your style from the Styles panel.
Make sure that the Rounded Rectangle Tool is still active, return to the Tool Options bar and drag the Corner Radius to 2 pt. Create a 0.4 x 0.4 ft shape, place it as shown in the second image and apply that same style. Make sure that this shape stays selected focus on the Stroke pane. Drag that Line Weight slider to 3 pt and then move to the Styles panel and save a second style using that same plus button.
Step 9
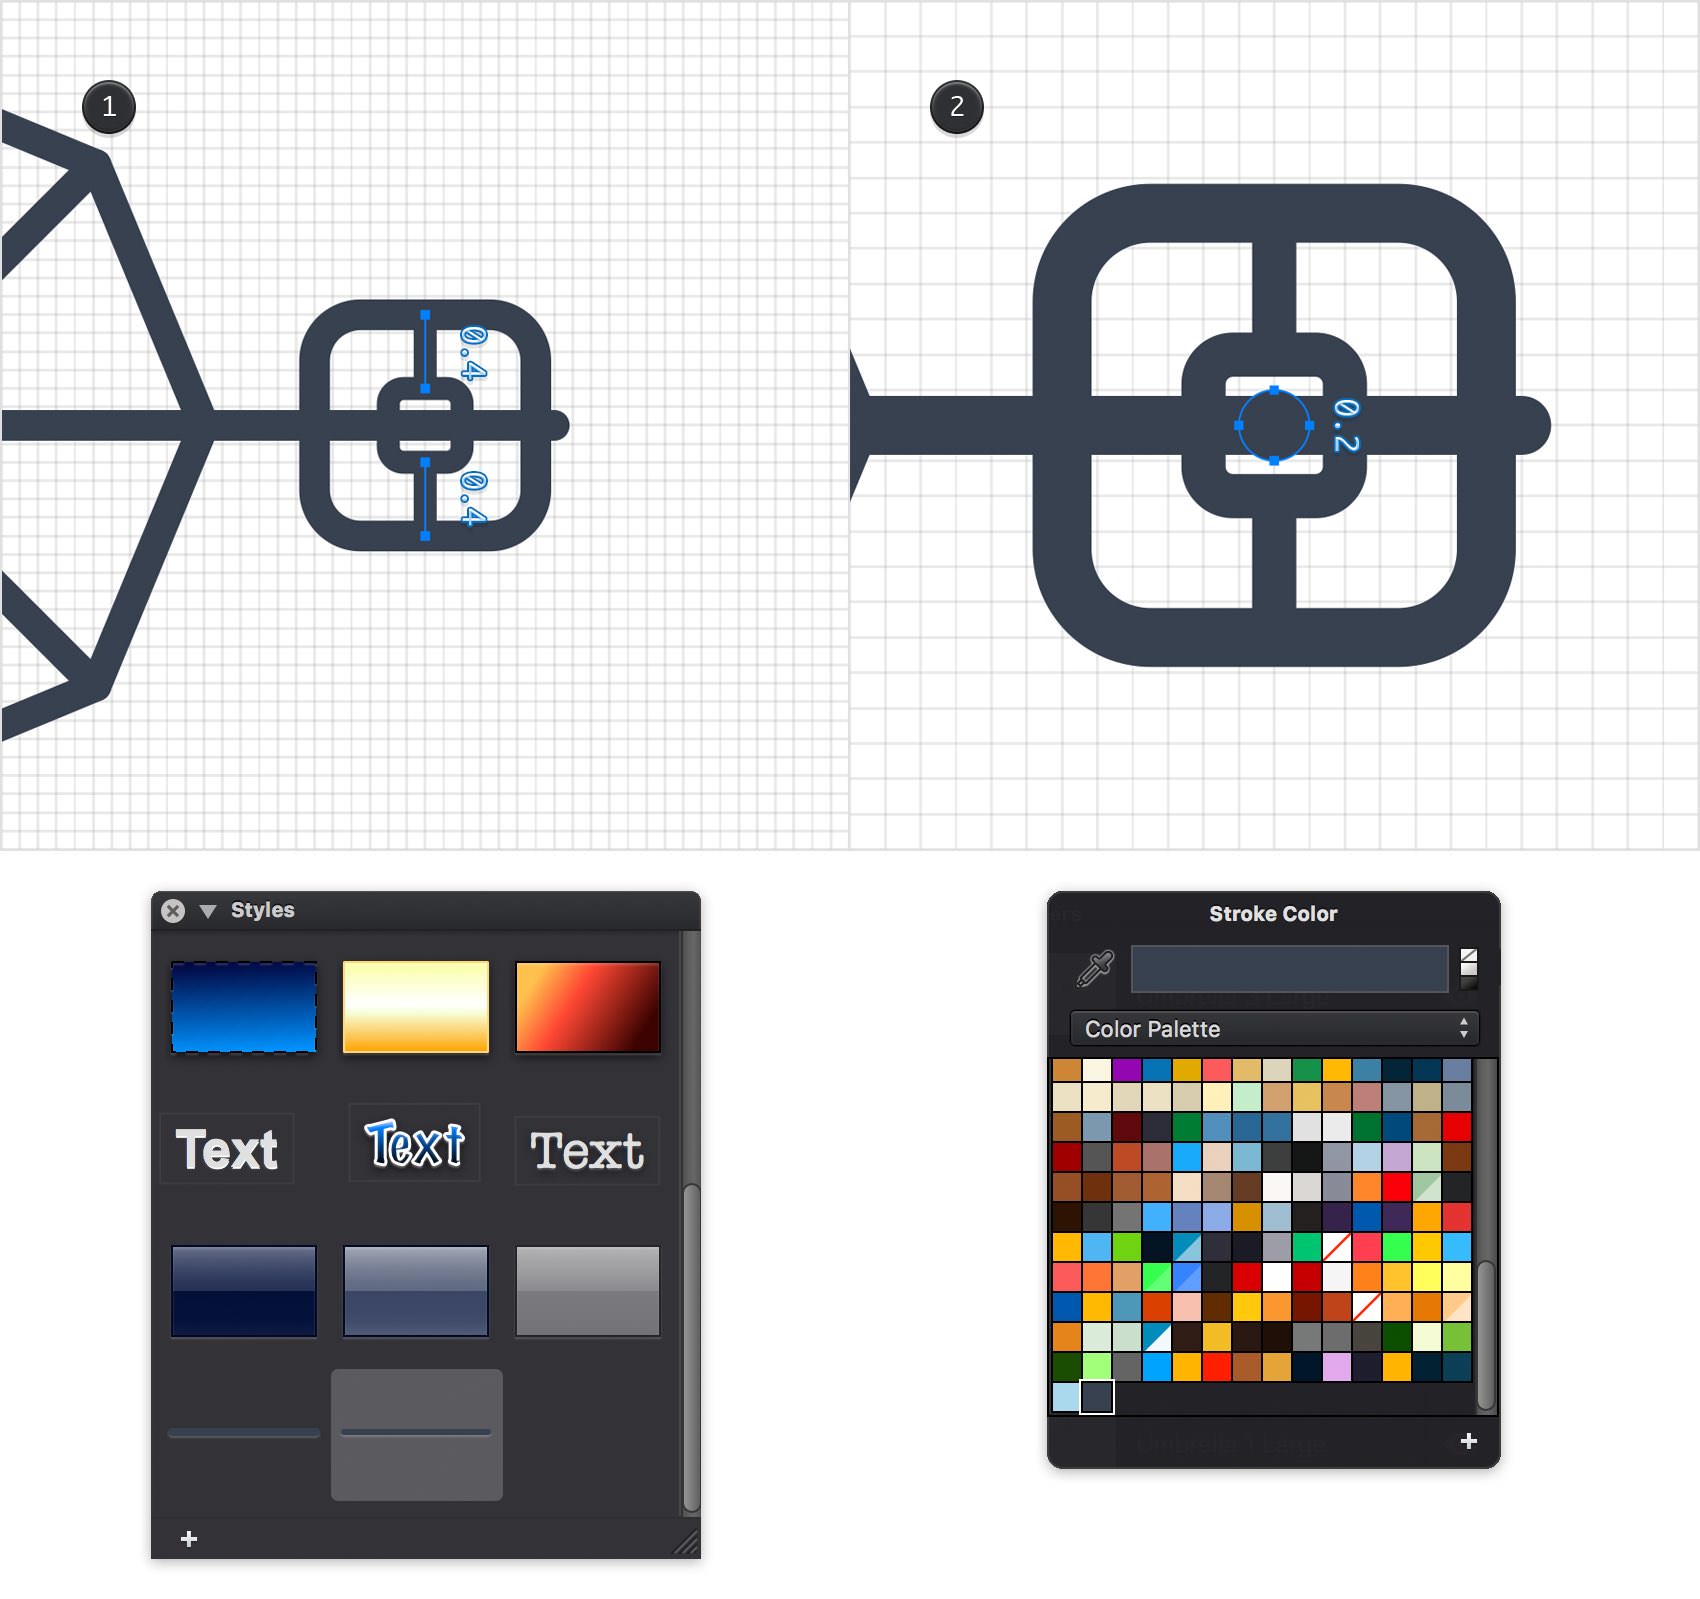
Pick the Line Tool (L) and create two 0.4 ft vertical paths. Place these straight lines as shown in the first image and apply your second style from the Styles panel.
Switch to the Ellipse Tool (O) and create a 0.2 ft circle. Place this new shape as shown in the second image and fill it with your color from the Color Palette.
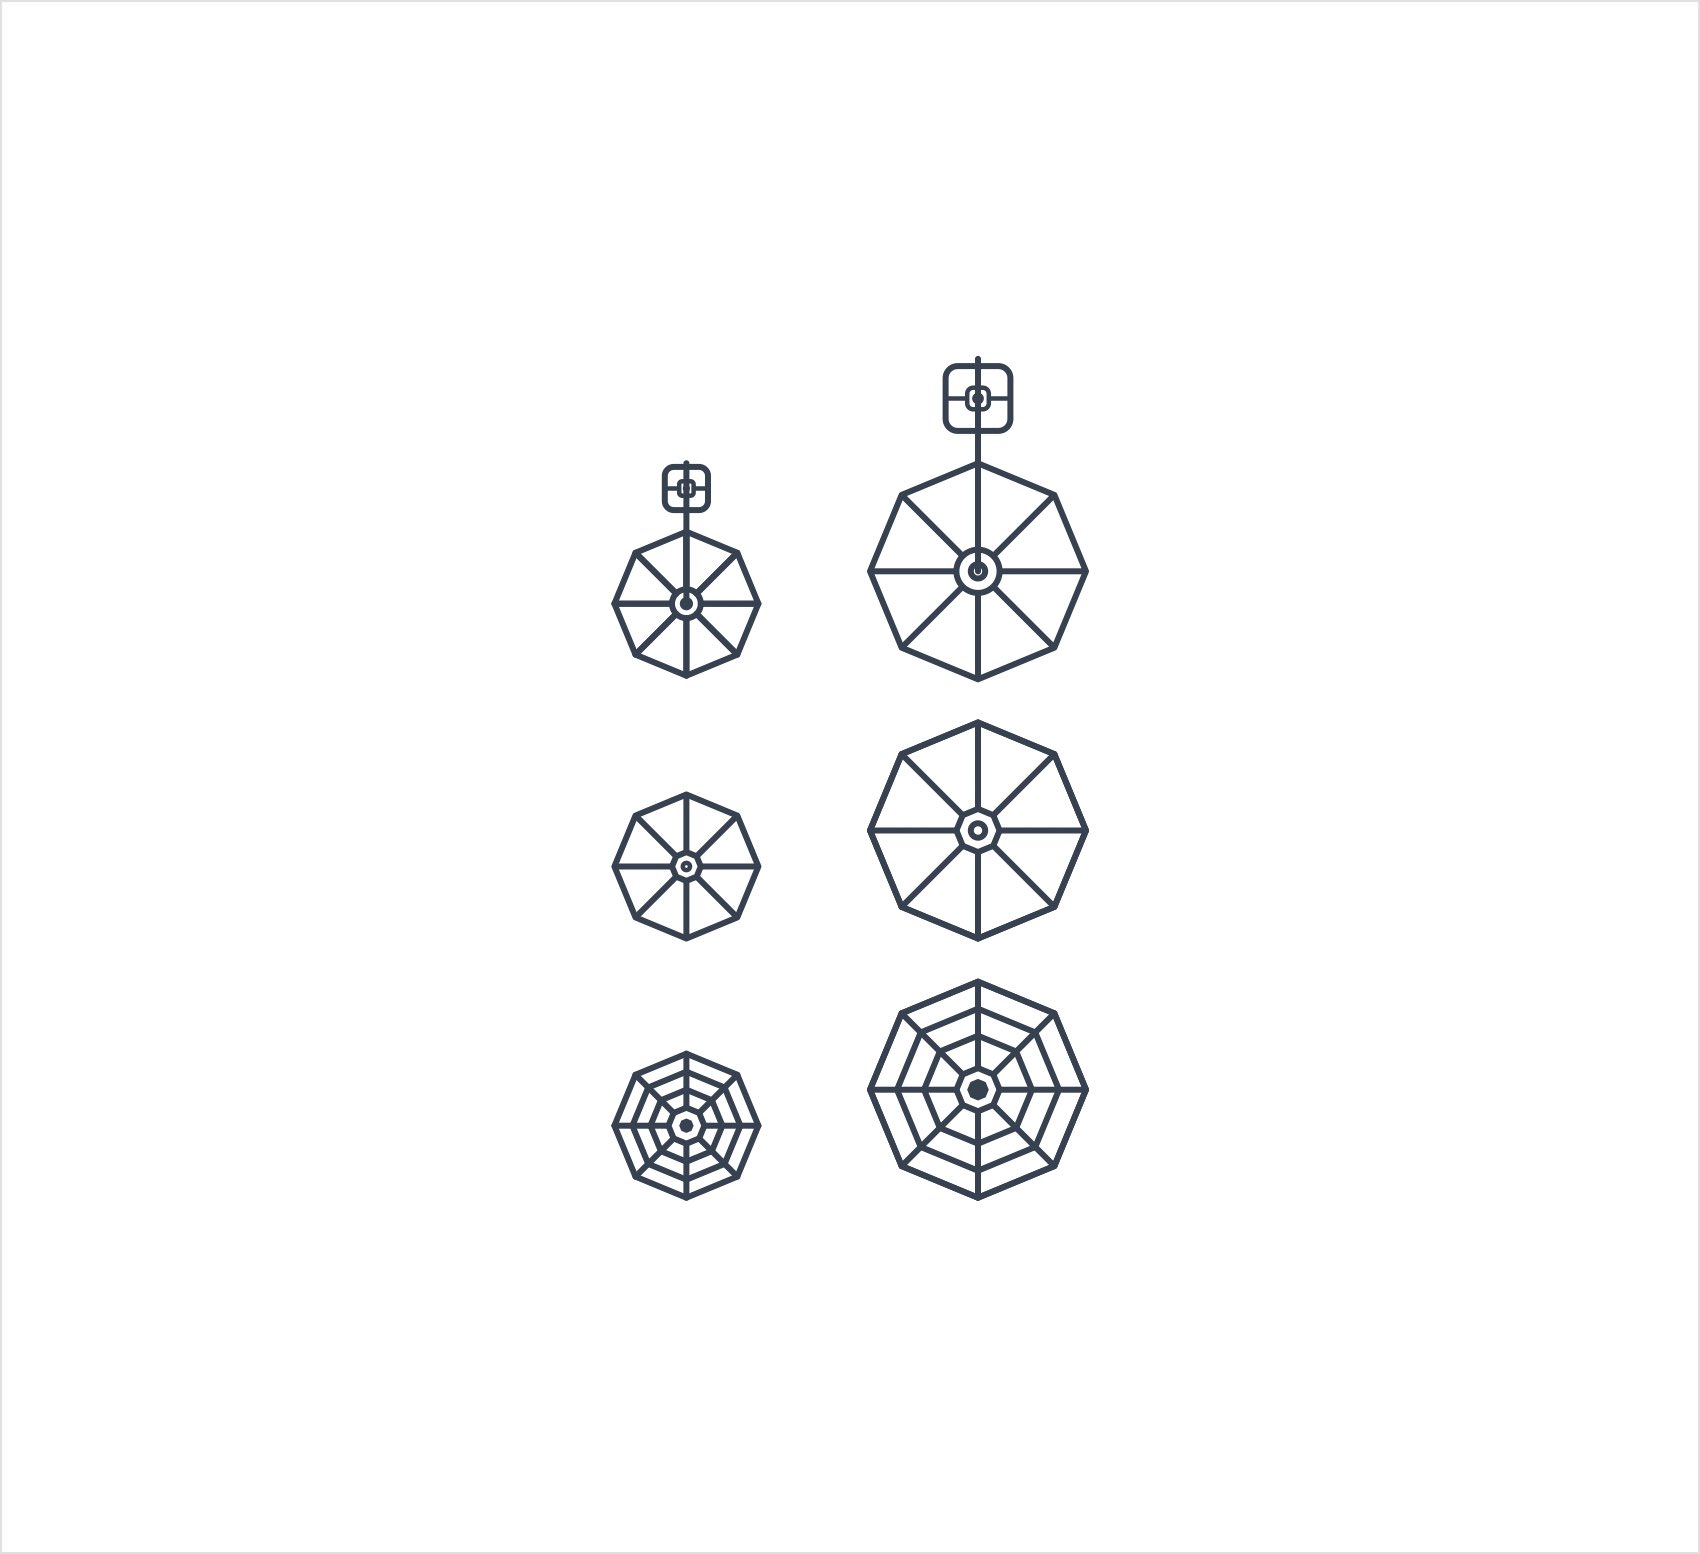
Using the same tools, techniques and styles you can create a variety of umbrella symbols as shown in the following image.
Step 10
Focus on the Layers panel, double-click the name of the existing layer and rename it "Umbrella". Move to the bottom of the panel and use that plus button to add a second layer. Make sure this new layer stays selected, as the new shapes you are about to create will go here. Also, rename it "Plant".
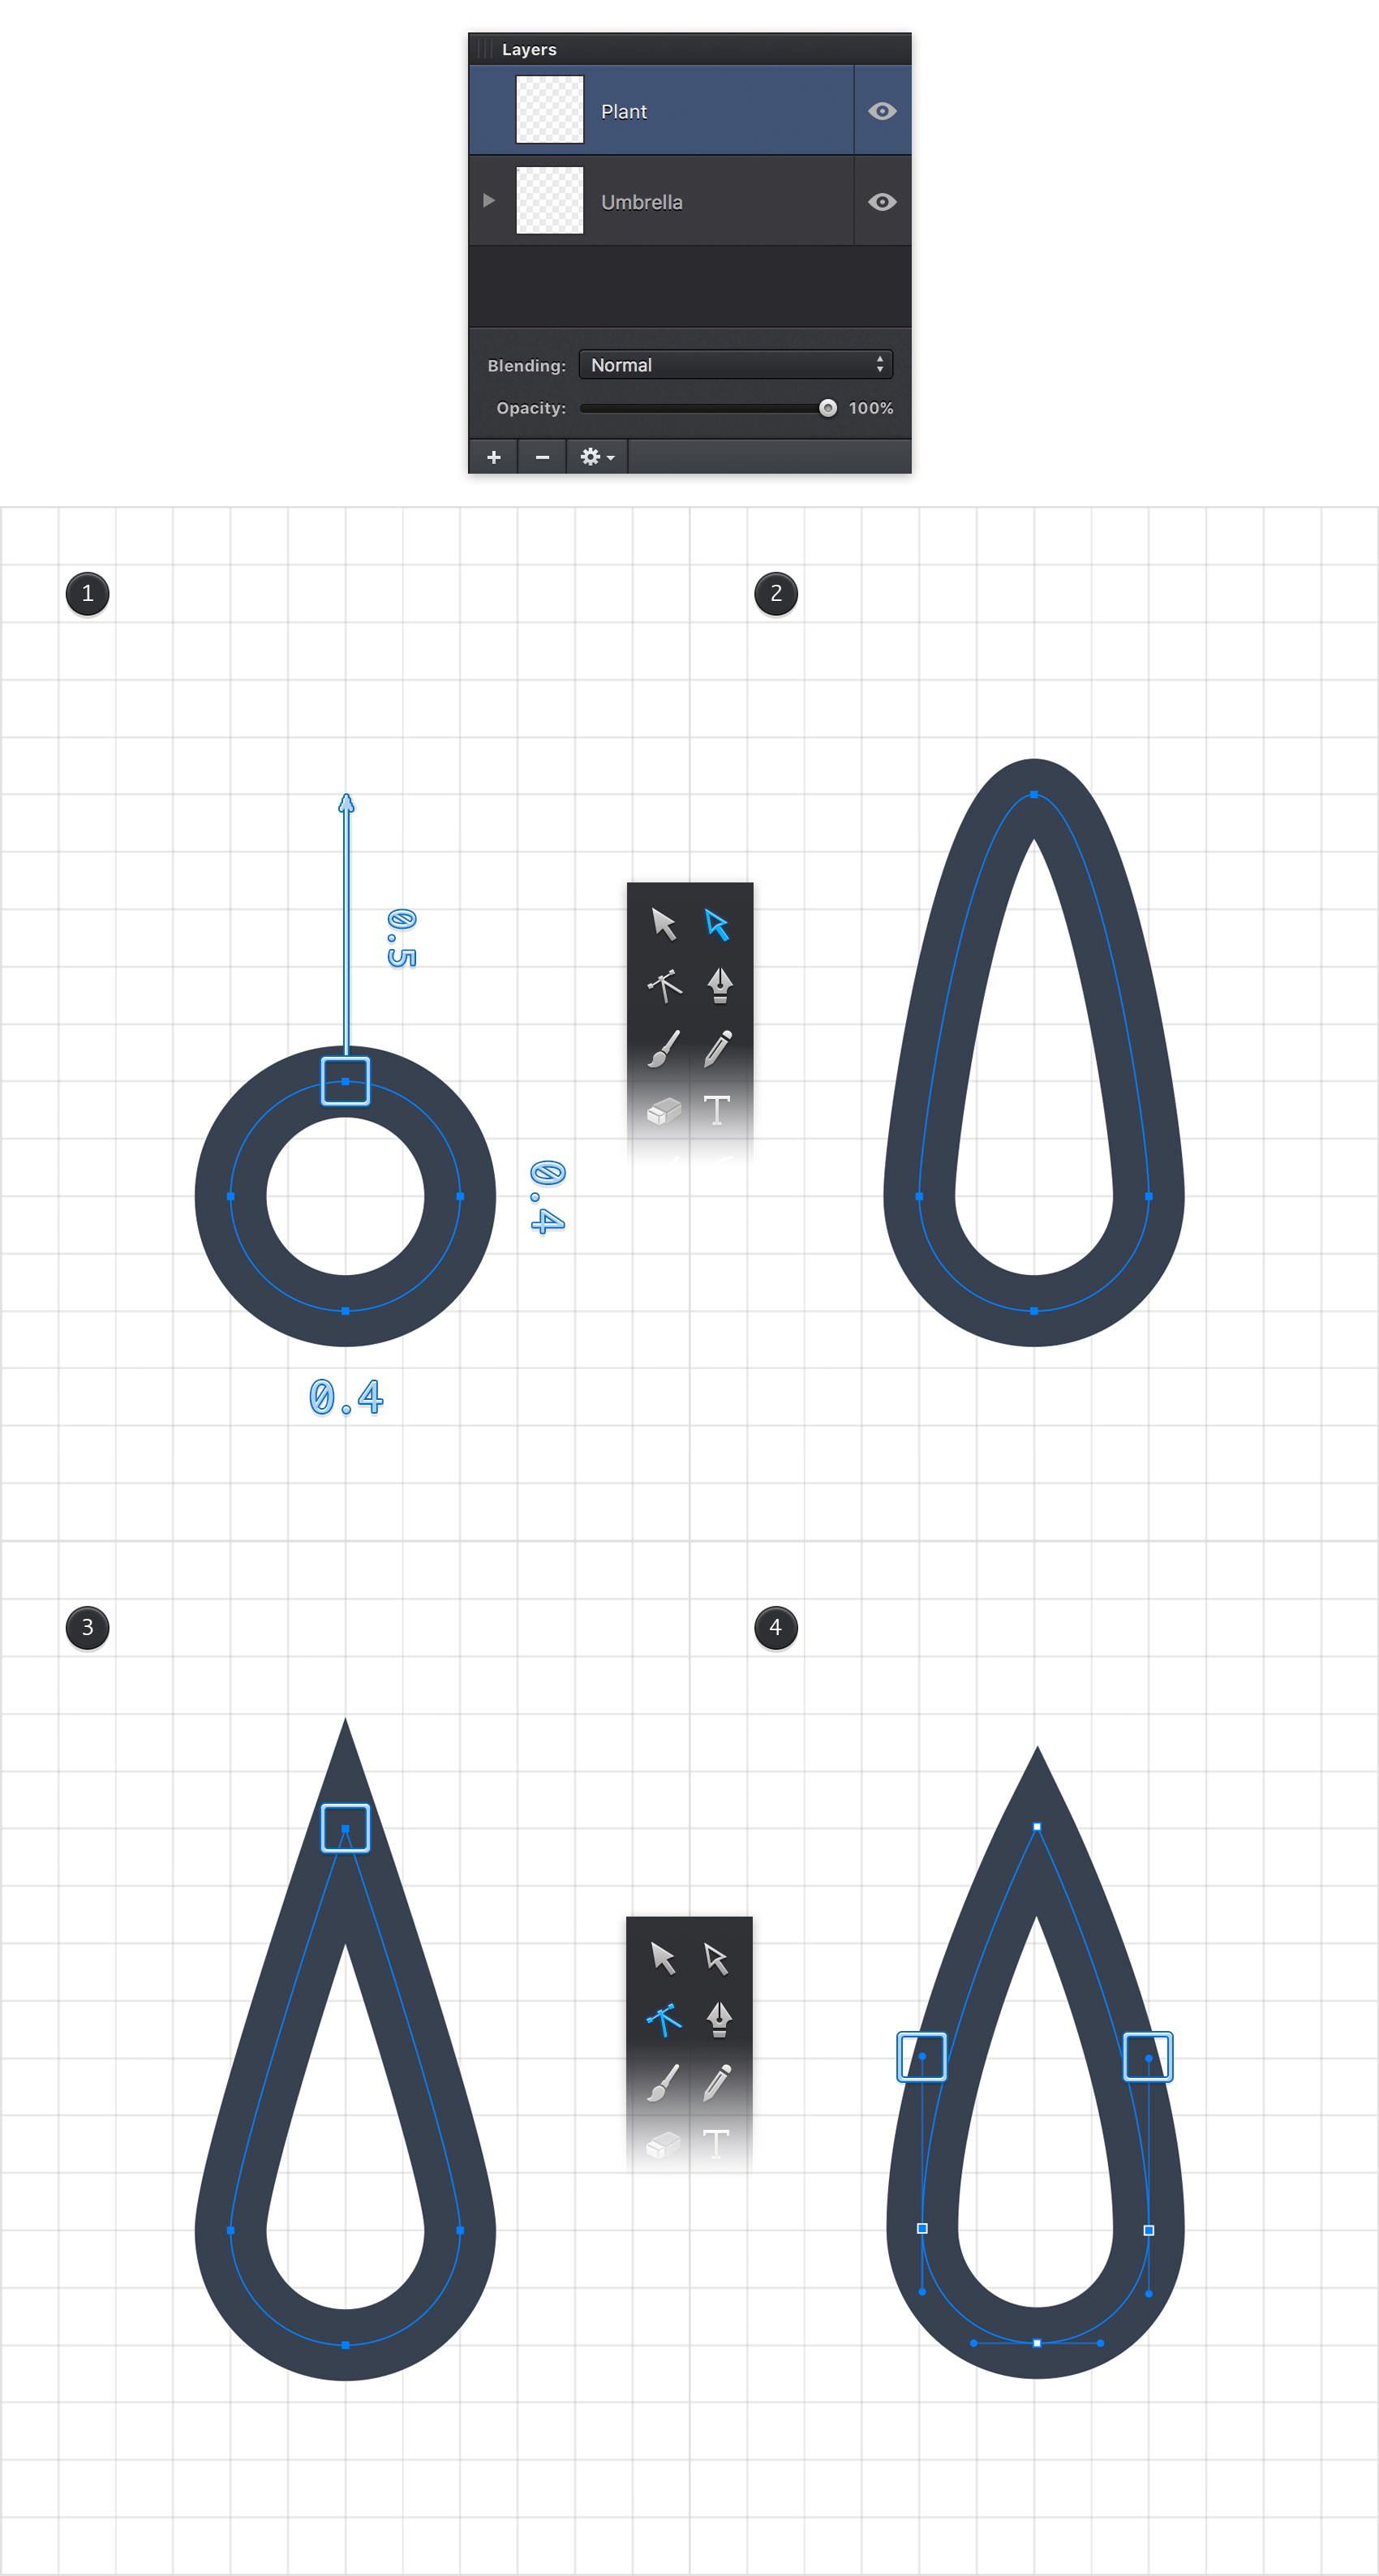
Using the Ellipse Tool (L), create a 0.4 ft circle and apply your second style from the Styles panel. Switch to the Path Selection Tool (A), select the top anchor point and drag it 0.5 ft up as shown in the second image. Pick the Convert Anchor Tool (Shift + C) and click the anchor point that you just moved. Reselect the Path Selection Tool (A), focus on the left and right anchor points and drag the top handles as shown in the fourth image. Once again, the grid and the Snap to Grid feature will ease your work.
Step 11
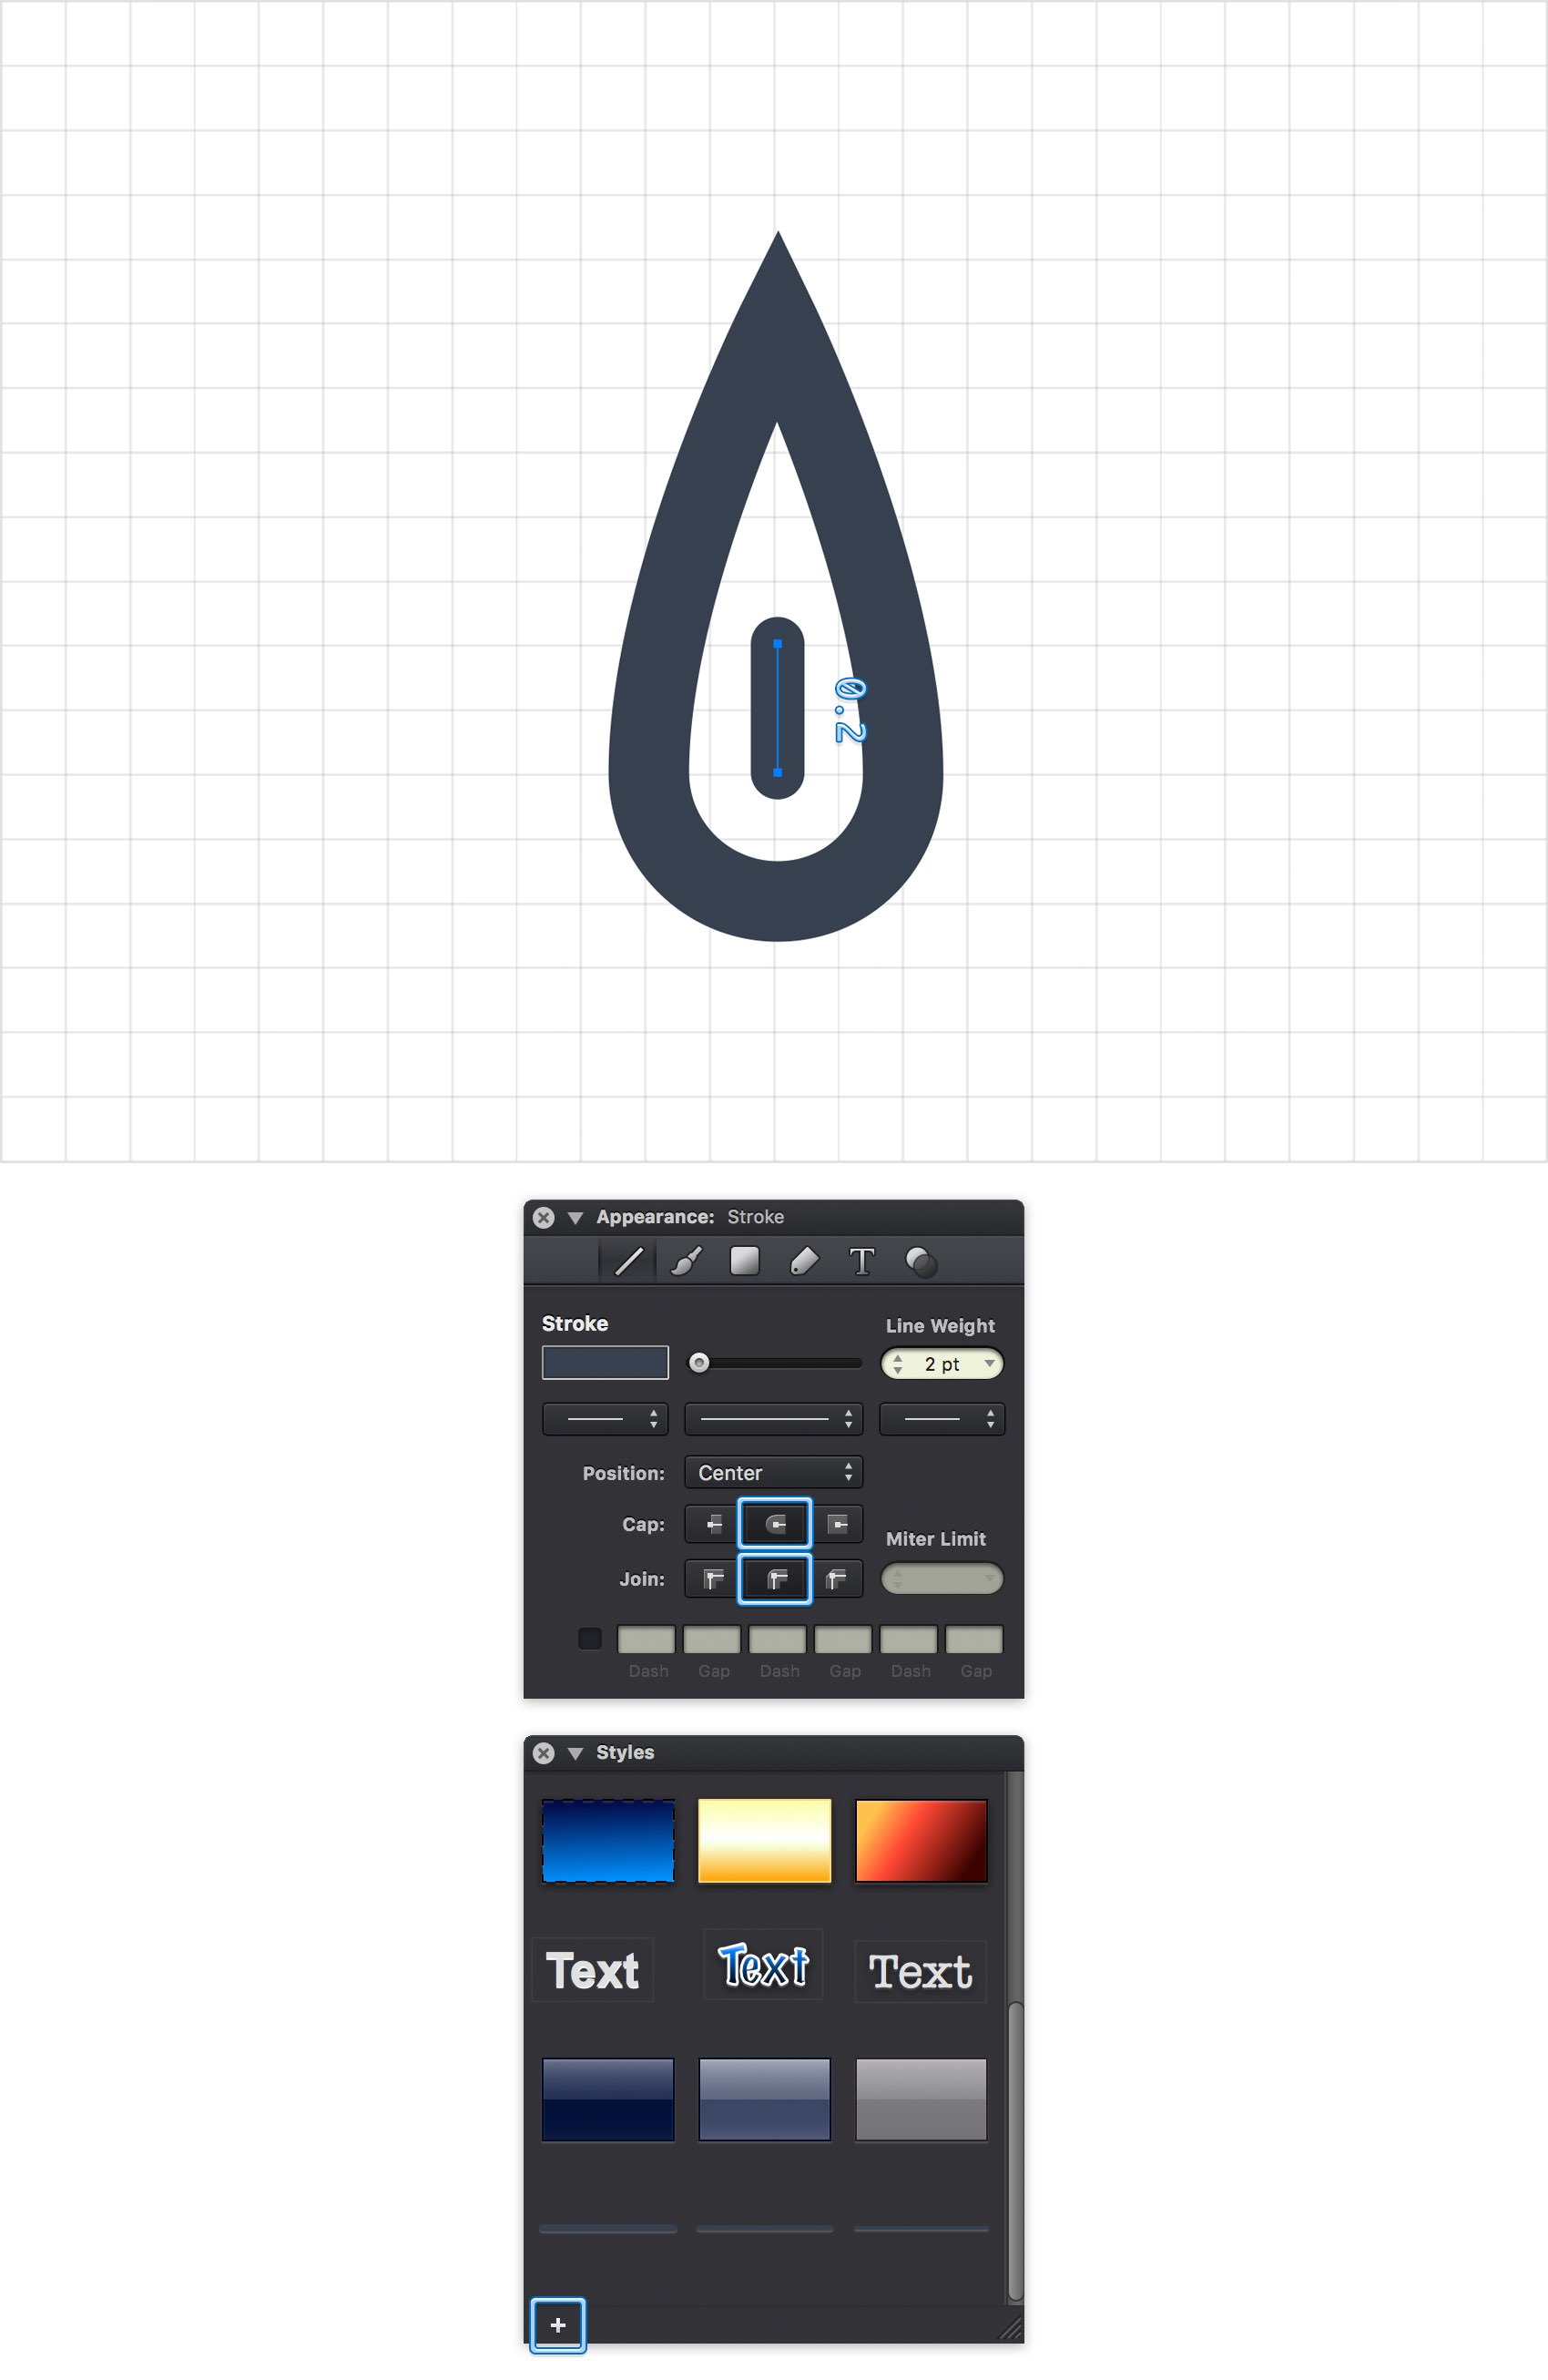
Using the Line Tool (L), create a 0.2 ft vertical path and place it as shown below. Apply one of your styles for this tiny path and go to the Stroke pane.
Drag the Line Weight slider to 2 pt and then move to the Styles panel and save your third style using that same plus button.
Step 12
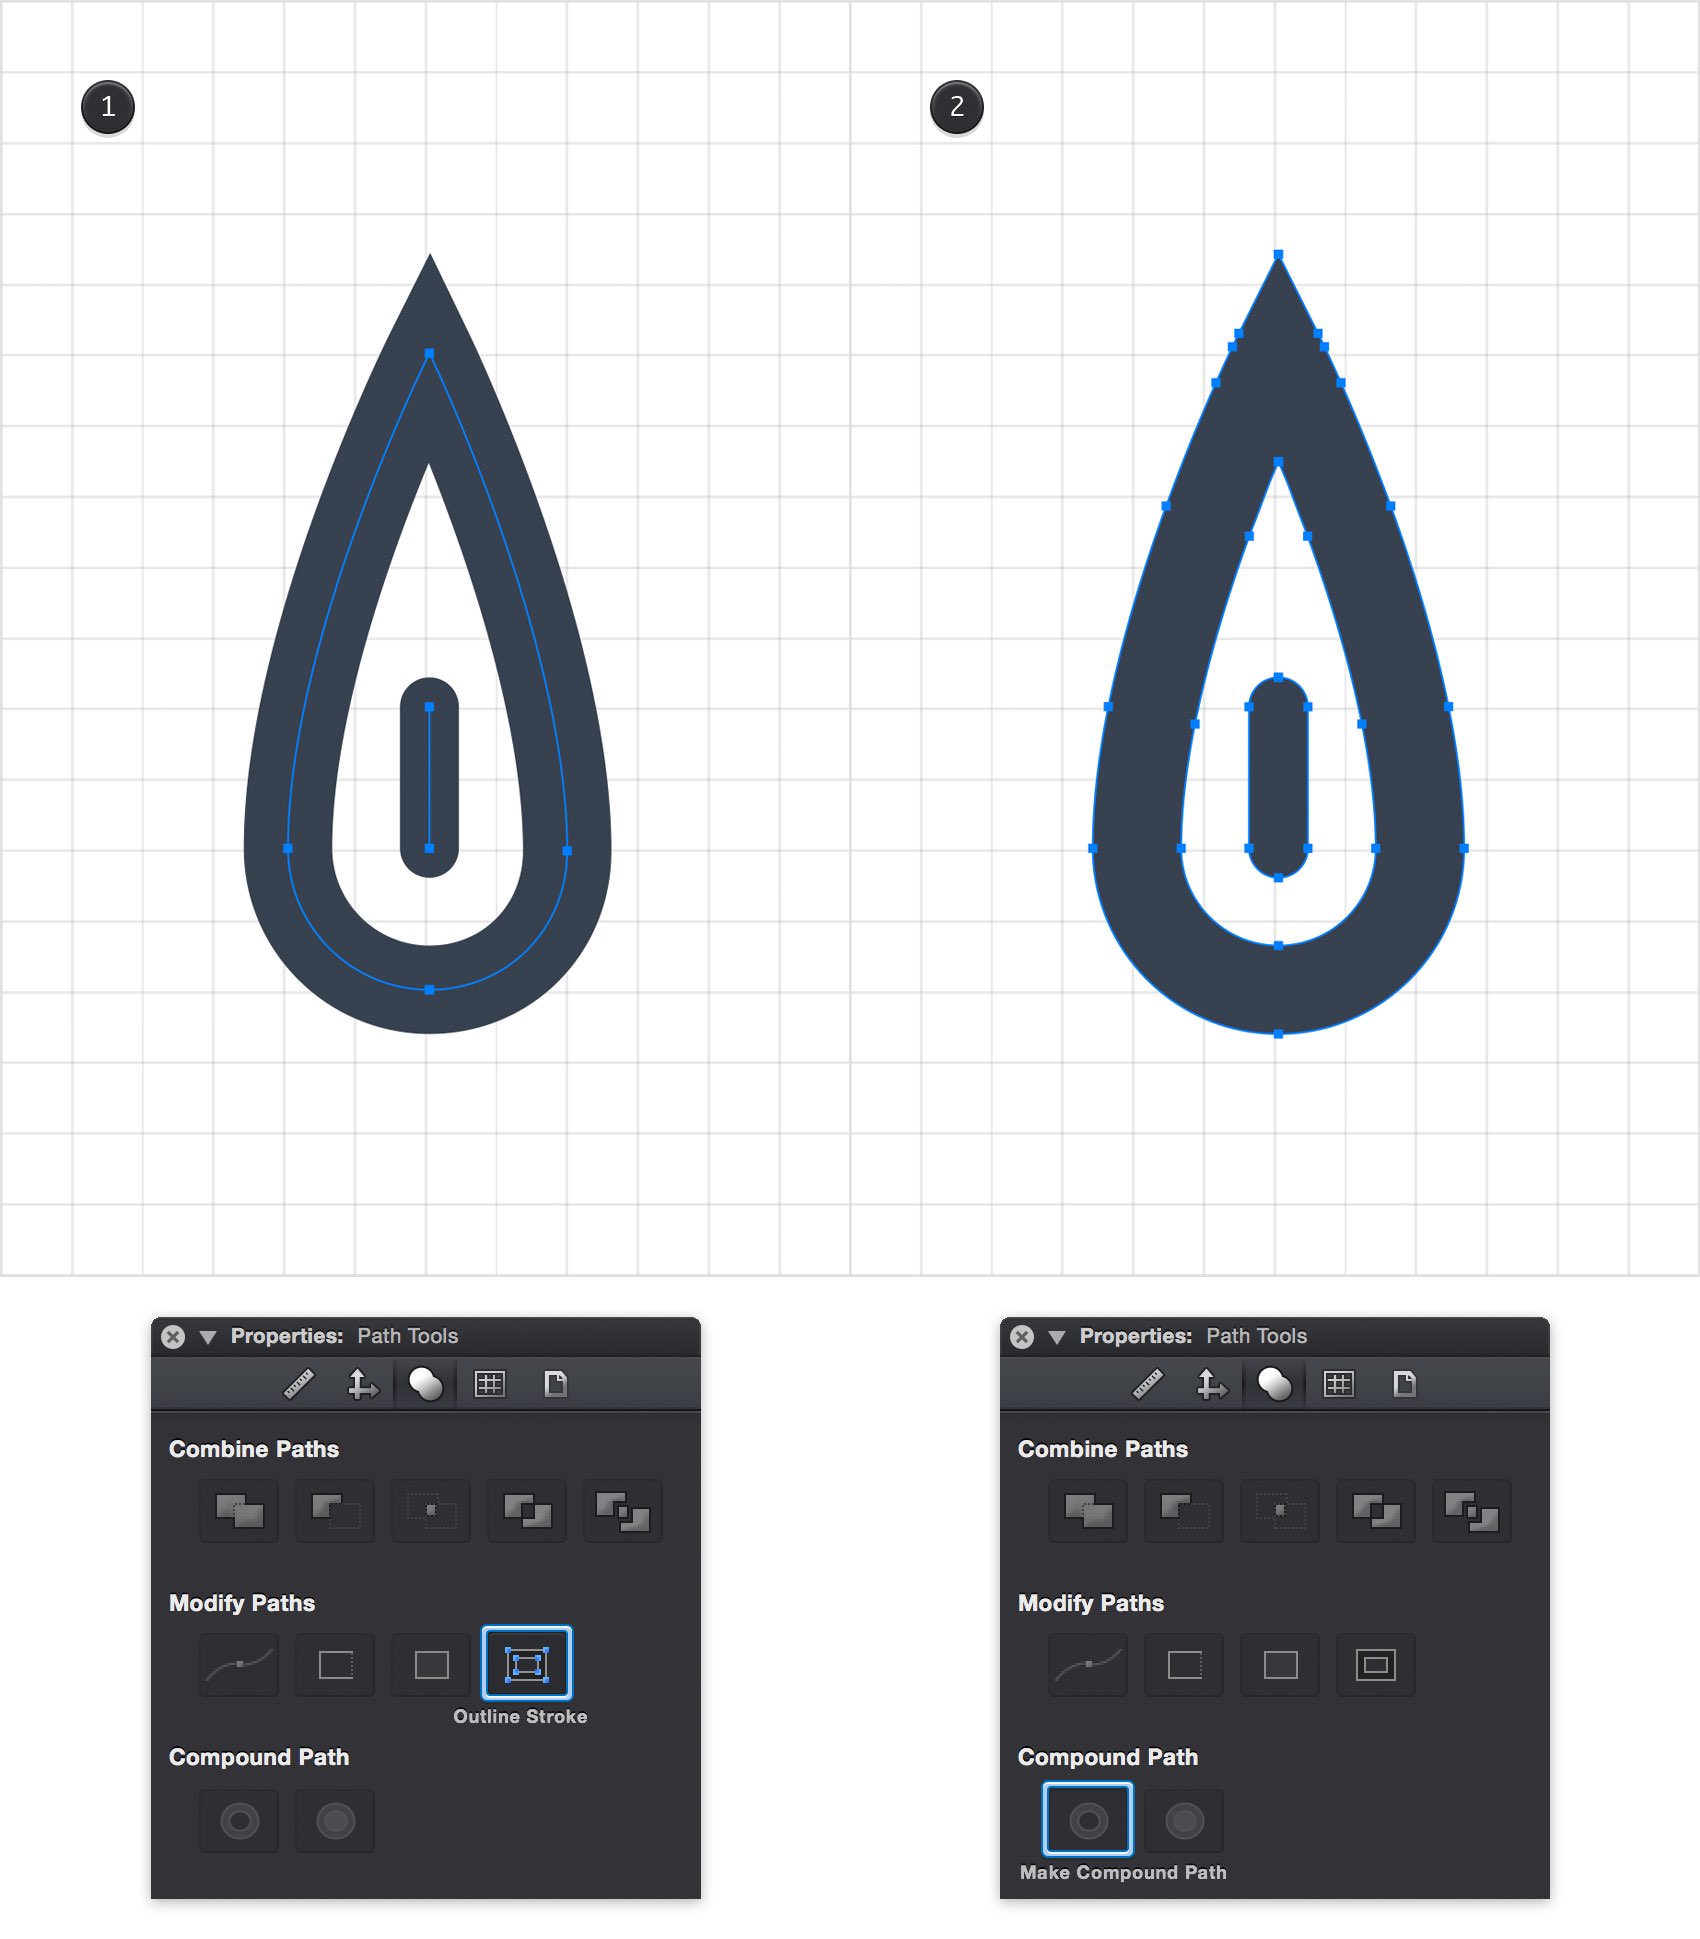
Select the two shapes that make up your leaf symbol and go to the Path Tools pane from the Properties panel. First, click the Outline Stroke command and then click the Make Compound Path command.
Step 13
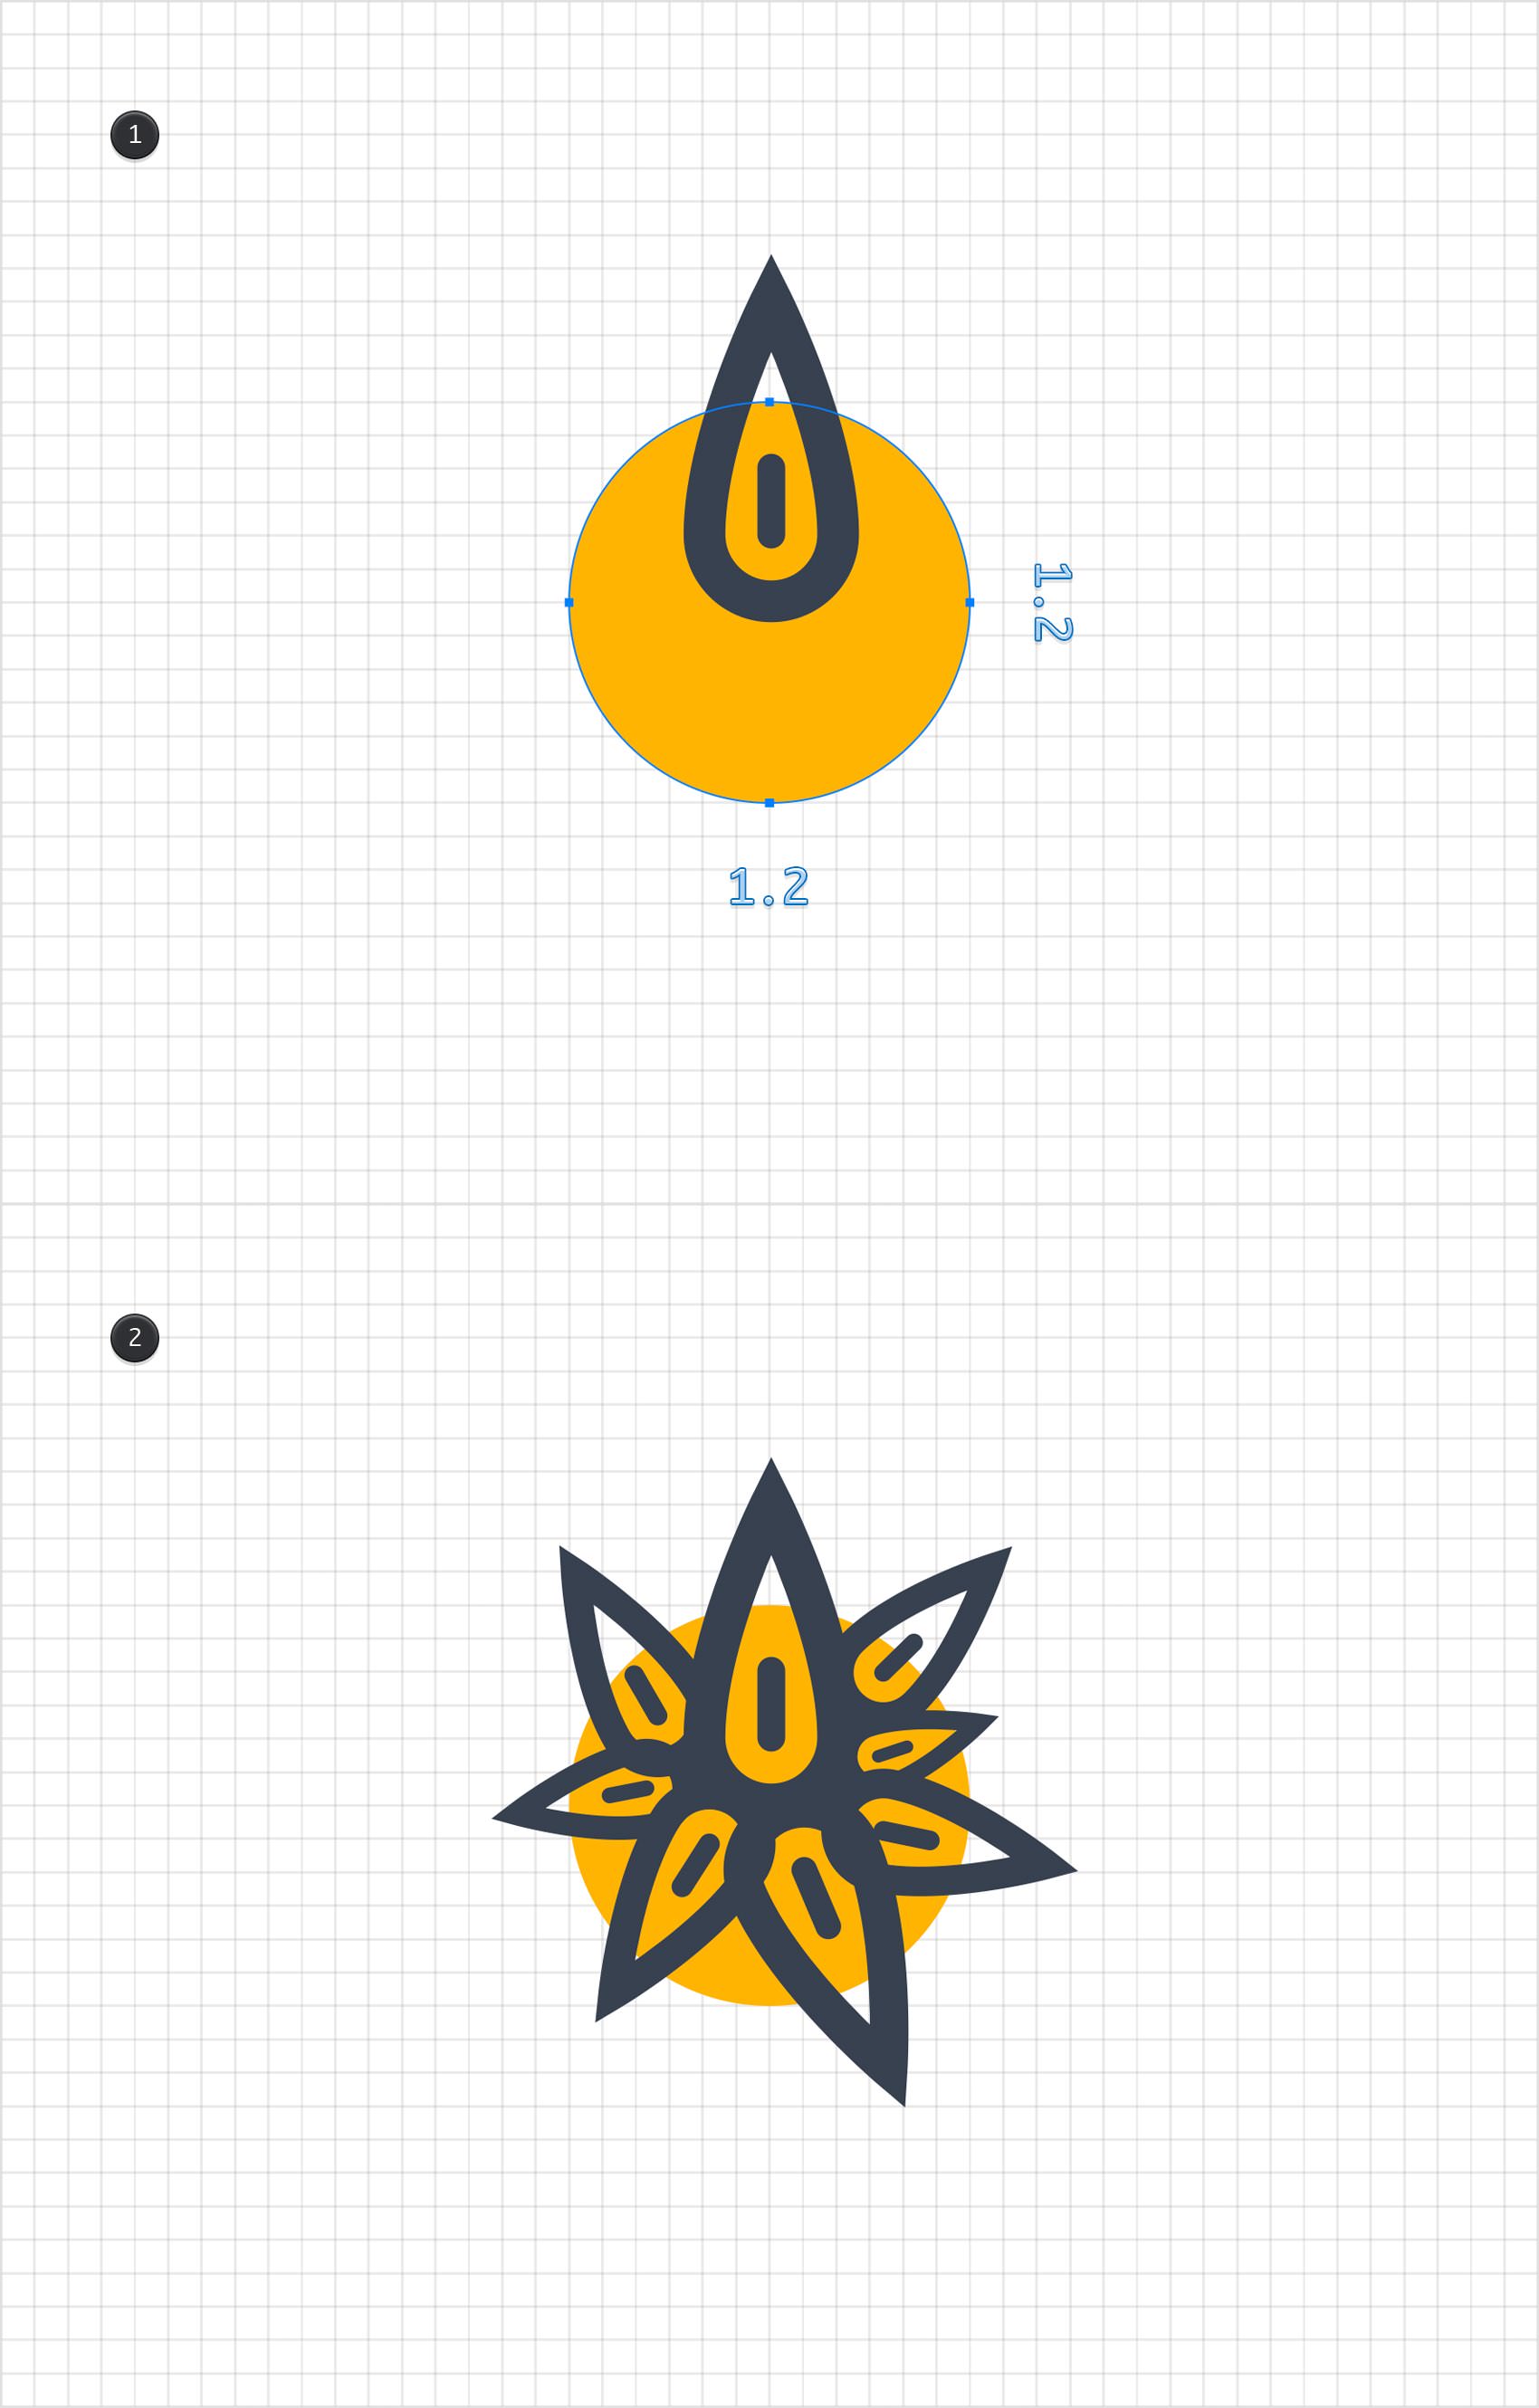
Using the Ellipse Tool (O), create a 1.2 ft circle and fill it with a random yellow. Place this new shape as shown in the first image and send it to back using the Command + Shift + [ keyboard shortcut.
Now, disable the Snap to Grid feature and make several copies of your leaf shape (Control + C > Control + V). Rotate and resize these copies and then spread them roughly as shown in the second image.
Step 14
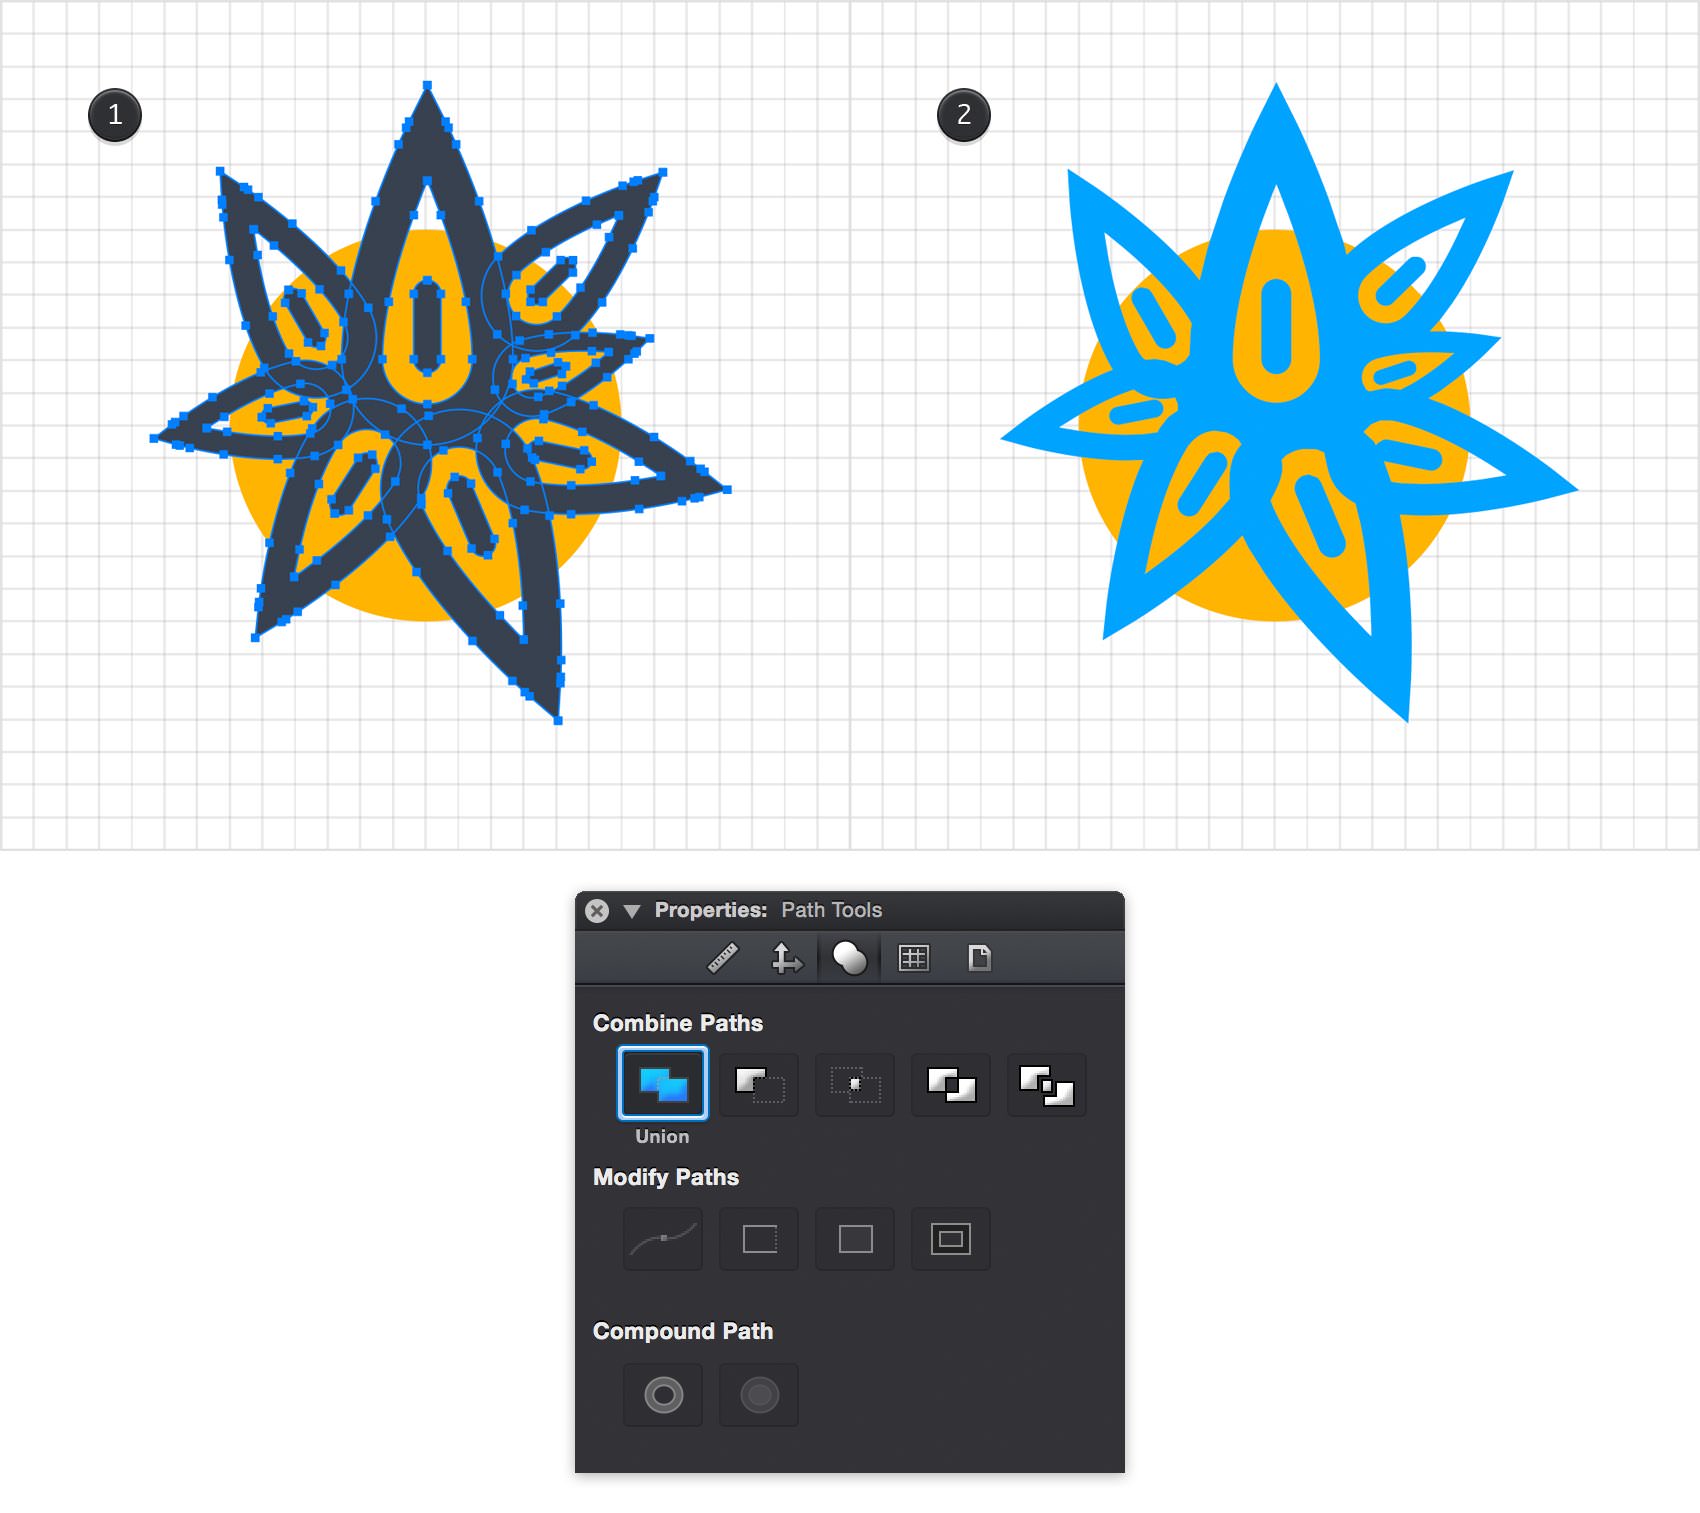
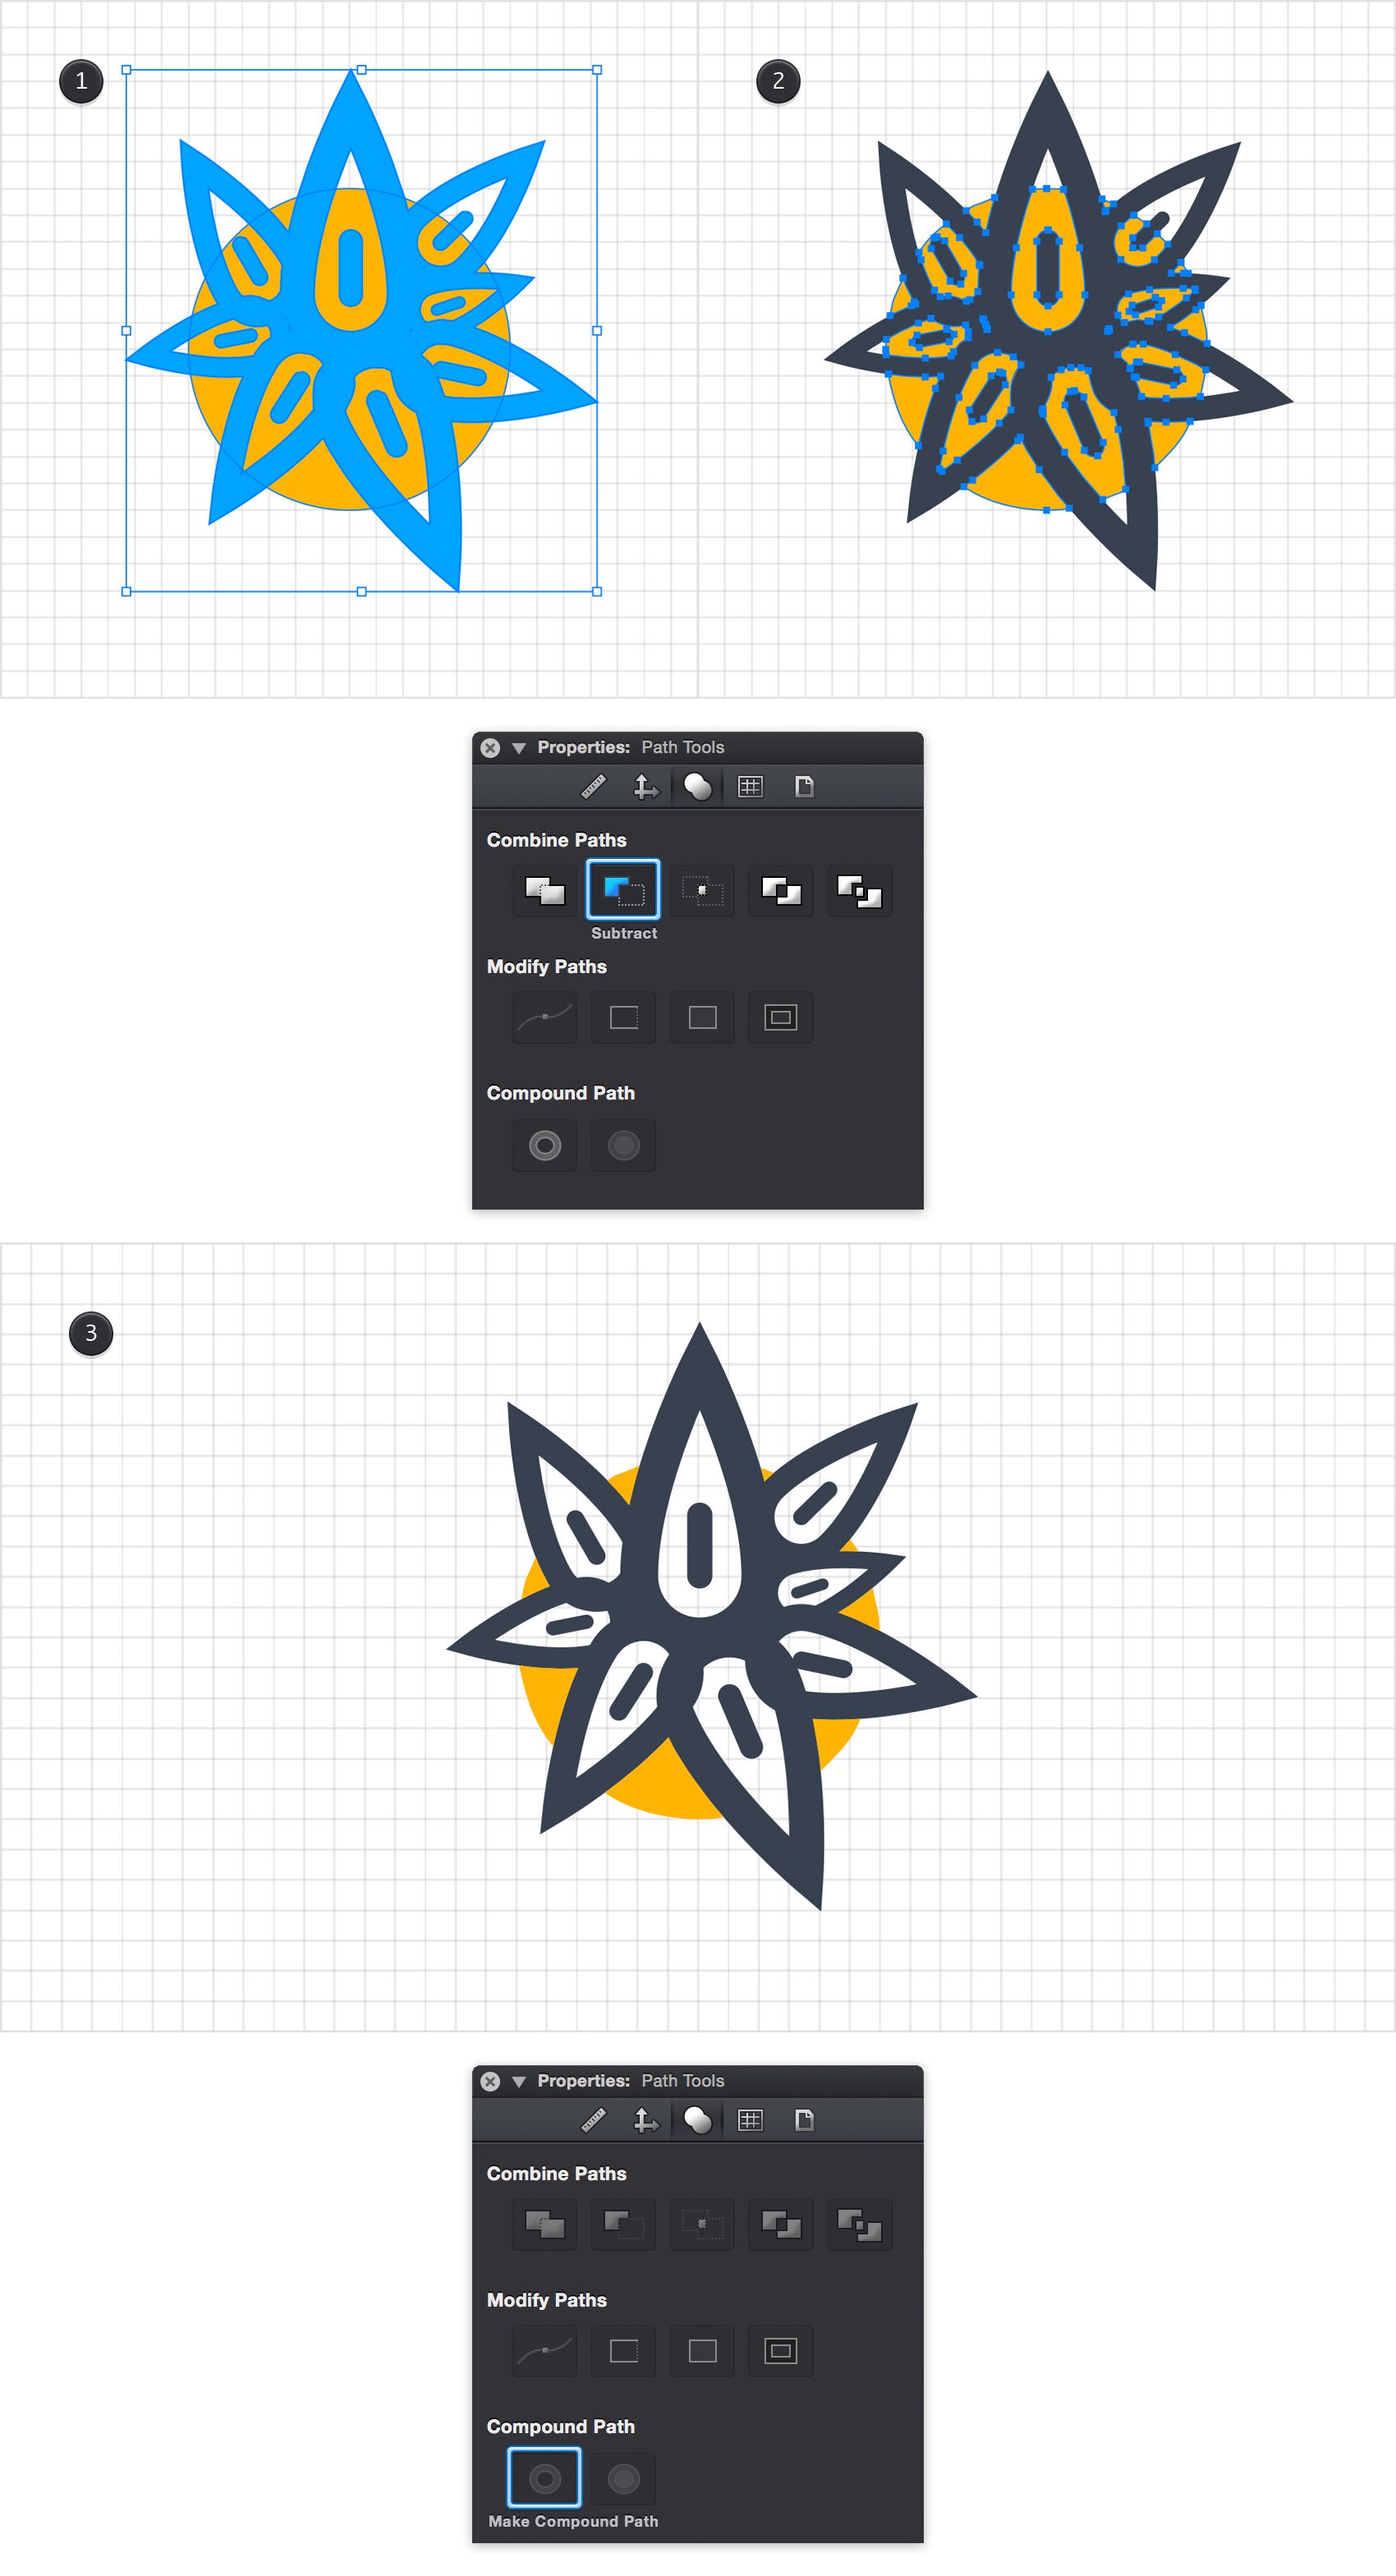
Select all your leaf shapes and add copies in the same location (Command + C > Command + Shift + V). With all these copies selected, go to the Path Tools pane and click the Union command. Fill the resulting shape with a random blue.
Step 15
Select the blue shape made in the previous step along with the yellow circle that lies in the back and click the Subtract command from the Path Tools pane.
Focus on the resulting yellow shapes. Select the ones that lies inside your leaf shapes and remove them using the Delete key (or the Backspace key). Select the remaining yellow shapes and click the Make Compound Path command from the Path Tools pane.
Step 16
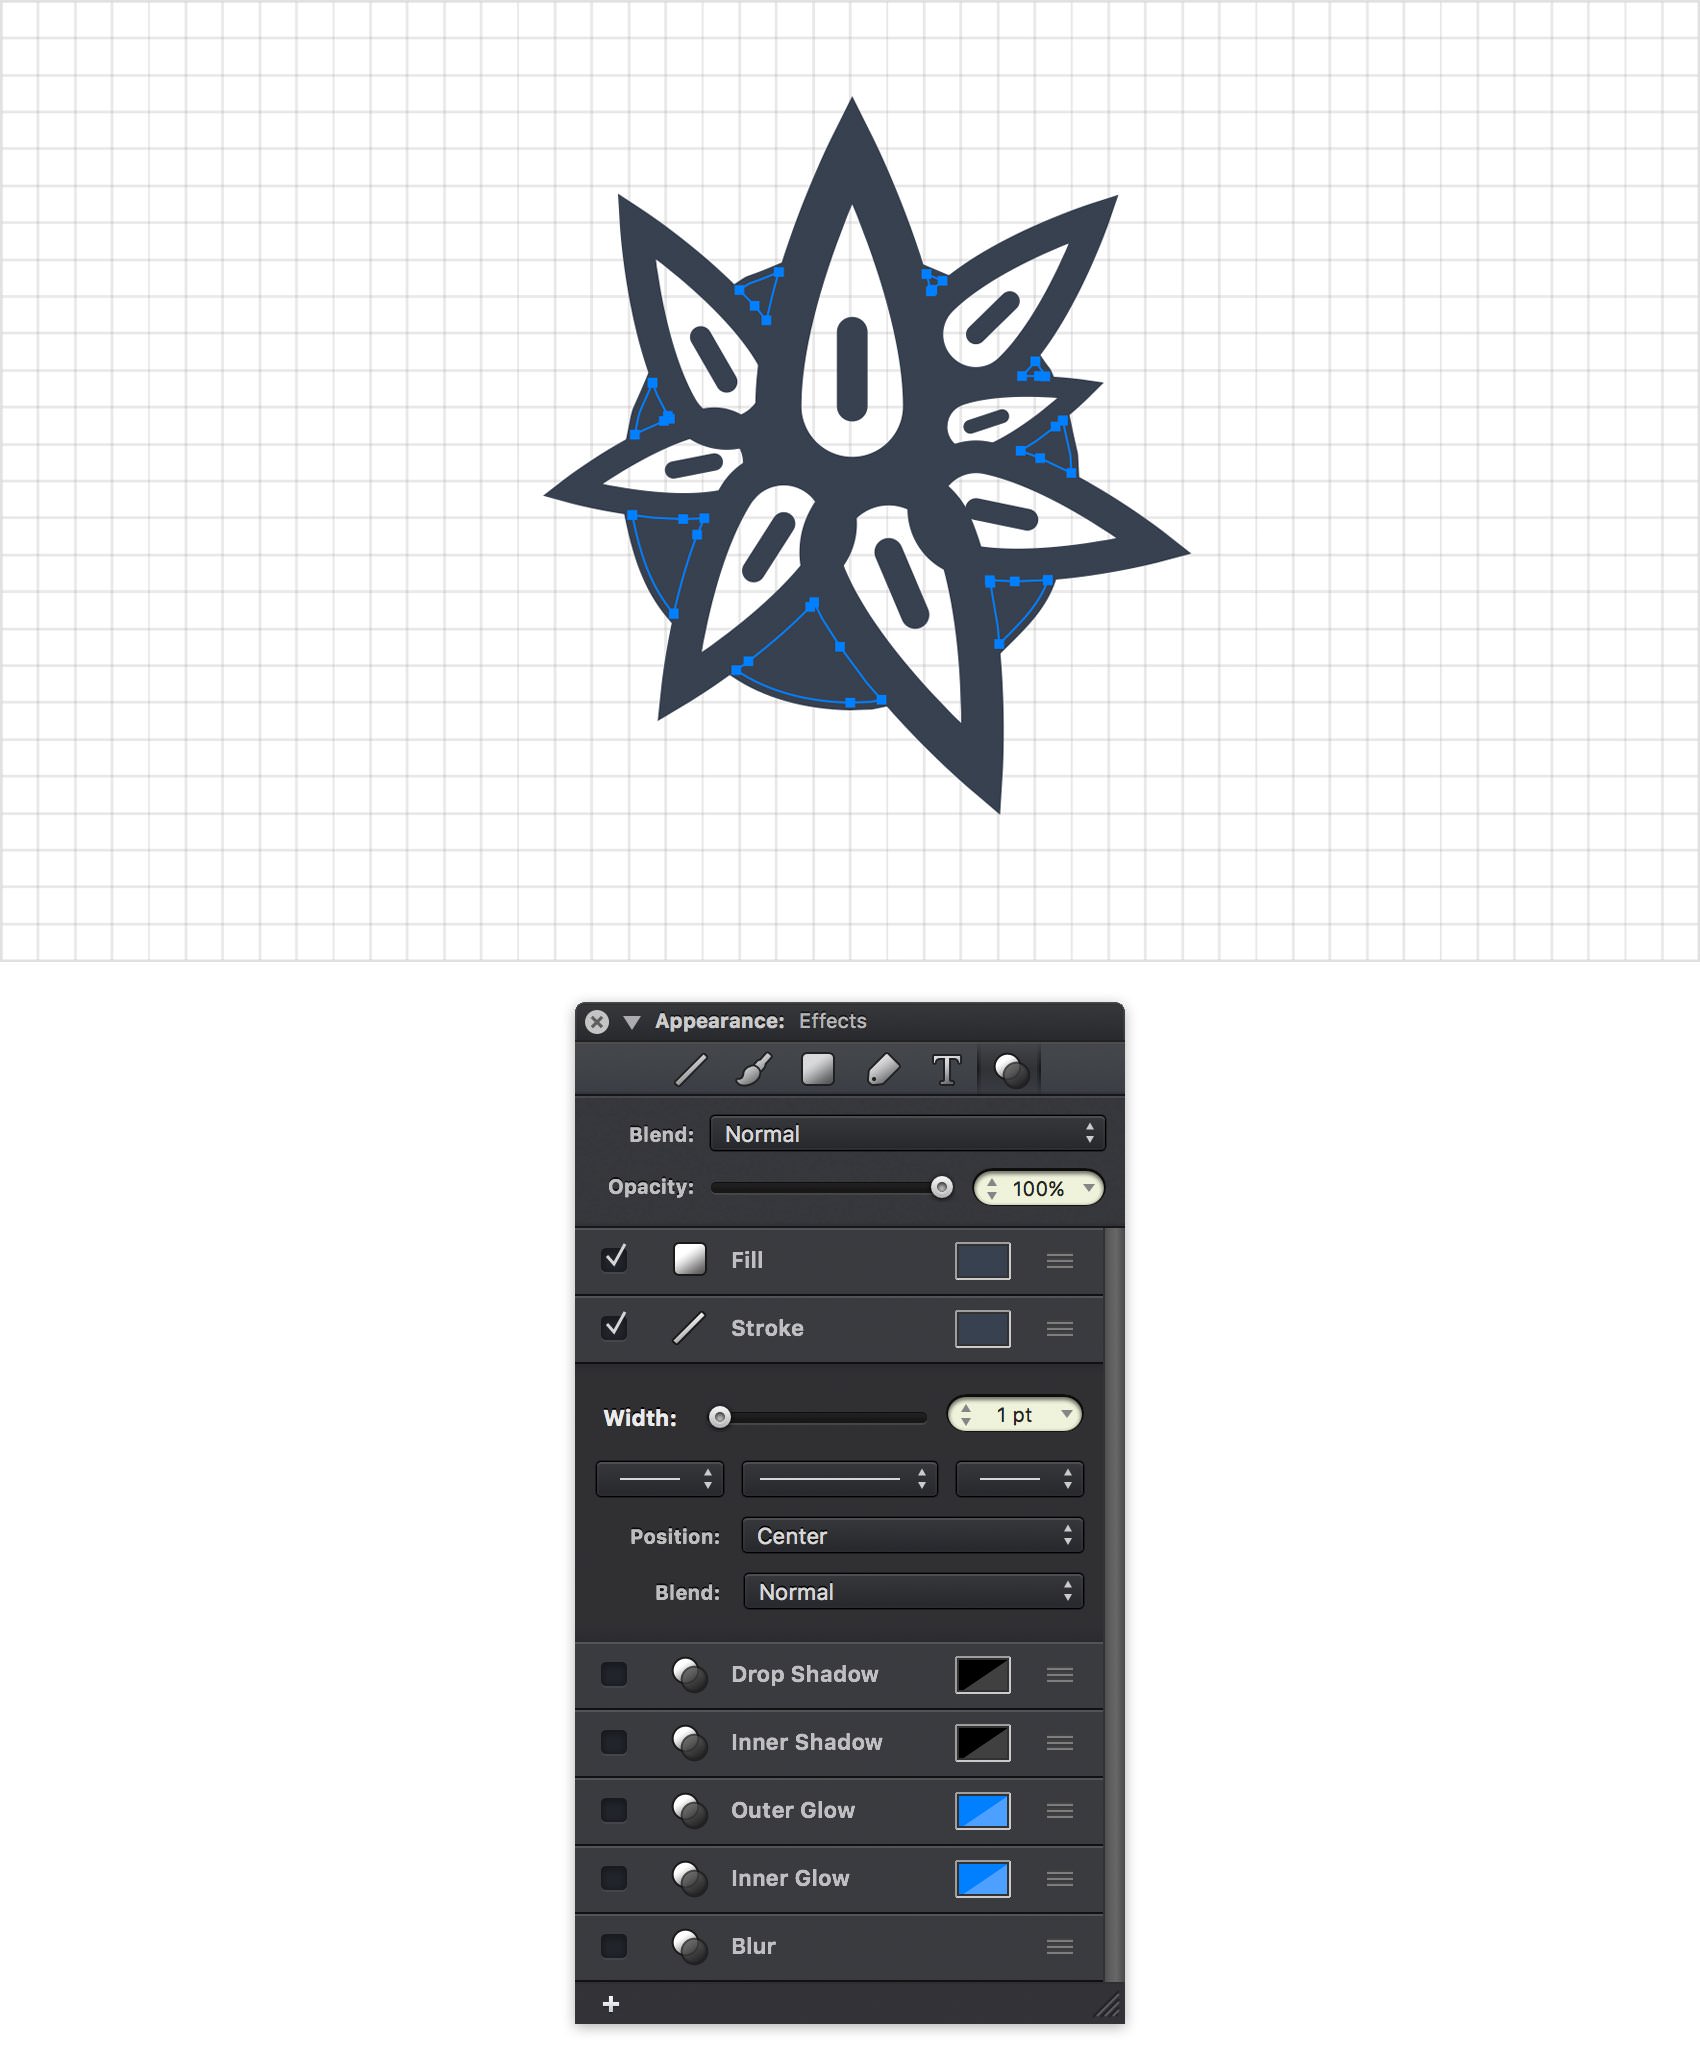
Select the yellow compound path made in the previous step and focus on the Effects pane from the Appearance panel. Replace the existing Fill color with your saved color and then select the Stroke. Make sure that the Width is set to 1 pt and apply the same color used for the Fill.
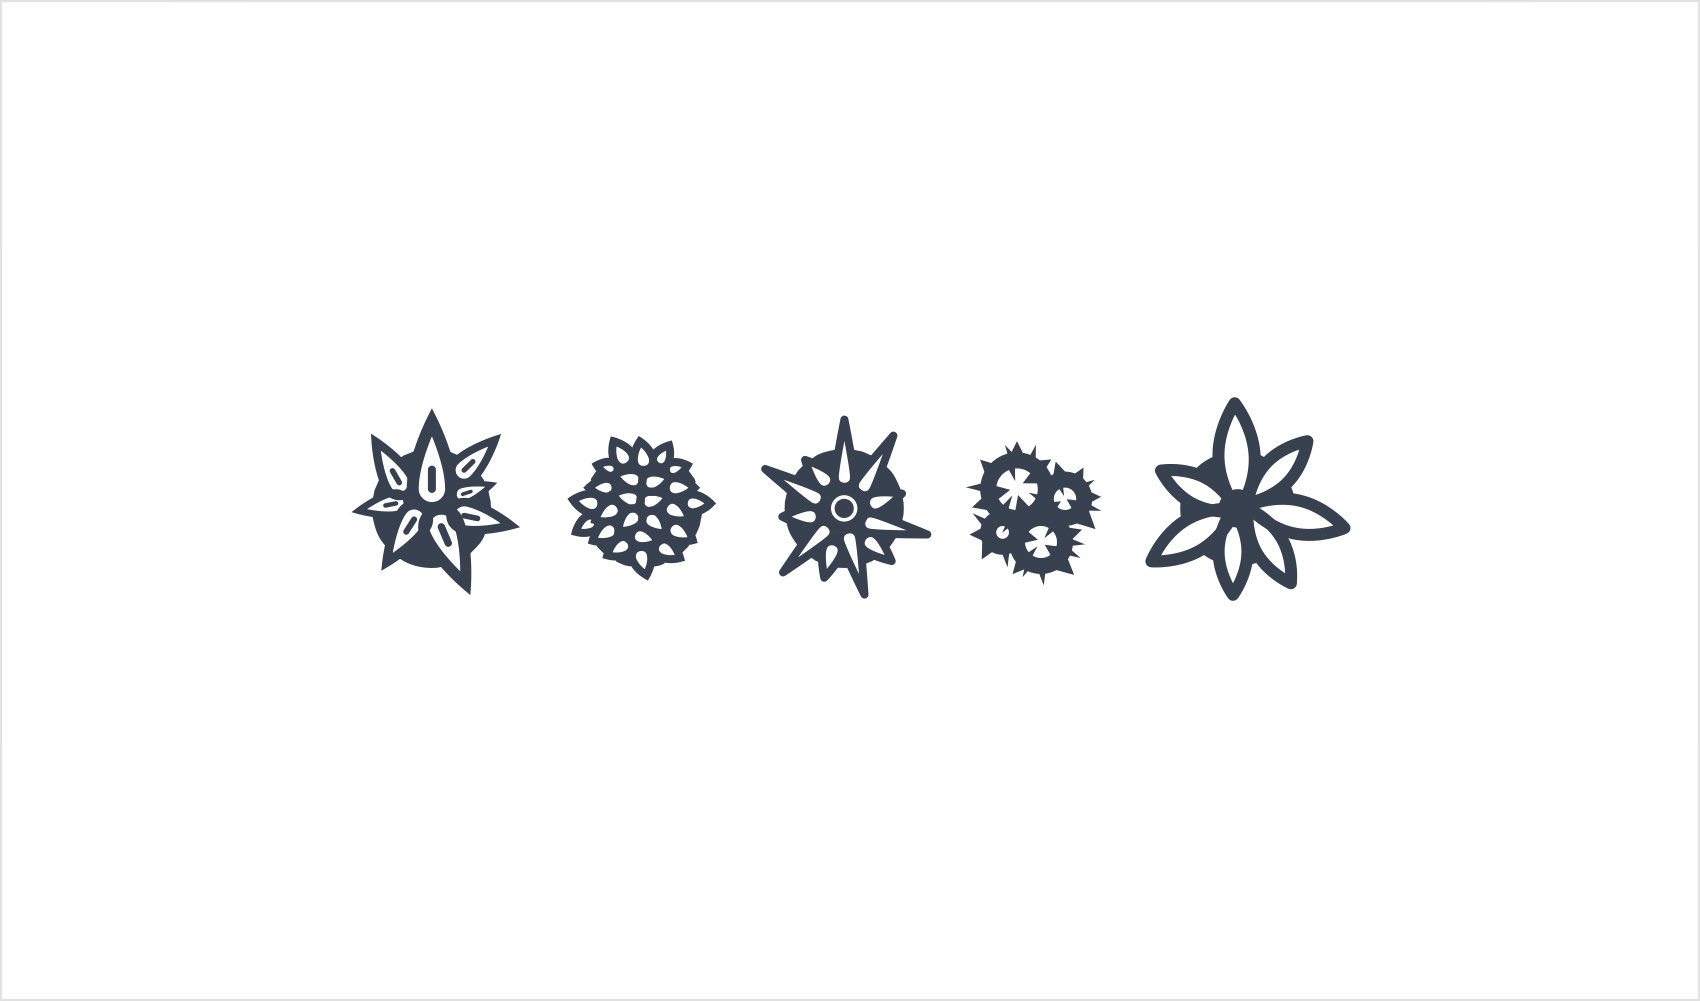
Using the same tools, techniques and styles you can create a variety of plant symbols as shown in the following image.
Step 17
Move to the Layers panel, add a new layer and rename it "Sunbed". Make sure that this new layer stays selected.
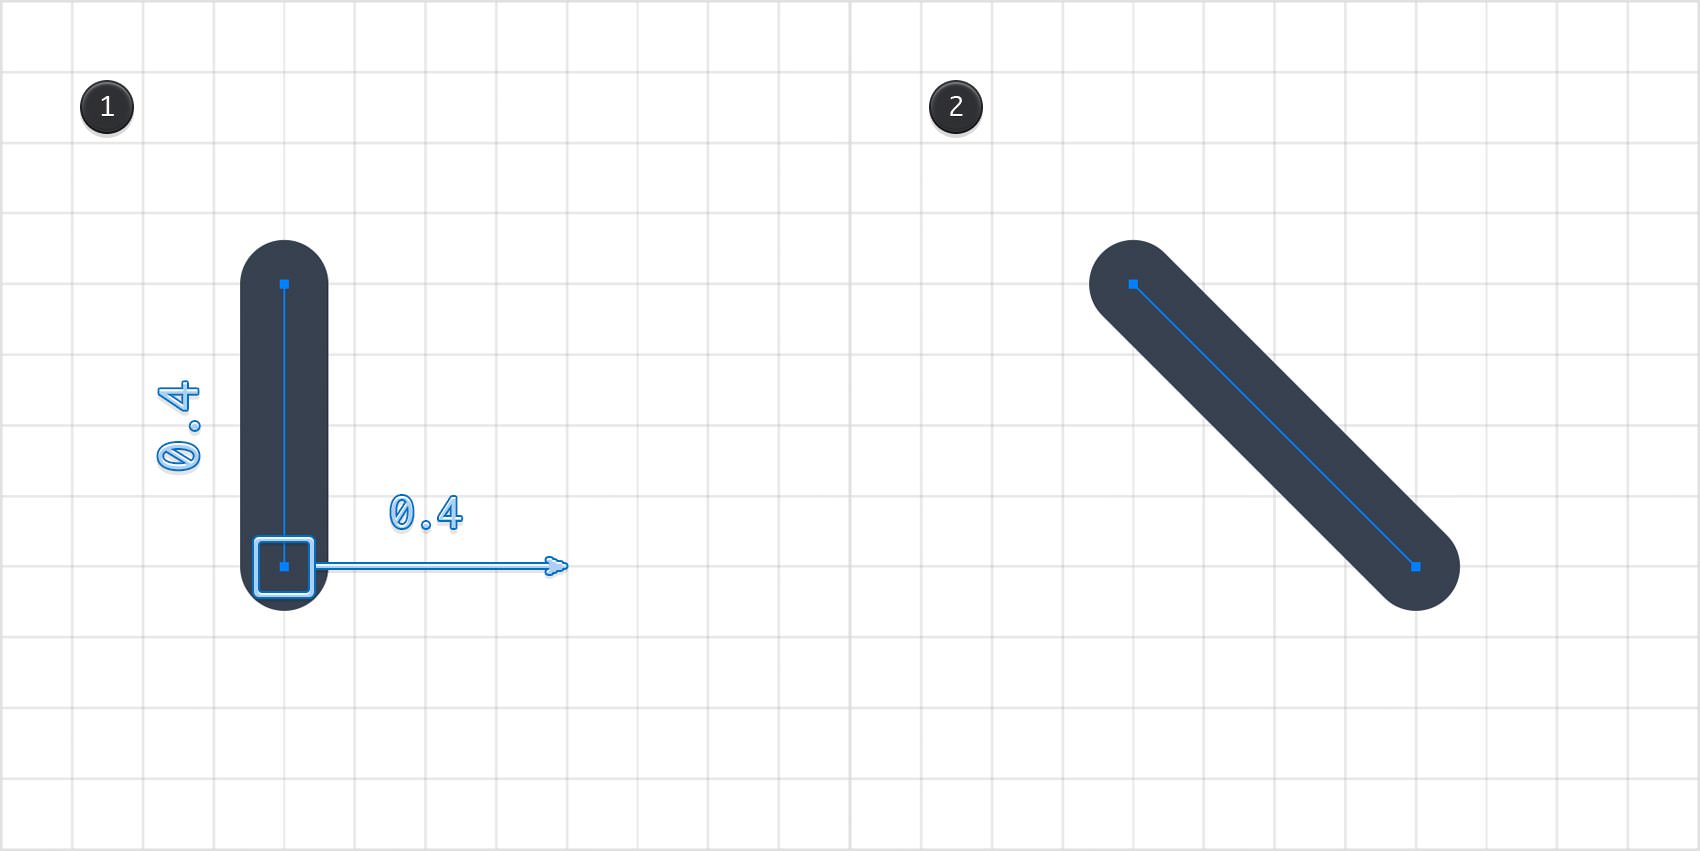
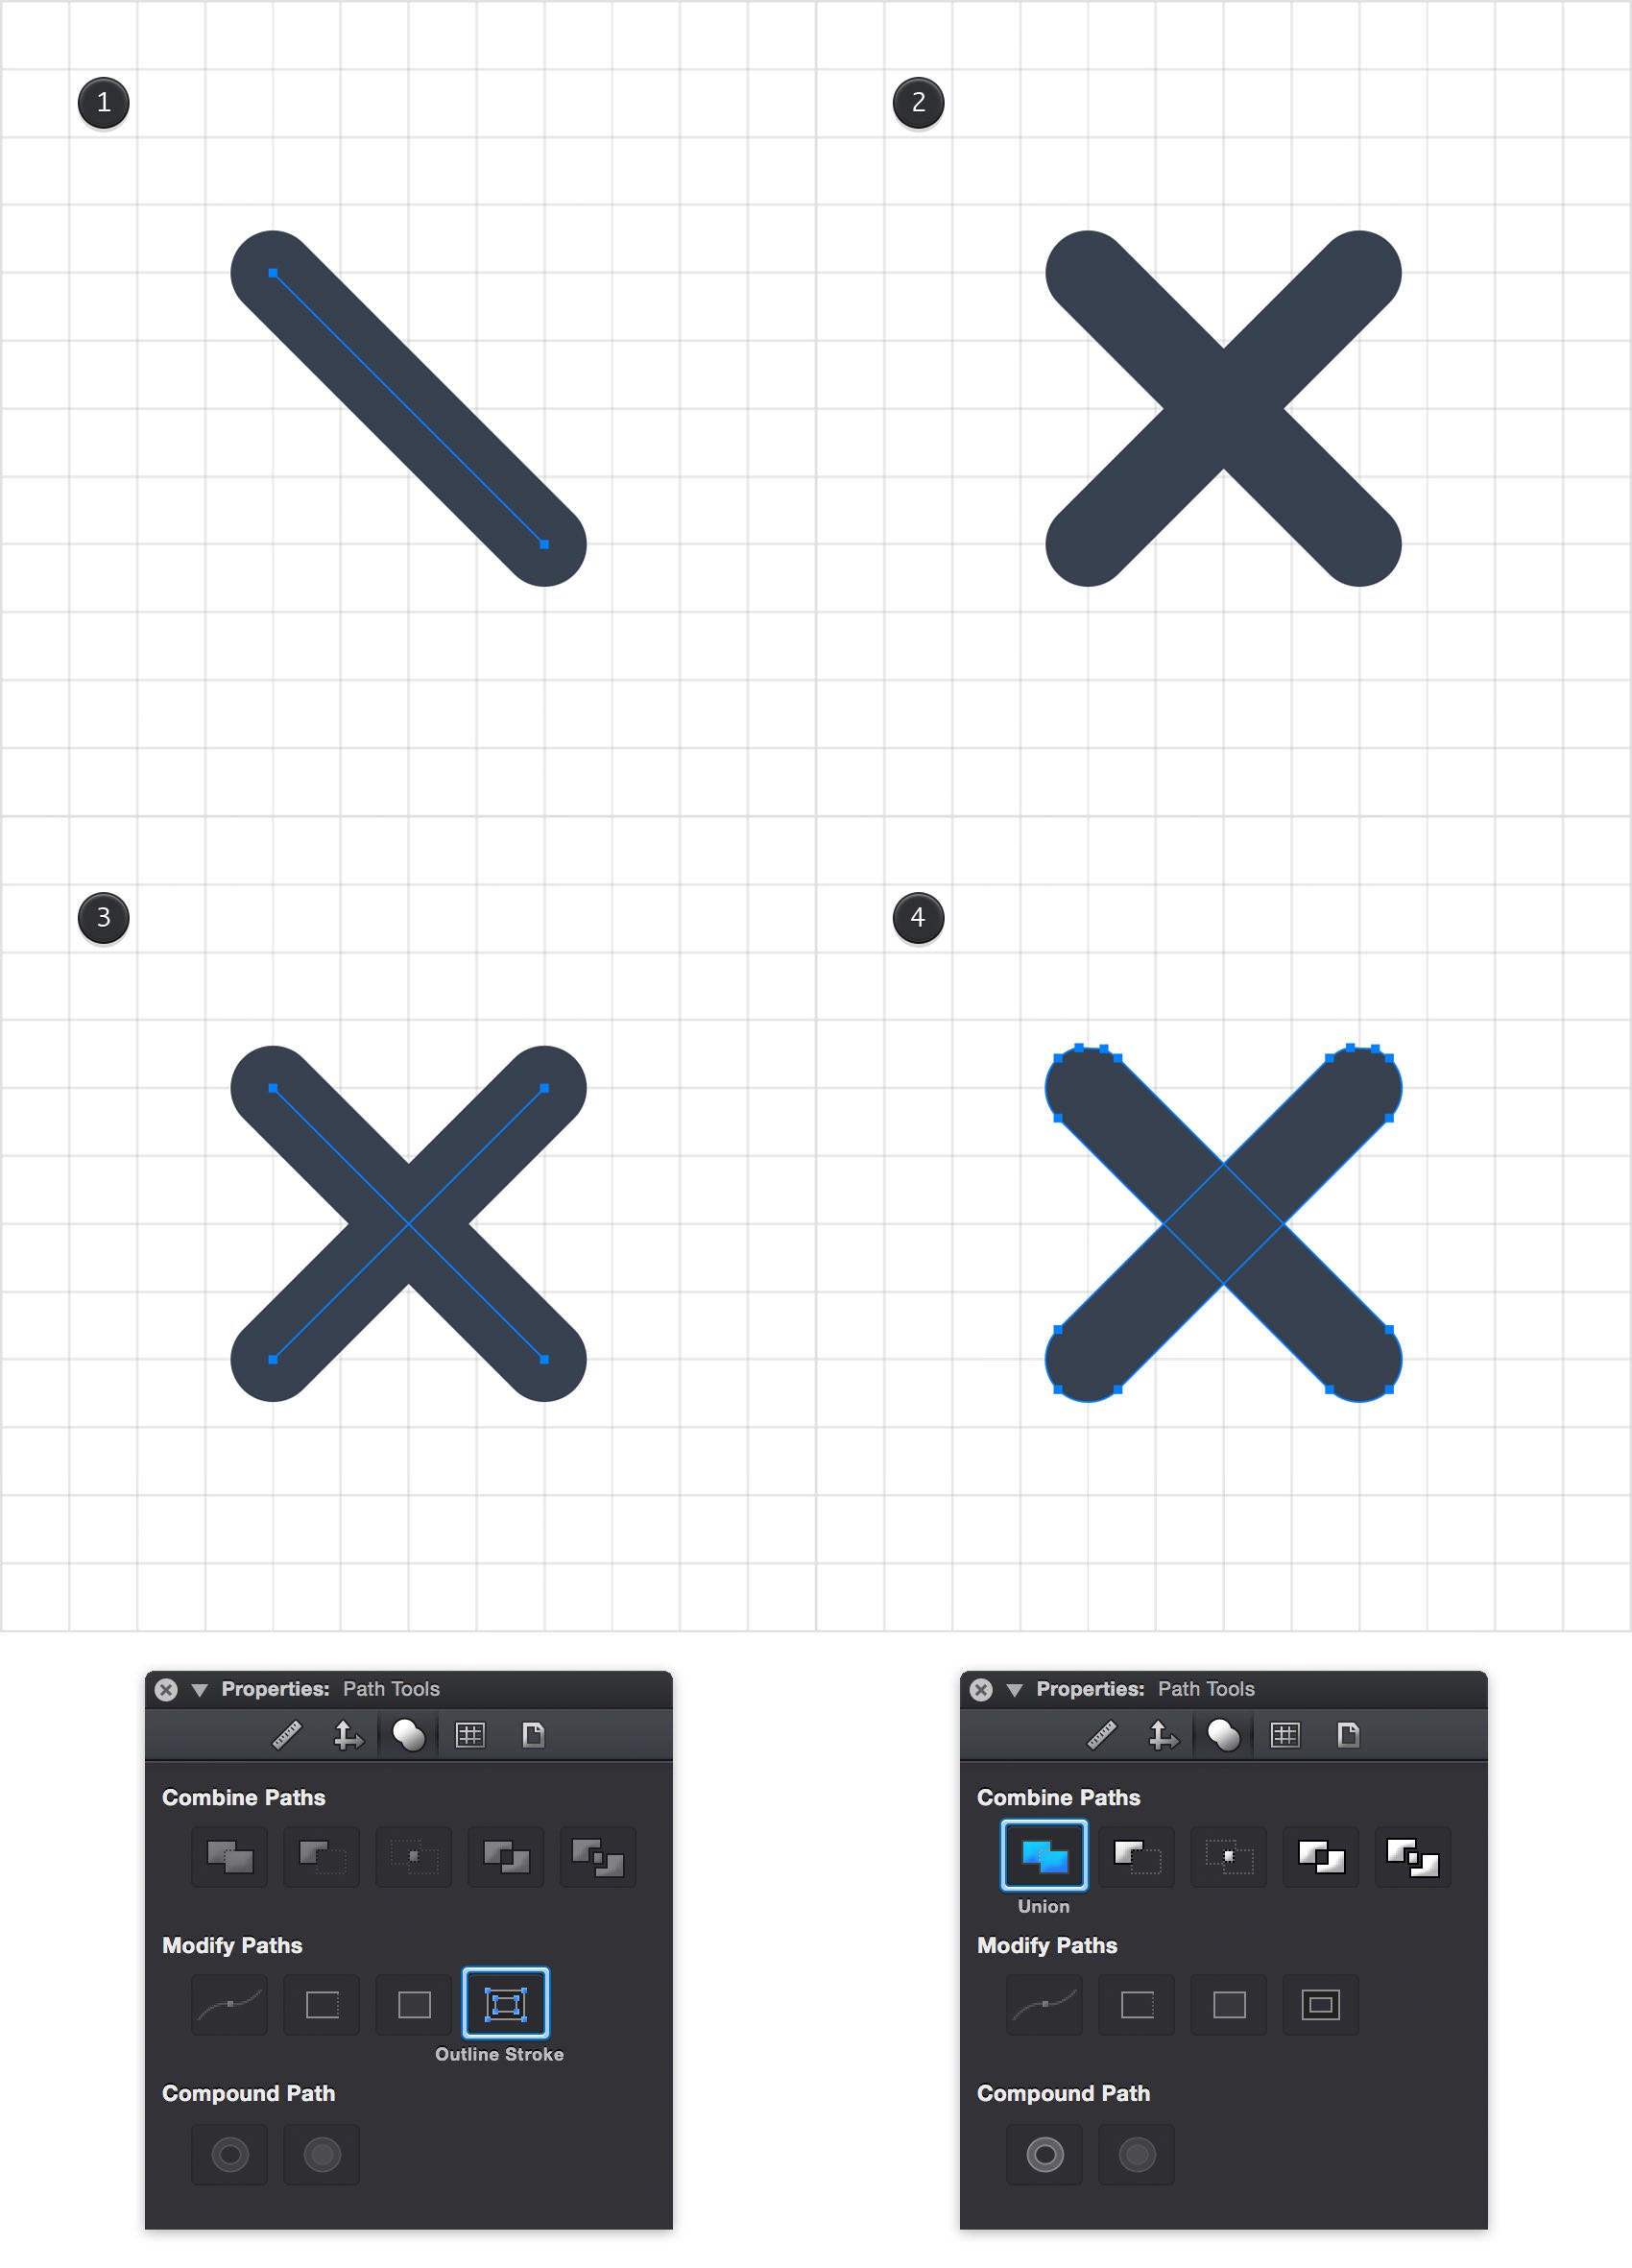
Using the Line Tool (L), create a 0.4 ft vertical path and apply your second style from the Styles panel. Keep focusing on this tiny path and switch to the Path Selection Tool (A). Select the bottom anchor point and drag it 0.4 ft to the right as shown in the second image.
Step 18
Make sure that the tiny path made in the previous step is still selected and pick the Rotate Tool (R). Focus on the Tool Options bar, set the Angle to -90 degrees and then click that Copy button.
Select both tiny paths and focus on the Path Tools pane from the Properties panel. First, click the Outline Stroke command and then hit that Union command.
Step 19
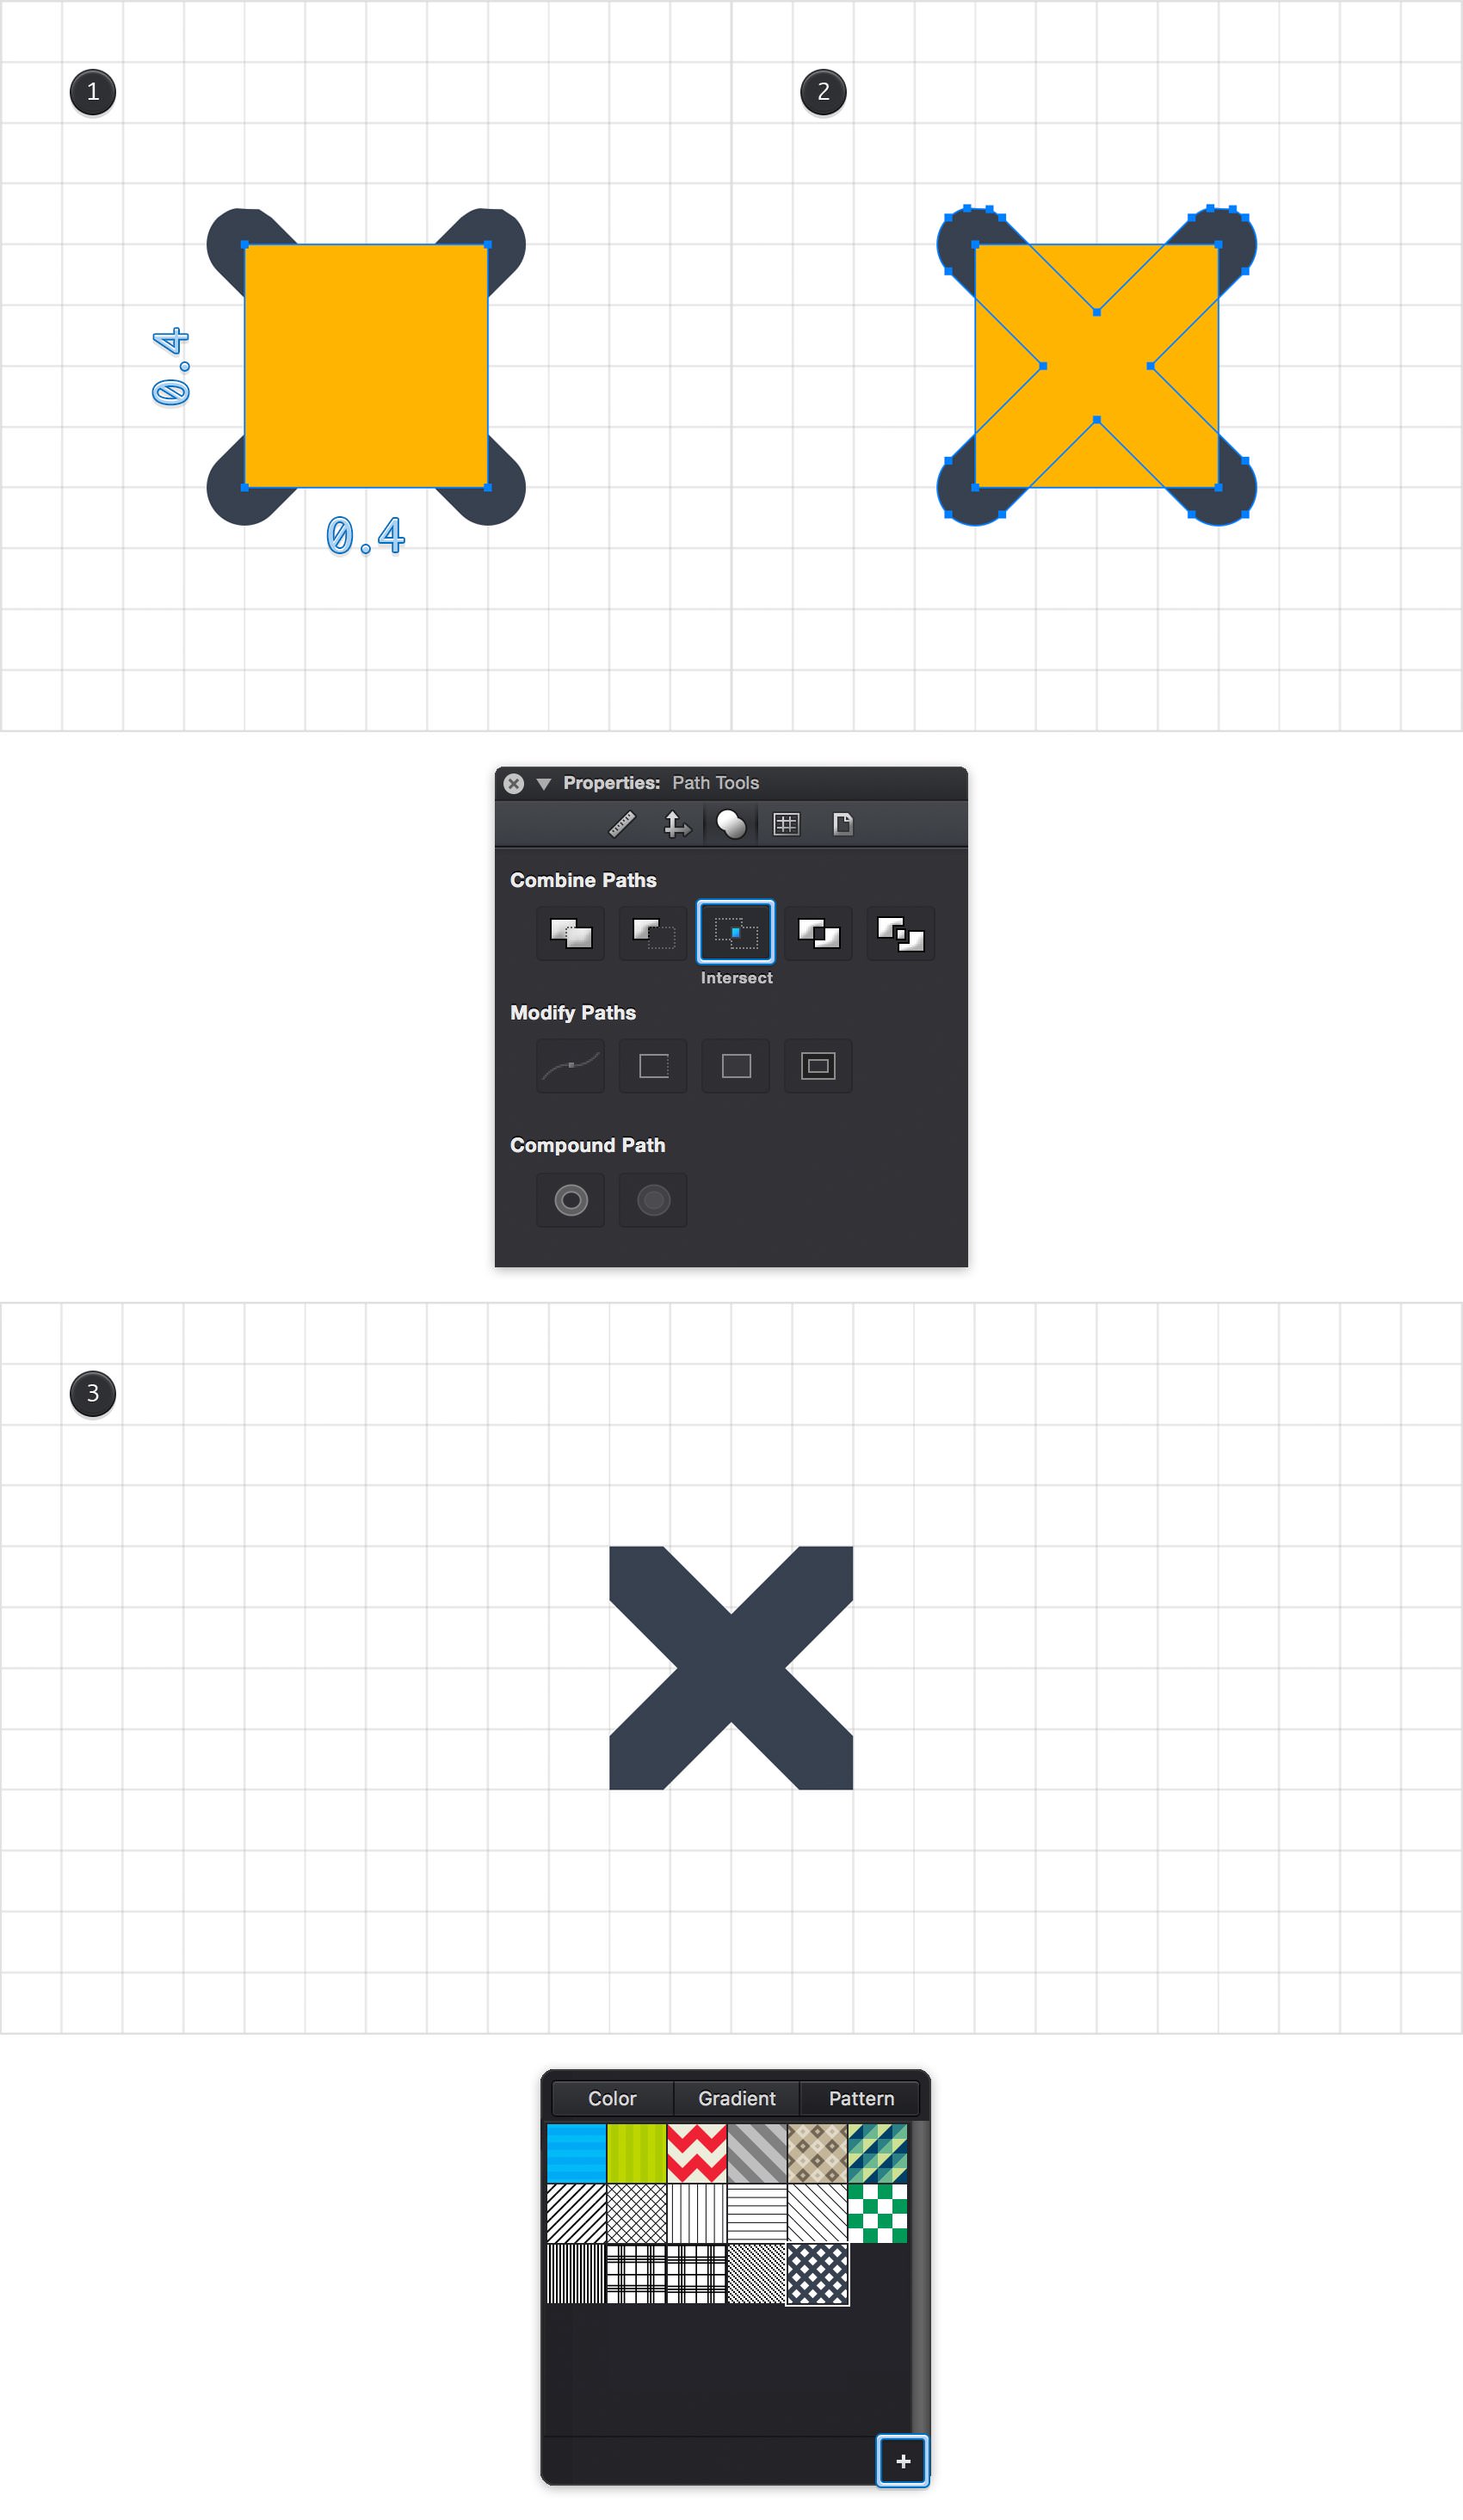
Using the Rectangle Tool (M) create a 0.4 ft square. Fill it with a random yellow and place it as shown in the first image.
Select this new shape along with the one that lies behind it and click the Intersect command from the Path Tools pane. Make sure that the resulting shape remains selected and move to your Toolbar. Click the Fill color well, move to the Pattern Palette and click that plus button to save your selection as a pattern.
Step 20
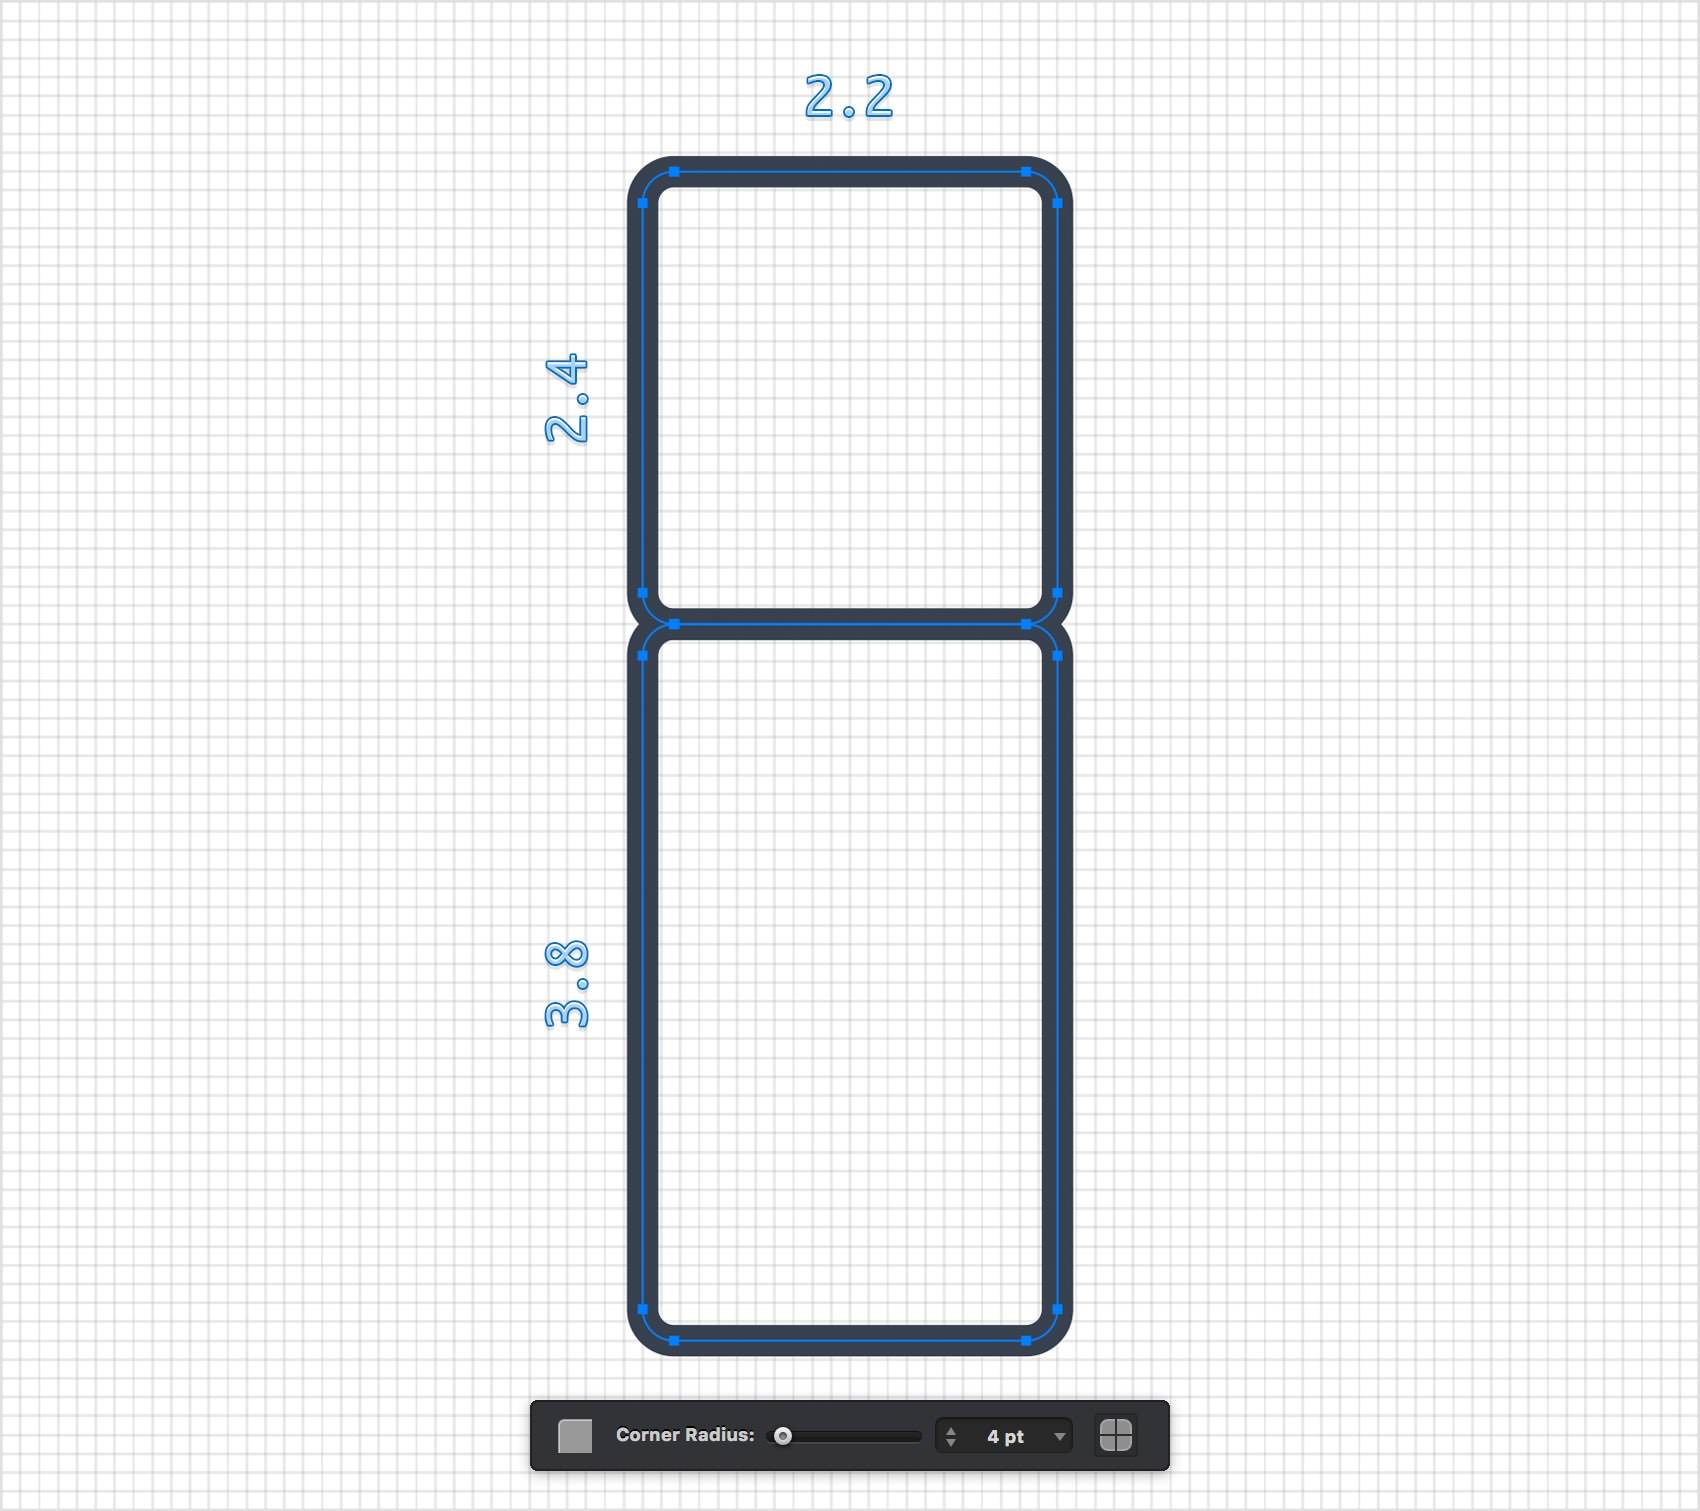
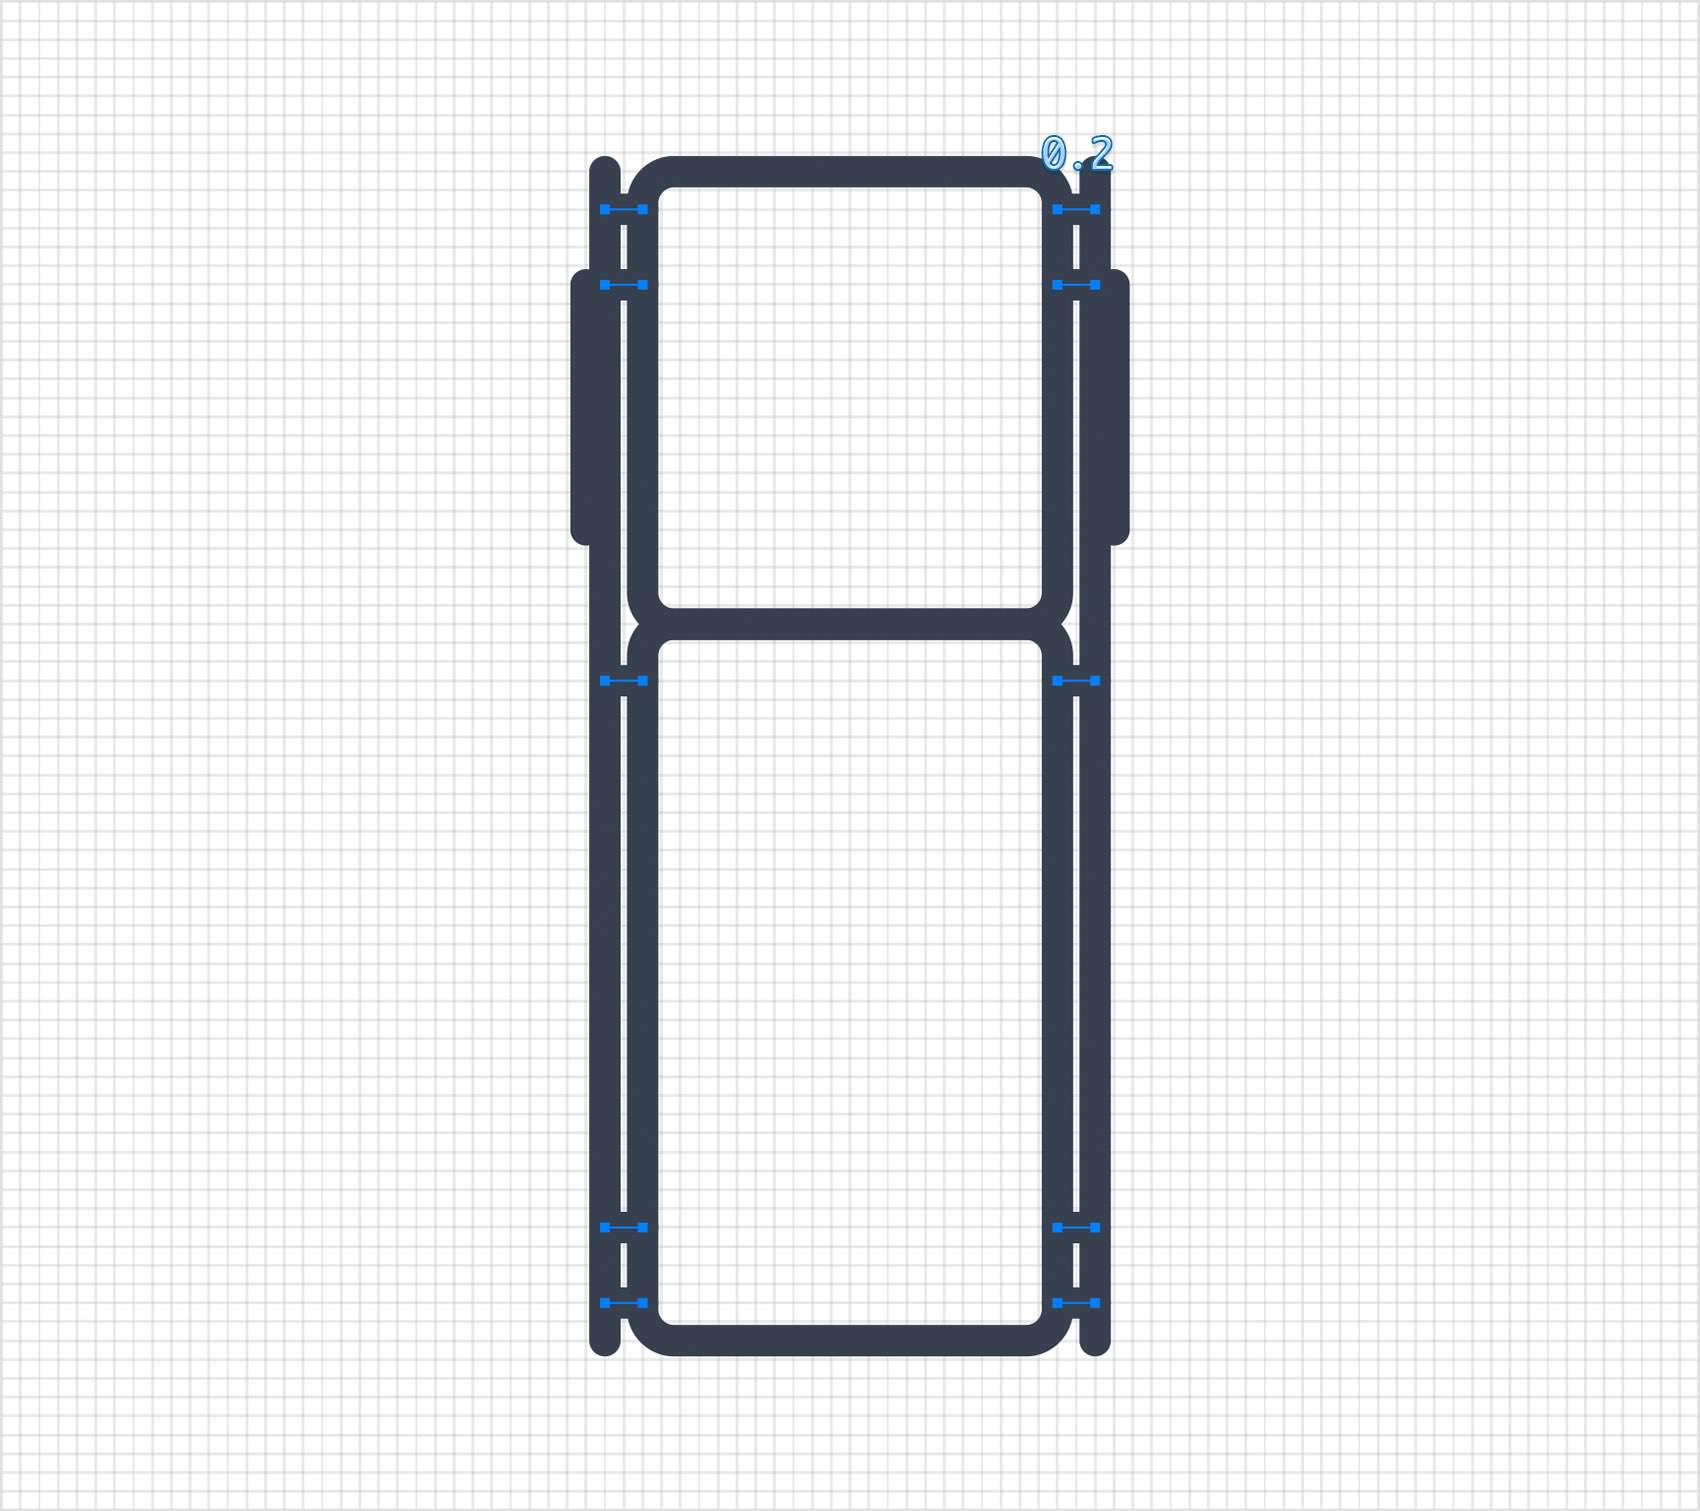
Pick the Rounded Rectangle Tool (Shift + M), focus on the Tool Options bar and drag that Corner Radius slider to 4 pt. Create a 2.2 x 2.4 ft shape and a 2.2 x 3.8 ft shape. Place these rounded rectangles one under the other as shown below and apply your first style from the Styles panel.
Step 21
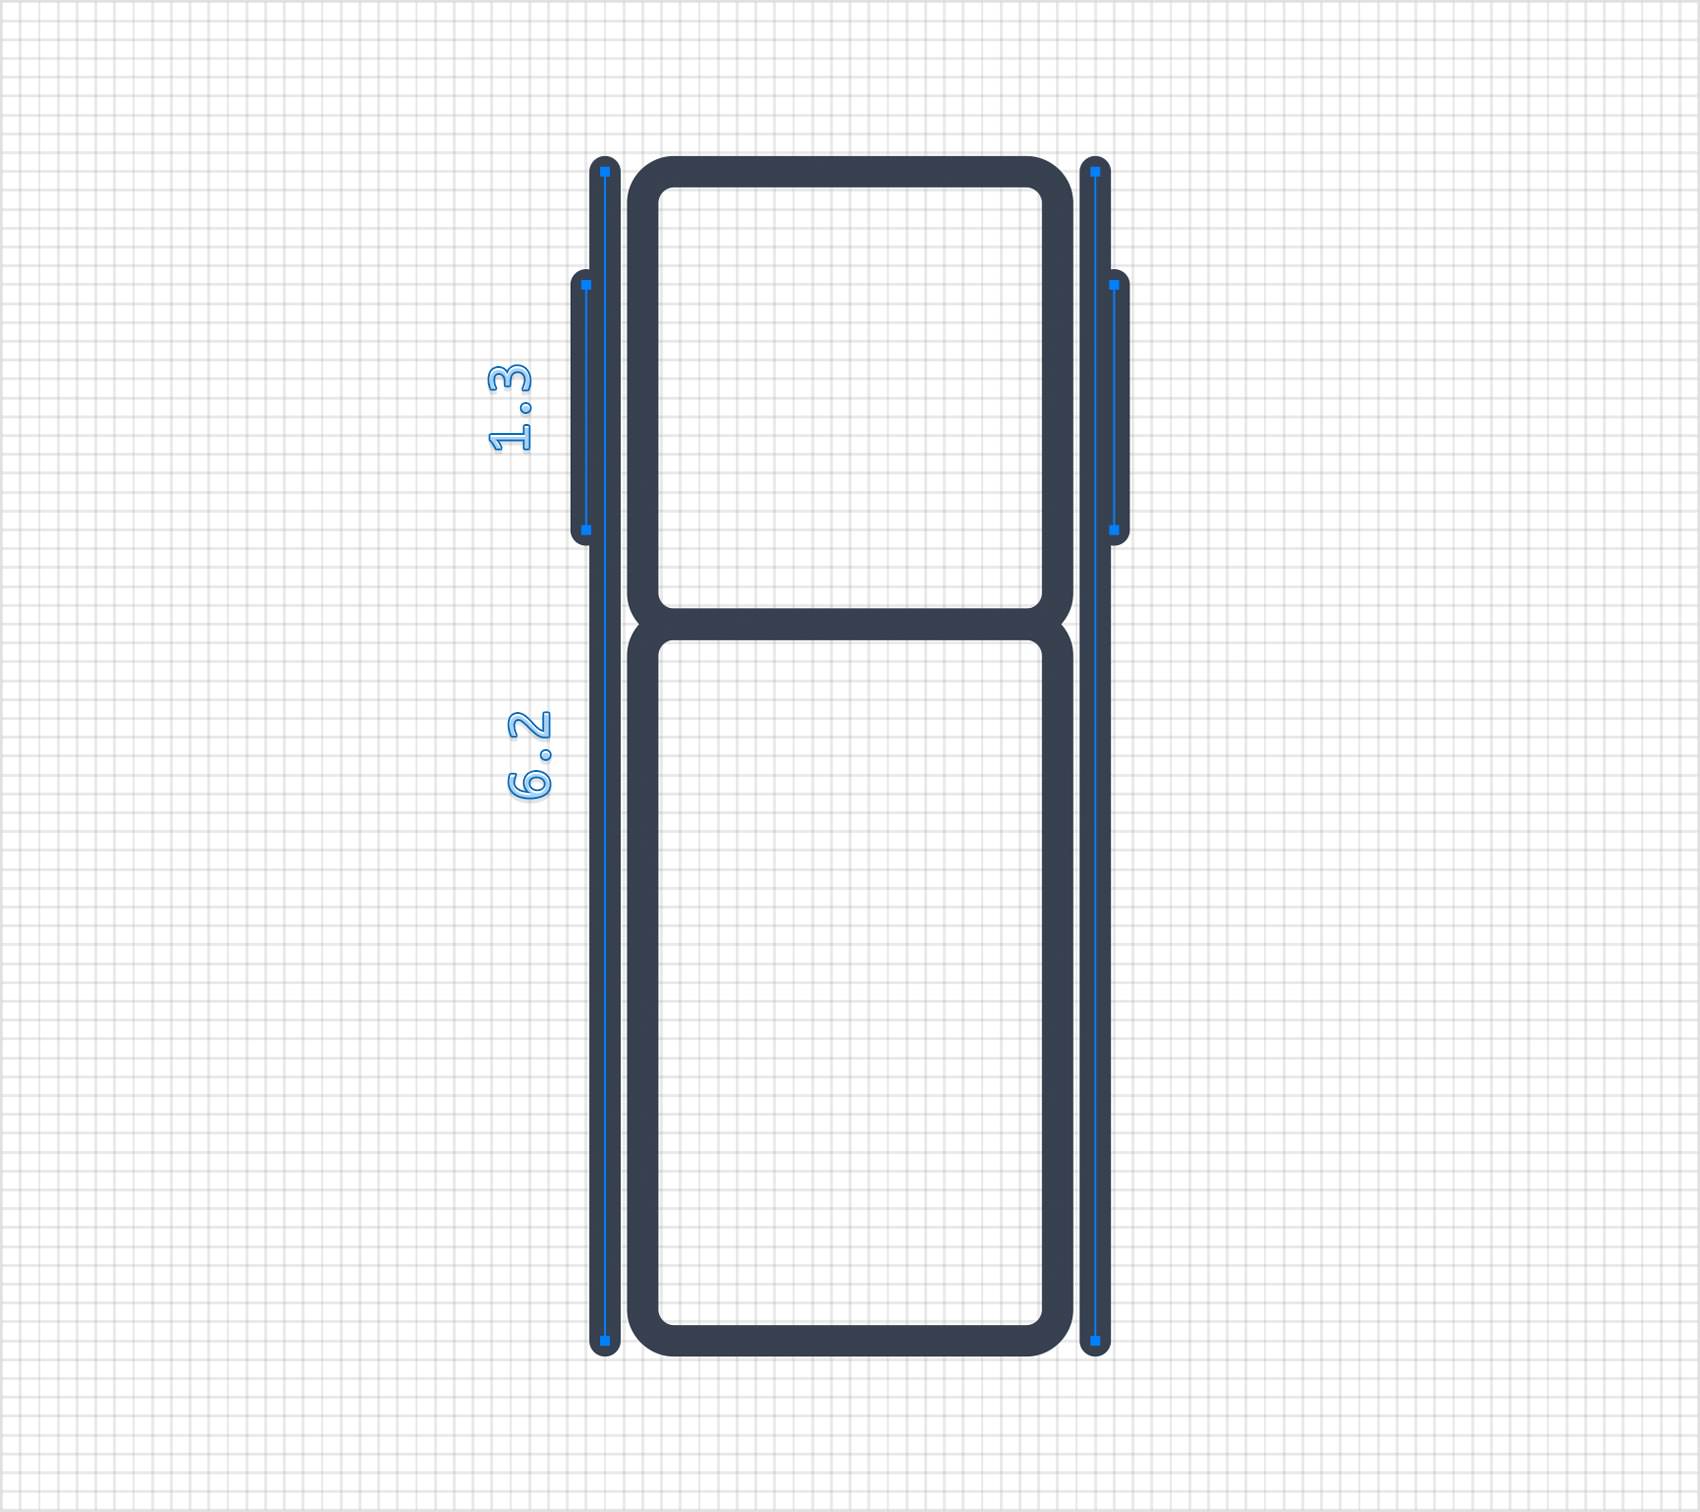
Using the Line Tool (L), create two 6.2 ft vertical paths and another two 1.3 ft vertical paths. Place these lines as shown below and don't forget to apply your first style.
Step 22
Using the Line Tool (L), create ten 0.2 ft horizontal paths. Place these new lines as shown below and don't forget to apply your first style.
Step 23
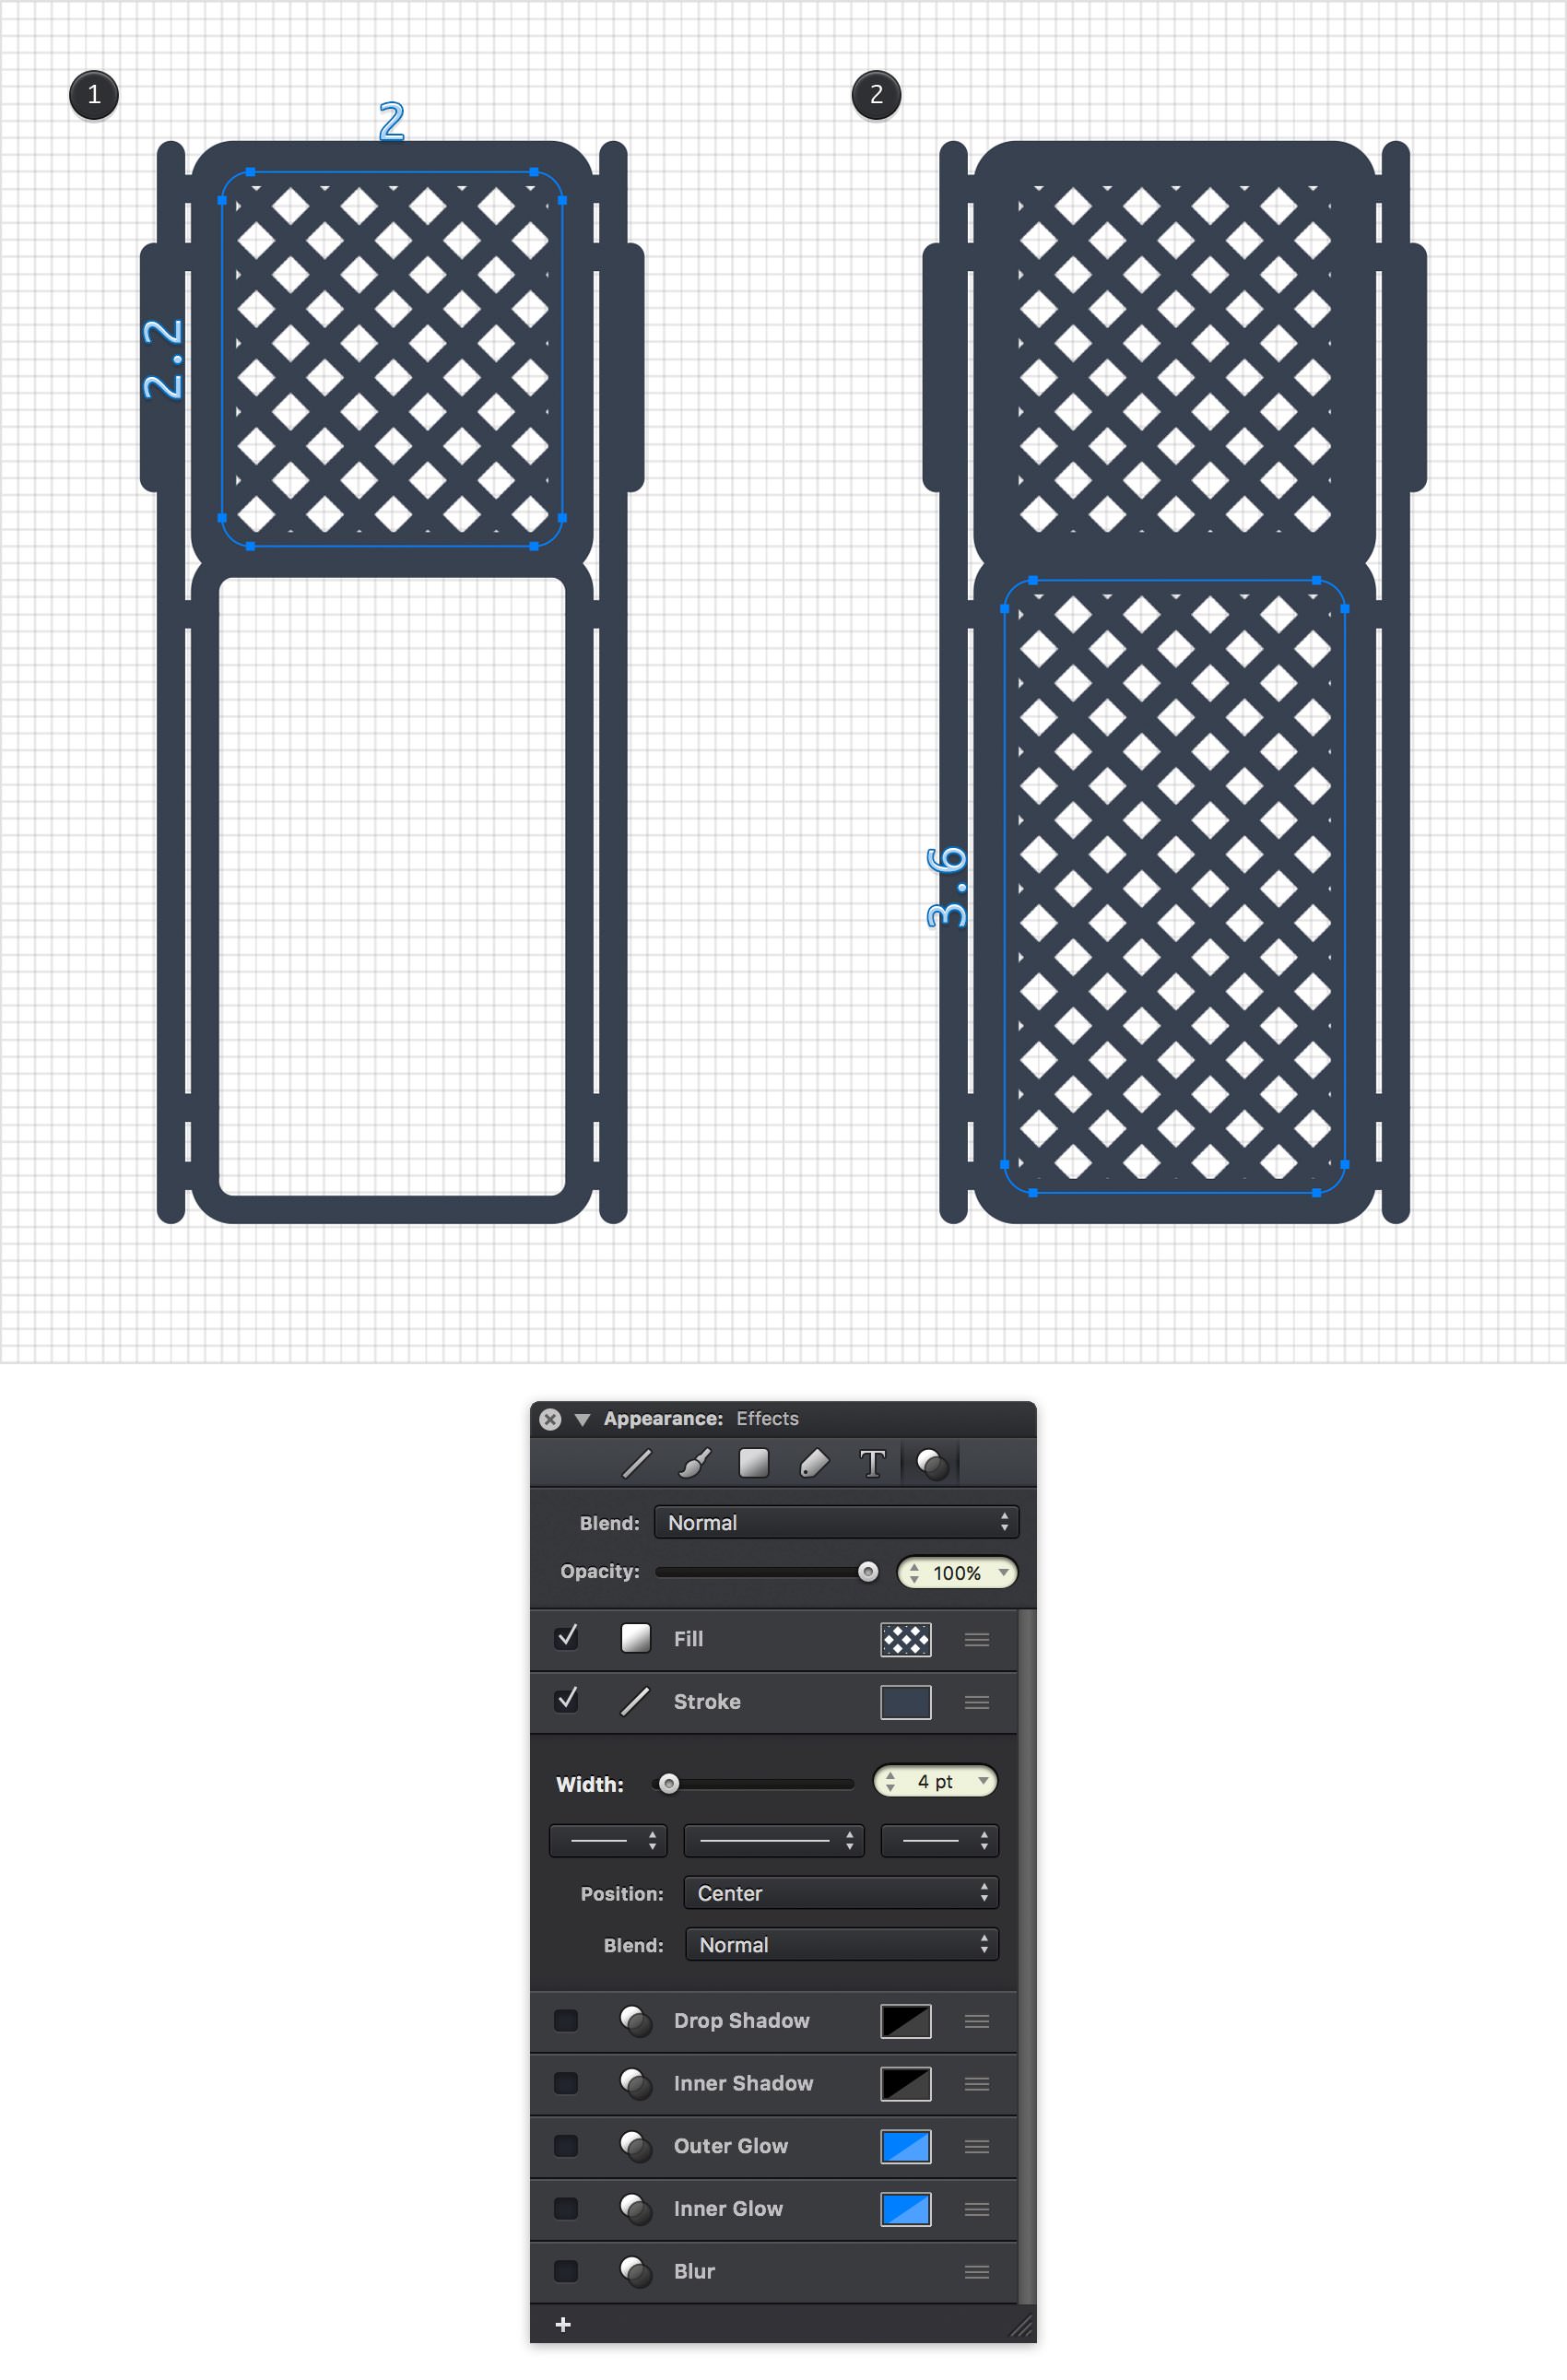
Pick the Rounded Rectangle Tool (Shift + M), create a 2 x 2.2 ft shape and place it as shown in the first image. Apply your first style for this new shape and then click the Fill color well and add your pattern from the Pattern Palette.
Using the same tool, create a 2 x 3.6 ft shape and place it as shown in the second image. Again, apply your first style and the pattern from the Pattern Palette.
Step 24
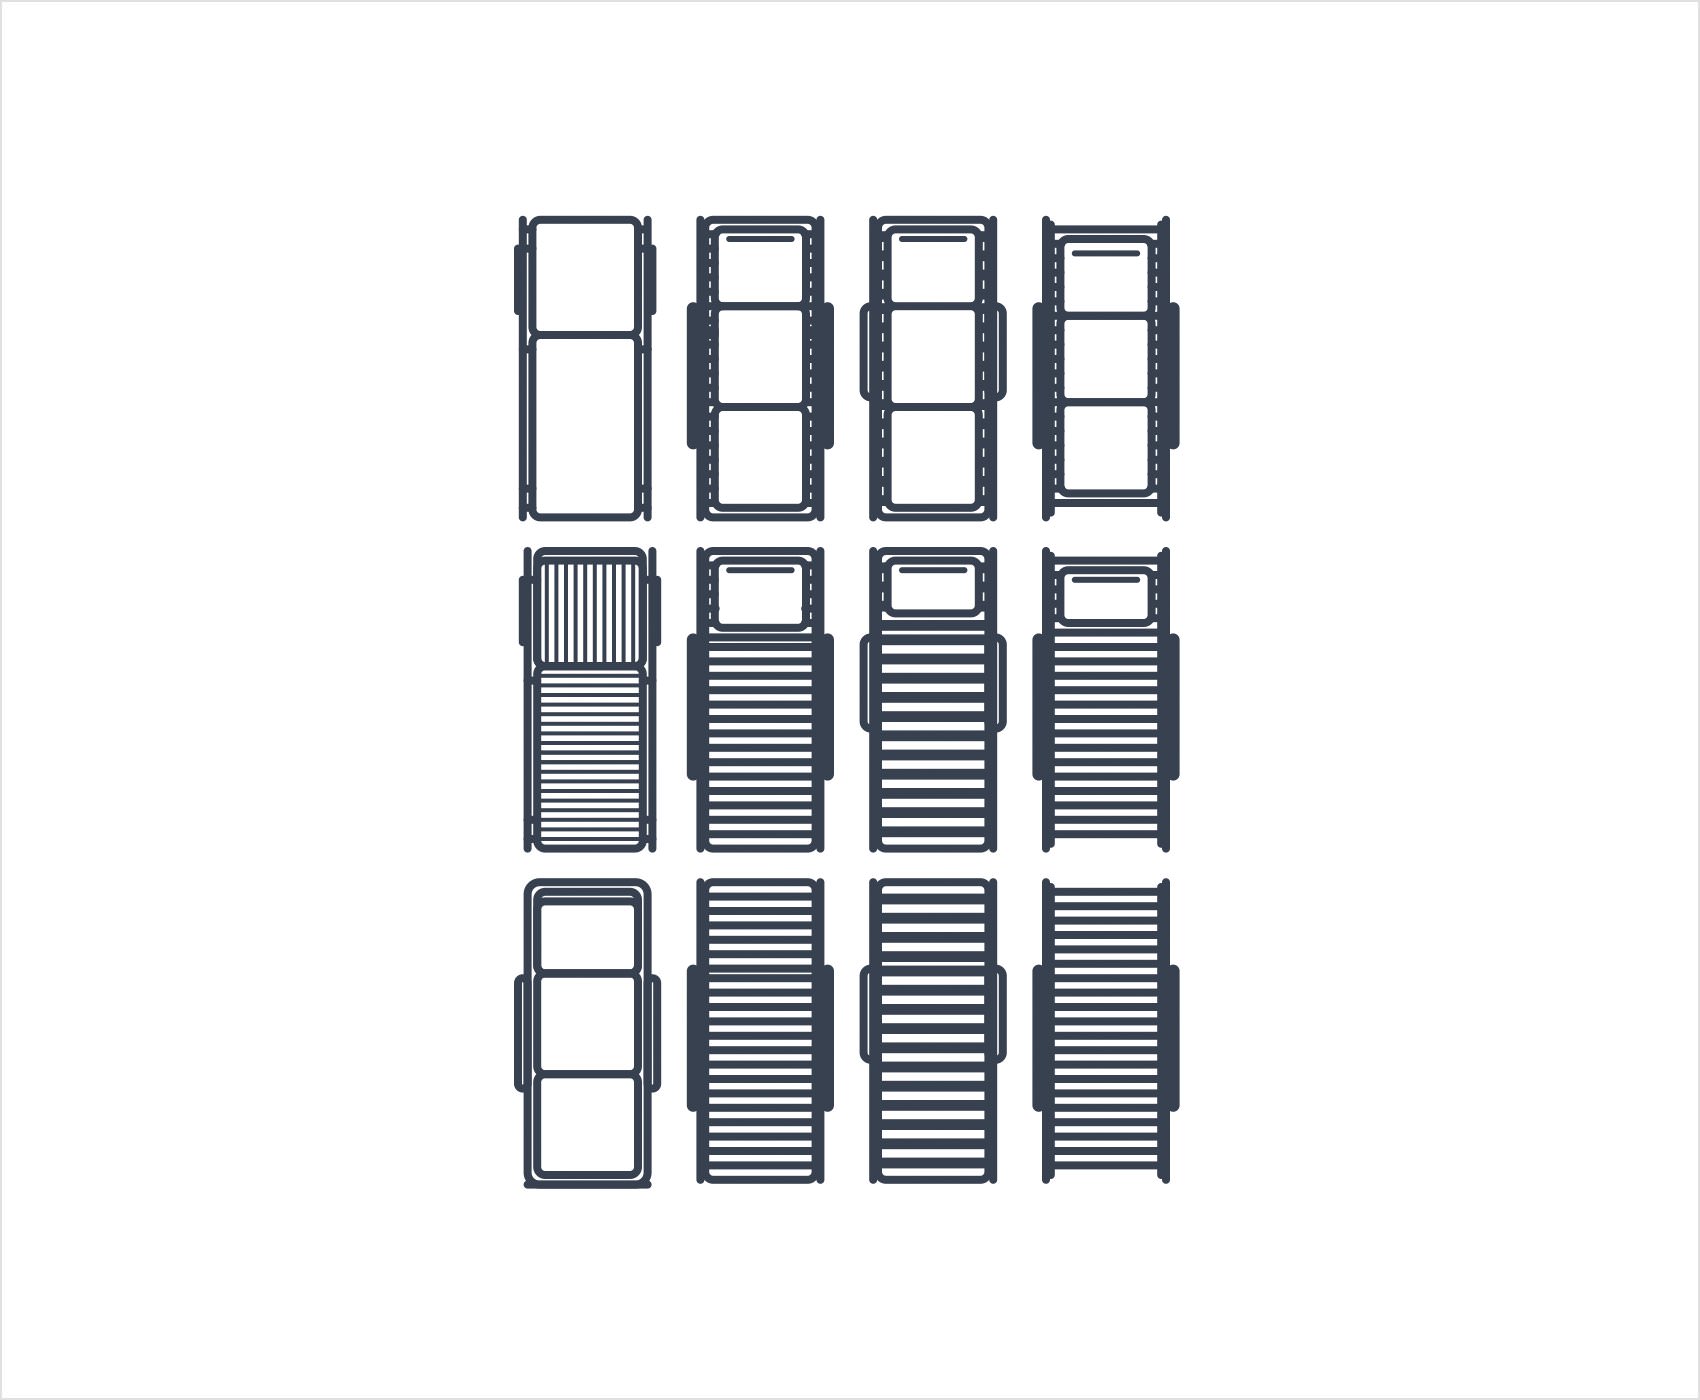
Using the same tools, techniques and styles you can create a variety of sunbed symbols as shown in the following image.
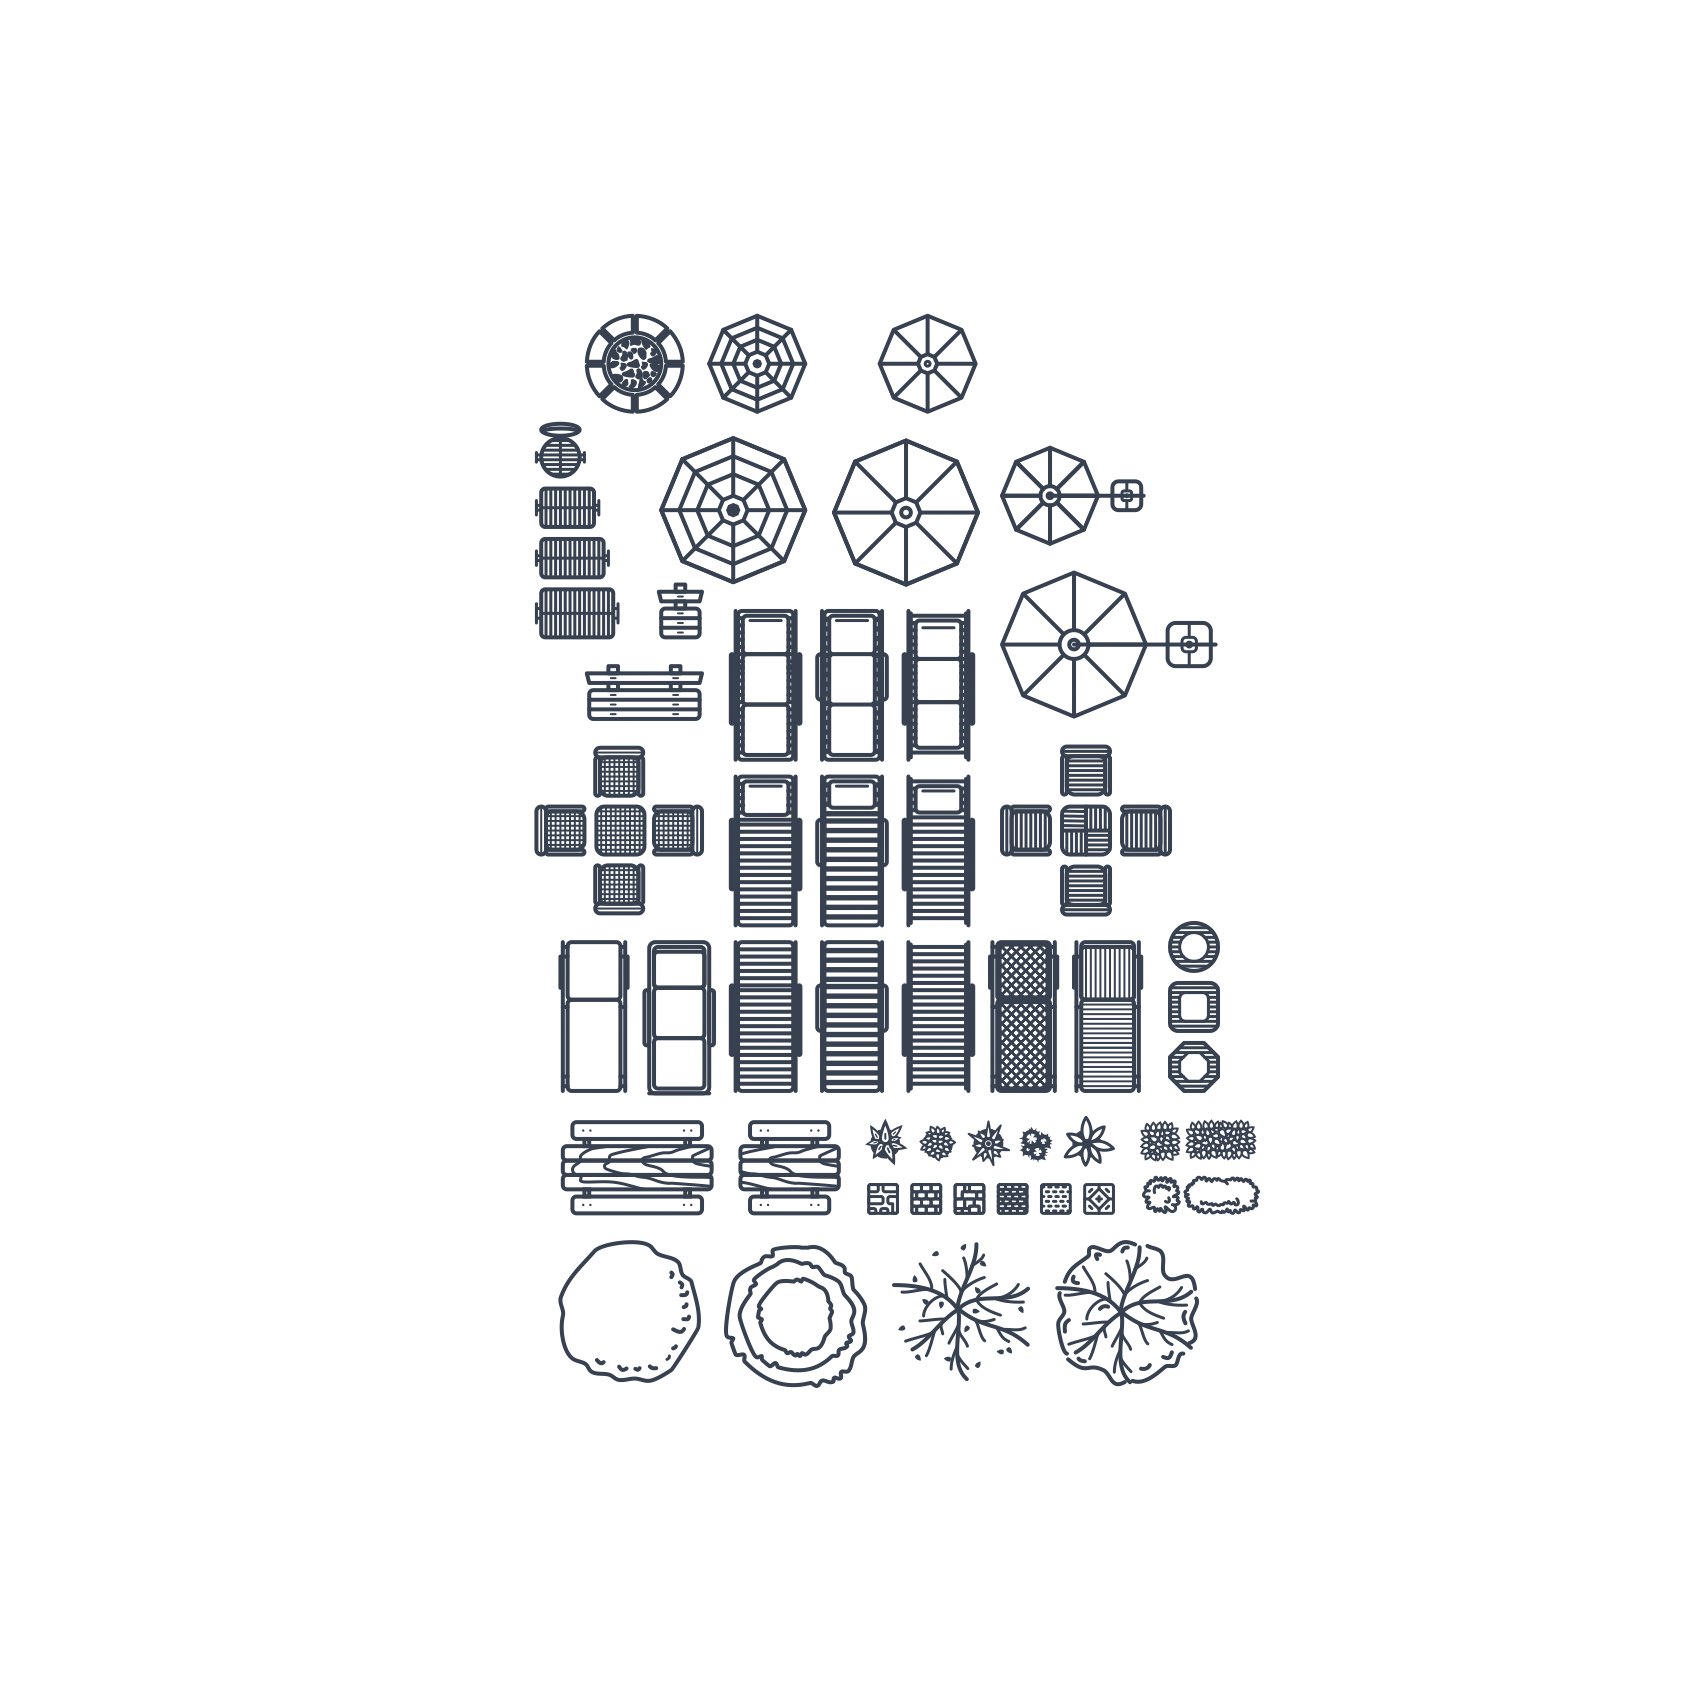
Or any of the symbols shown below.
Step 25
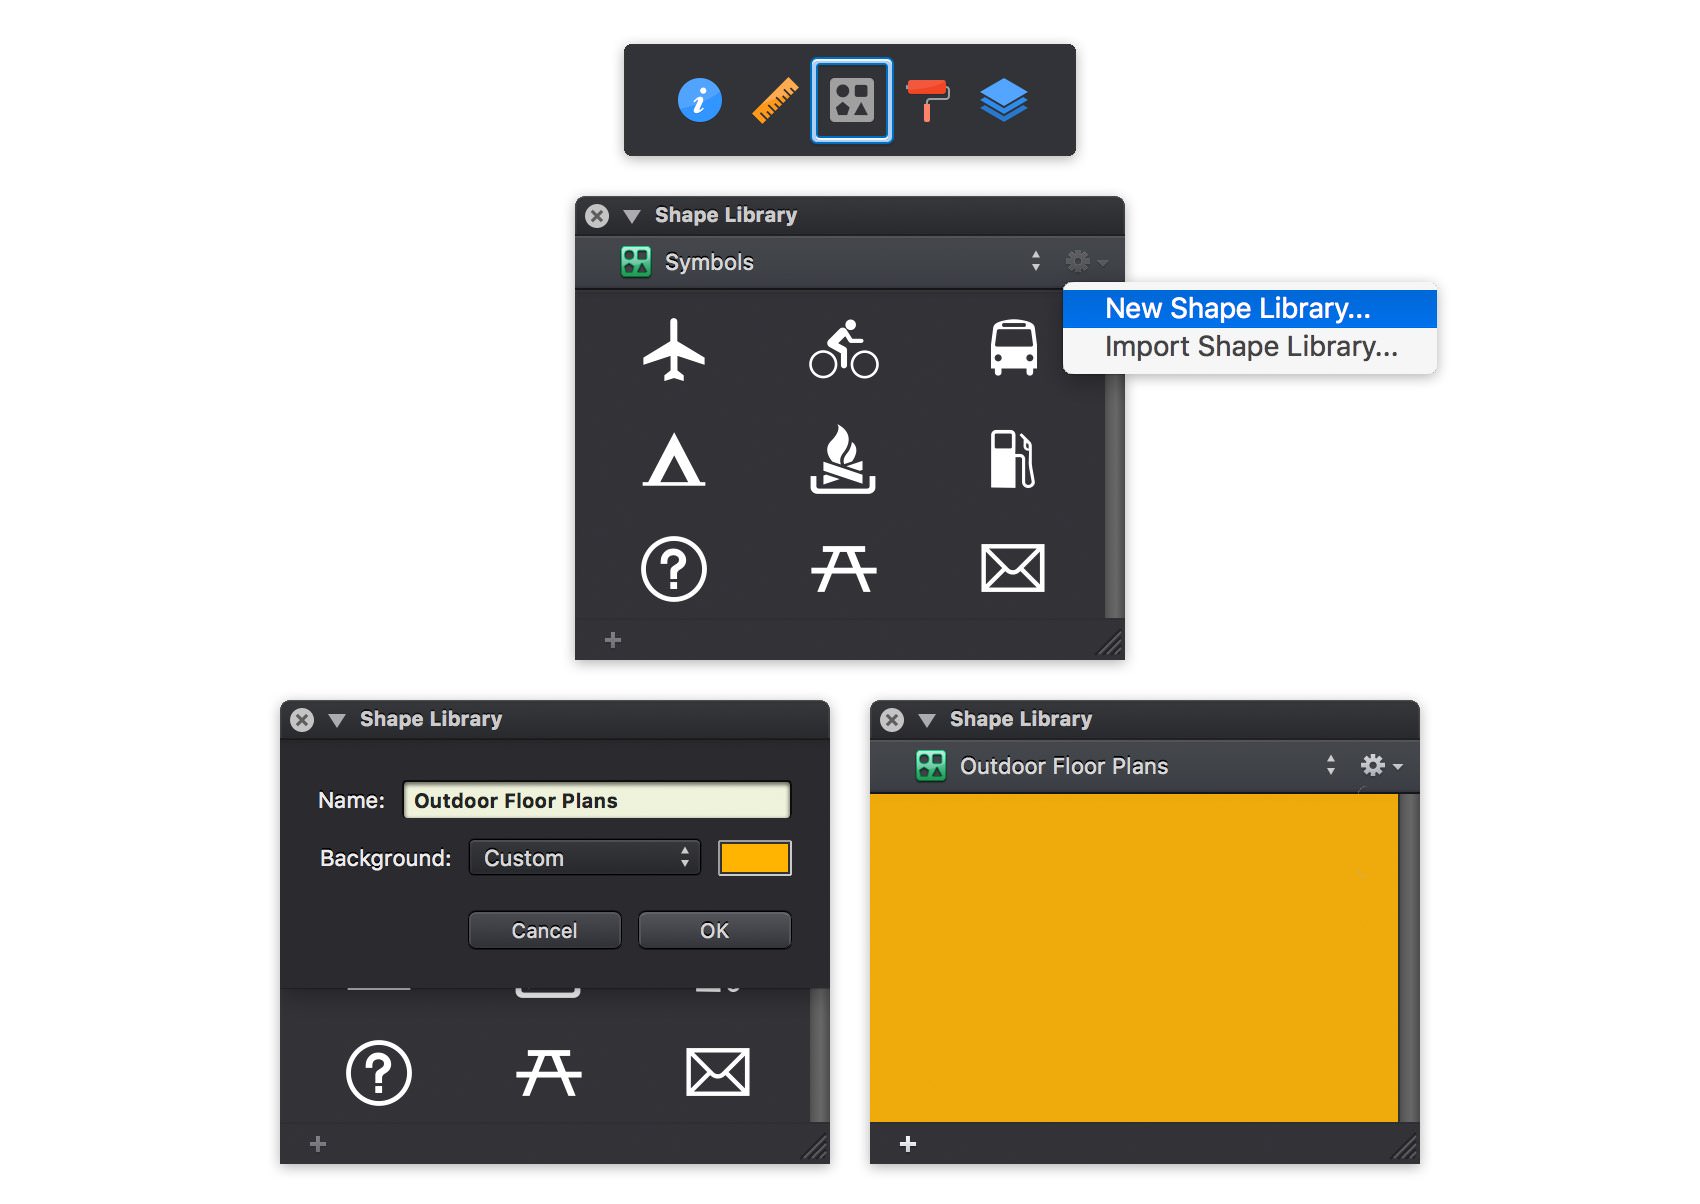
Finally, let's learn how to save your symbols inside a shape library. Open the Shape Library panel and click that settings button from the top-right corner. Go to New Shape Library... and a window with the attributes of your new shape library will open. Enter a name for your new shape library, pick a background color and then click OK.
By default your new shape library will open, but keep in mind that you can easily switch between shape libraries using the drop-down menu from the top of the panel.
Step 26
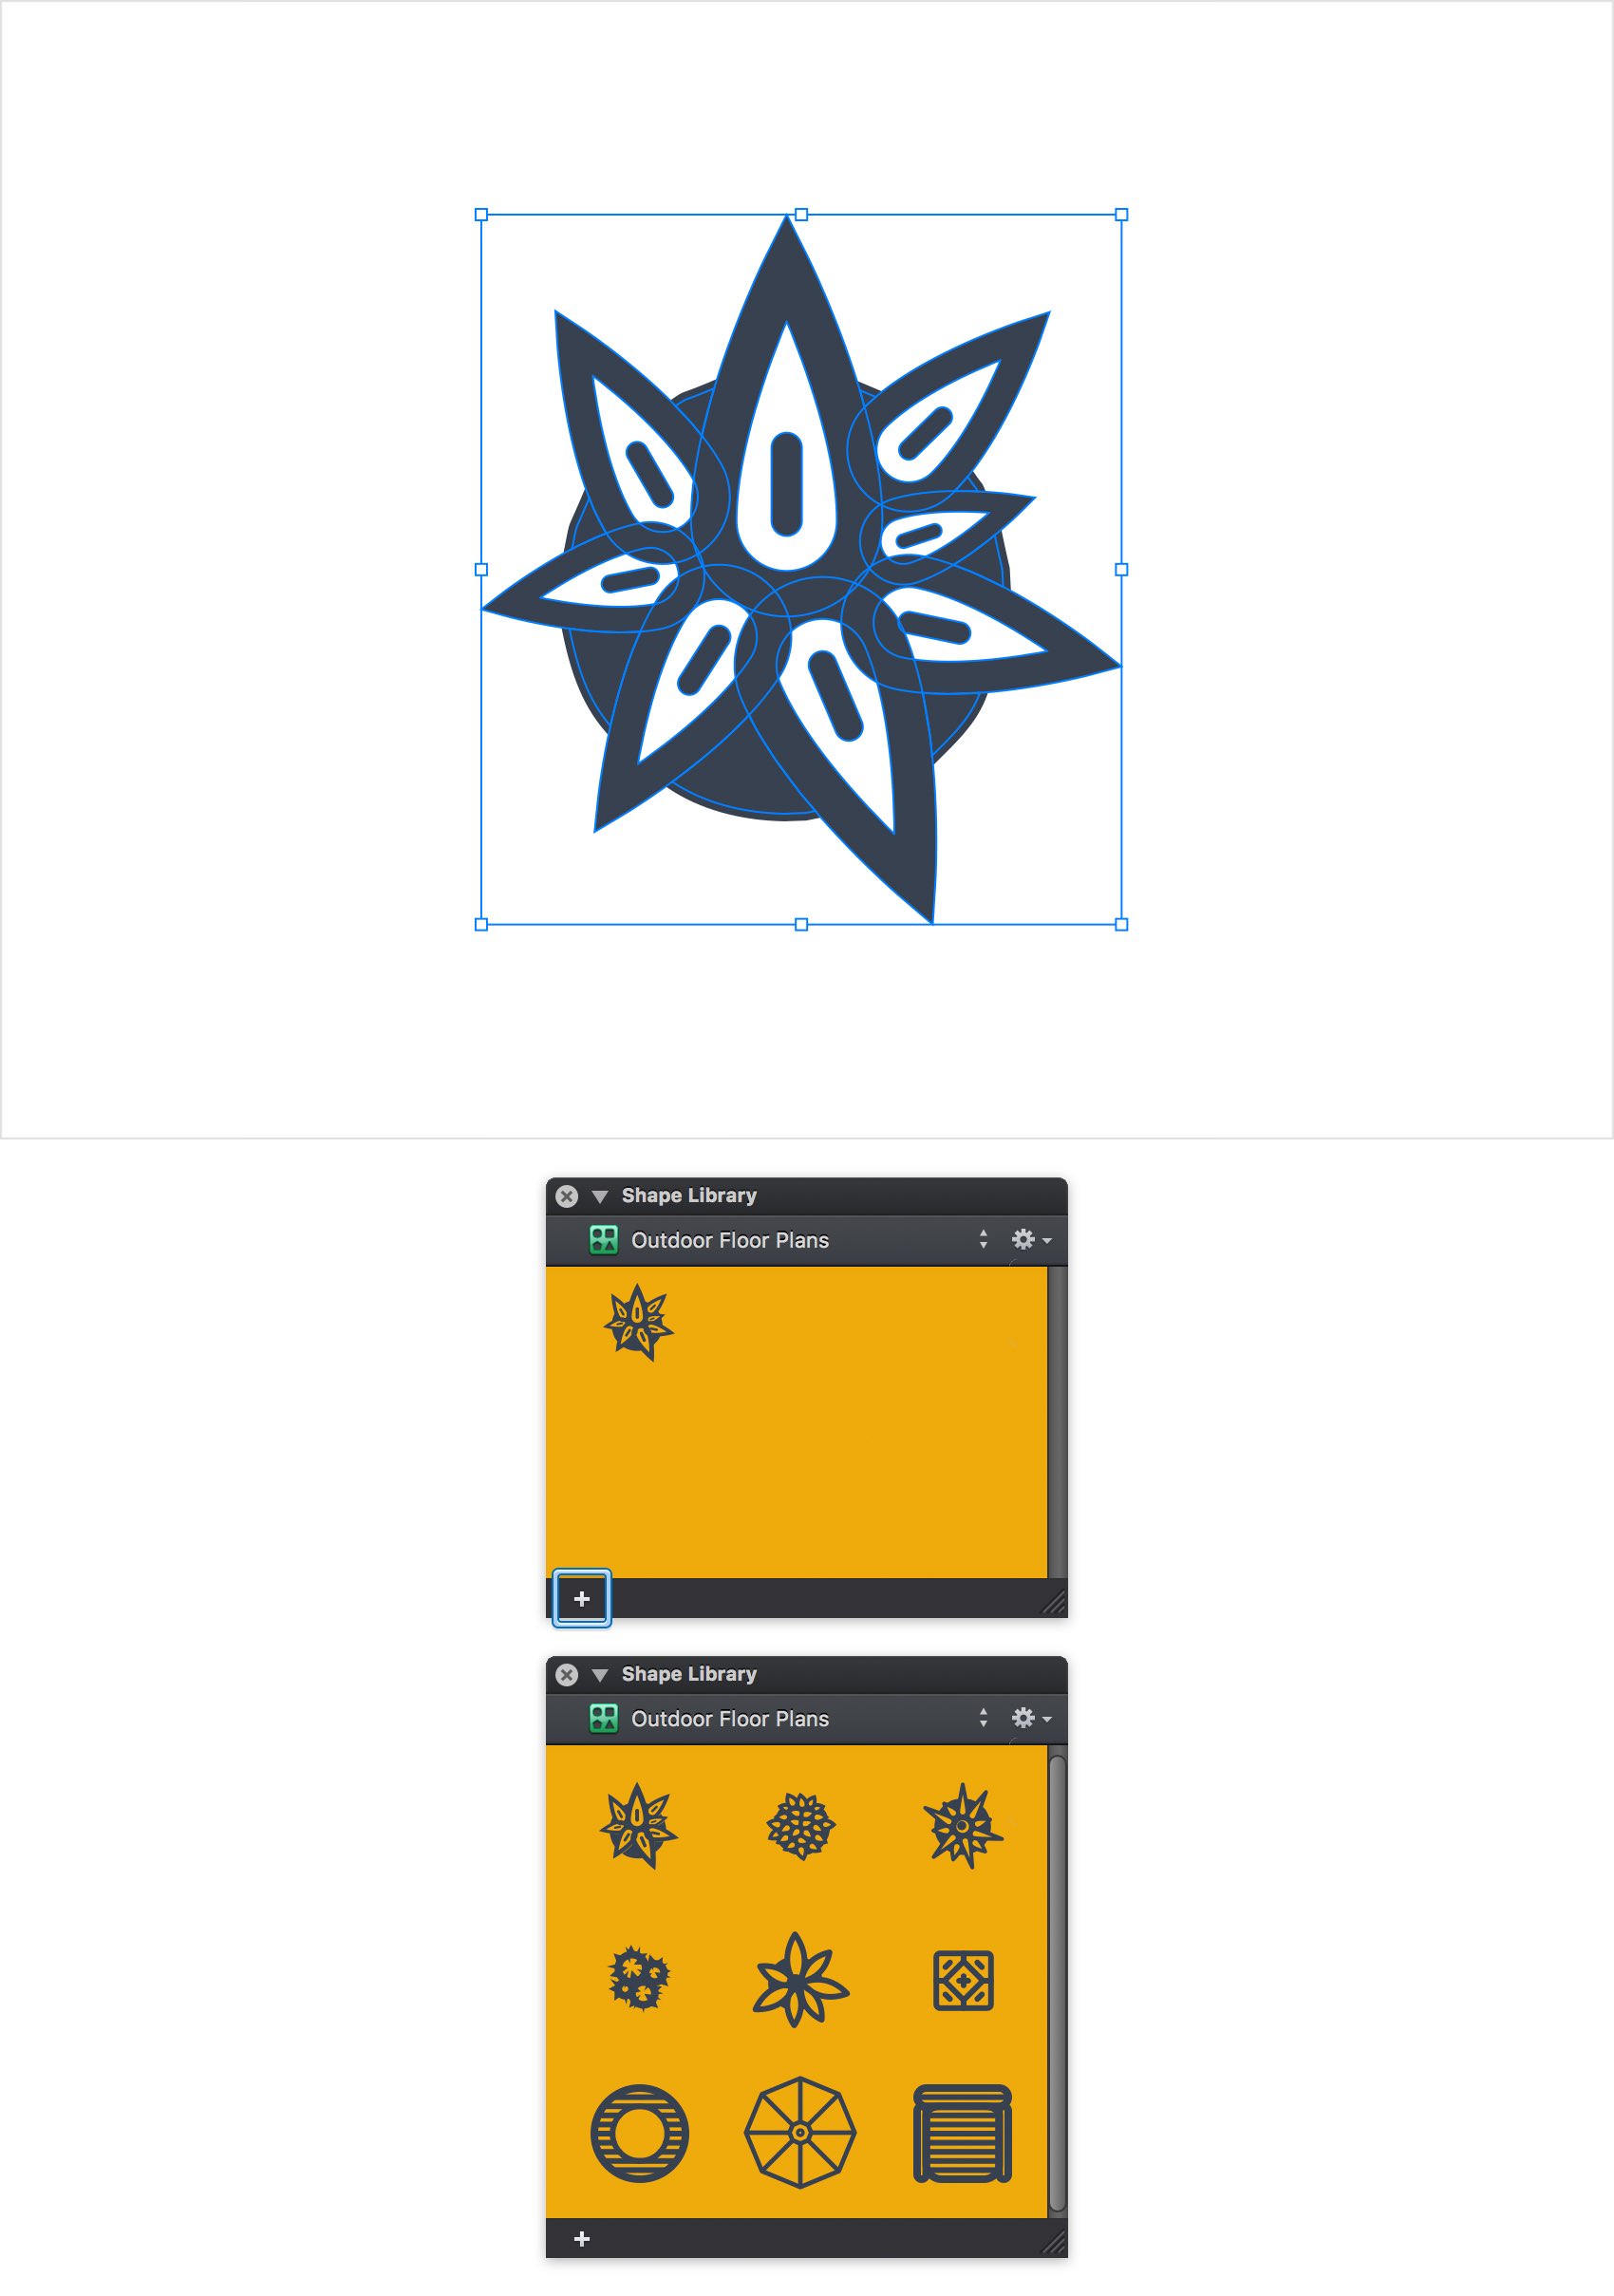
Make sure that your new shape library is active and focus on the shapes that lie inside your "Plant" layer. Make sure that you select the layer from the Layers panel and then pick the Move Tool (V). First, select all those shapes and Group them (Command + G). click the plus button that lies in the bottom, left corner of the Shape Library panel and your selected group will be added inside your active shape library.
Your shape libraries and their content are always available and you can easily add them inside any new document. You can also import/export shape libraries so that you can use them on different devices. Click that settings icon from the top, right corner and use the Import Shape Library and Export commands.
Finally, feel free to add the rest of the symbols created so far. Select each layer and don't forget to Group the existing shapes and paths before you click that plus button.
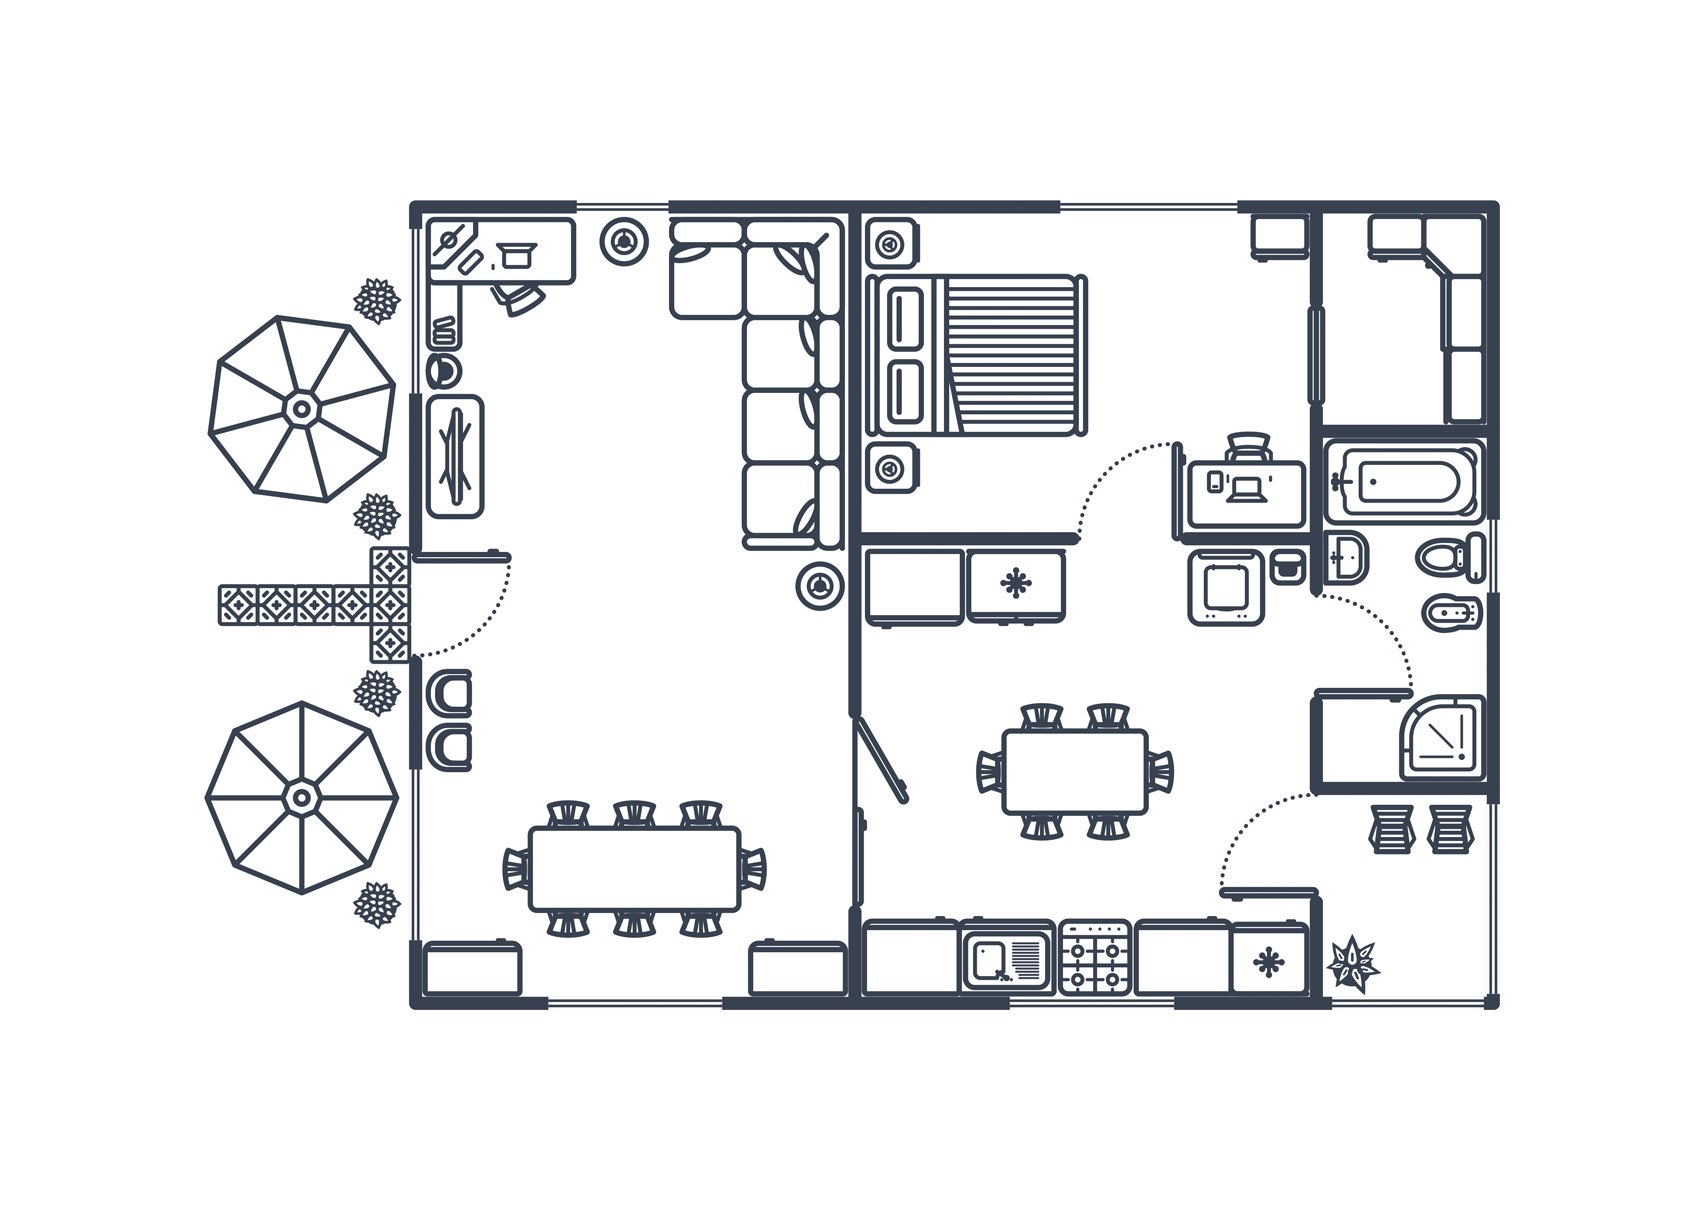
Finished Design
Congratulations, you've finished the tutorial!
Hope you've enjoyed learning some of the techniques and processes presented in these steps. As always, feel free to adjust the final design and make it your own.
Download Graphic File:
furnitureshapes-outdoor.idraw