

Grid
The grid appears on the canvas behind your design. In comparison with guides, grid can be exported with your design. The canvas grid is fully customizable, with adjustable settings for spacing, gridline colors, subdivisions, margins, and more.
Open the Grid pane from the Properties panel to customize your grid.
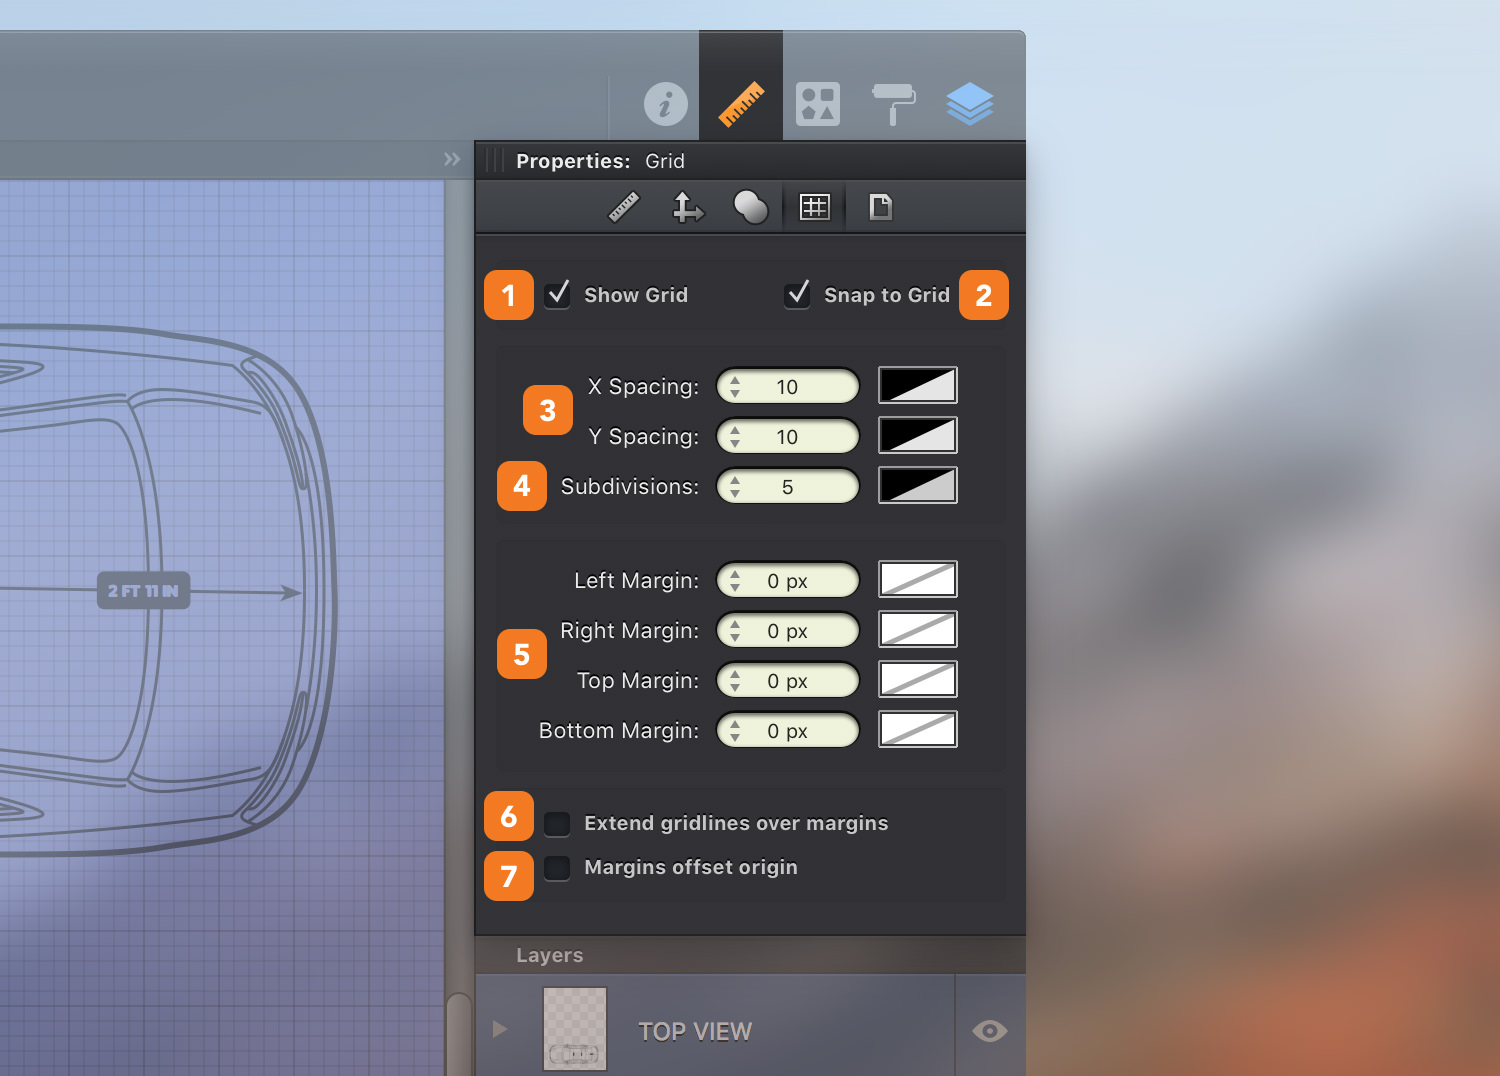
- Show Grid - Use this checkbox to enable or disable the visibility of the grid. Alternatively, you can enable or disable the grid by going to View > Show Grid [⌘ - ’].
- Snap to Grid - Enable this setting to snap objects and points to the nearest grid position when moving them. Alternatively, you can enable or disable this feature by going to View > Snap to Grid [⇧ - ⌘ - ’].
-
Spacing - The X and Y spacing settings set the spacing between each gridline, X represents the horizontal axis while Y represents the vertical axis. For grids without X or Y lines (to create a notebook paper style, for example), you can set the spacing to zero. Change the colors used to draw the gridlines using the color wells next to each setting.
-
Subdivisions - The subdivisions setting determines how many gridlines are drawn between each thicker major gridlines. Change the colors used to draw the subdivision gridlines using the color well next to this setting.
-
Margins - Set the width and color of each margin. Set the size to 0 to move the margin lines on the edge of your document or simply remove the color to make the margin lines invisible.
-
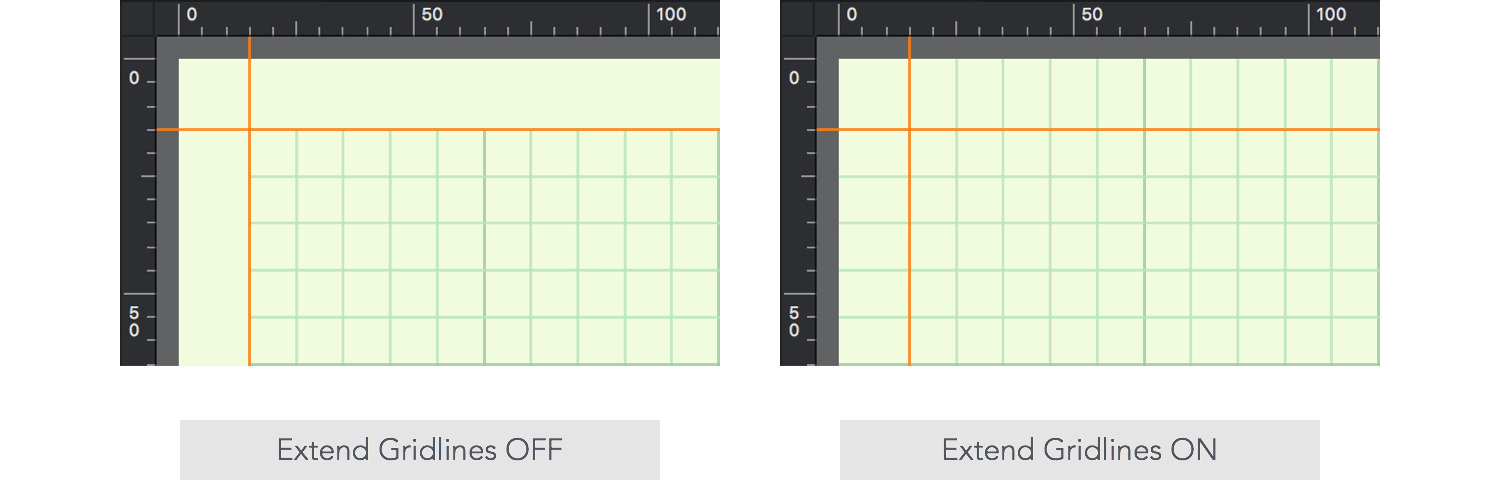
Extend Grid Lines - This setting allows you to extend the drawing of the gridlines beyond the edges of the margins. If checked, the gridlines extend over the margins, or if unchecked the gridlines end at each margin.
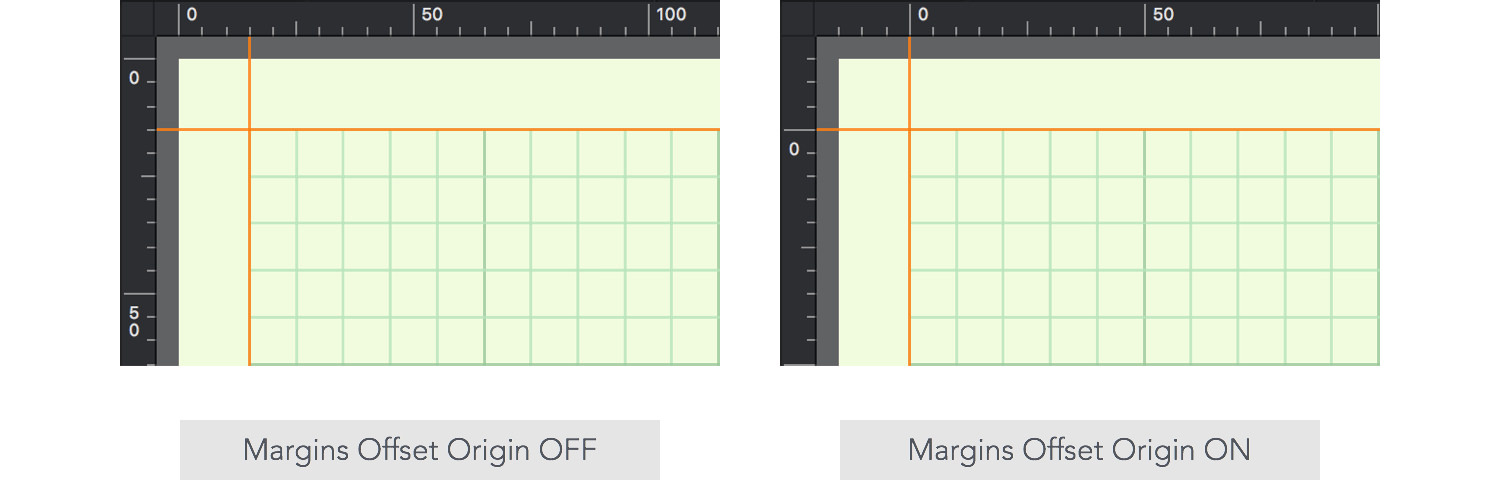
- Margins Offset Origin - If checked, the origin point of the rulers will be offset by the width of each margin. If unchecked, the origin point will be at the top left corner of the printable canvas.
Next: Point Snapping >